| “This site contains affiliate links for which OEMDTC may be compensated” |
Service Bulletin
B15-046
September 18, 2015
02365 Version 1
Security System Sounds or May Not Set
AFFECTED VEHICLES
| Year | Model | Trim | VIN Range |
| 2014–15 | MDX | ALL | ALL |
| 2016 | MDX | ALL 2WD | 5FRYD3H..GB000001 to 5FRYD3H..GB007326 |
| 2016 | MDX | ALL SH-AWD | 5FRYD4H..GB000001 to 5FRYD4H..GB029373 |
SYMPTOM
The factory security system may sound on its own or the system may not set. The client may also notice that the horn does not sound or the lights do not flash when setting the alarm (security system is not set).
POSSIBLE CAUSES
Excessive clearance in the hood latch causes the hood latch switch to indicate the hood is open when it is not.
CORRECTIVE ACTION
Replace the hood latch assembly.
PARTS INFORMATION
| Part Name | Part Number | Quantity |
| Hood Latch Assembly | 74120-TZ5-A01 | 1 |
WARRANTY CLAIM INFORMATION
The normal warranty applies.
| Operation Number | Description | Flat Rate Time | Template ID | Failed Part Number |
| 8121E5 | Replace hood latch assembly. (includes HDS diagnosis) | 0.4 hr | 15-046N | 74120-TZ5-A01 |
Defect Code: 03214
Symptom Code: 03217
Skill Level: Repair Technician
DIAGNOSIS
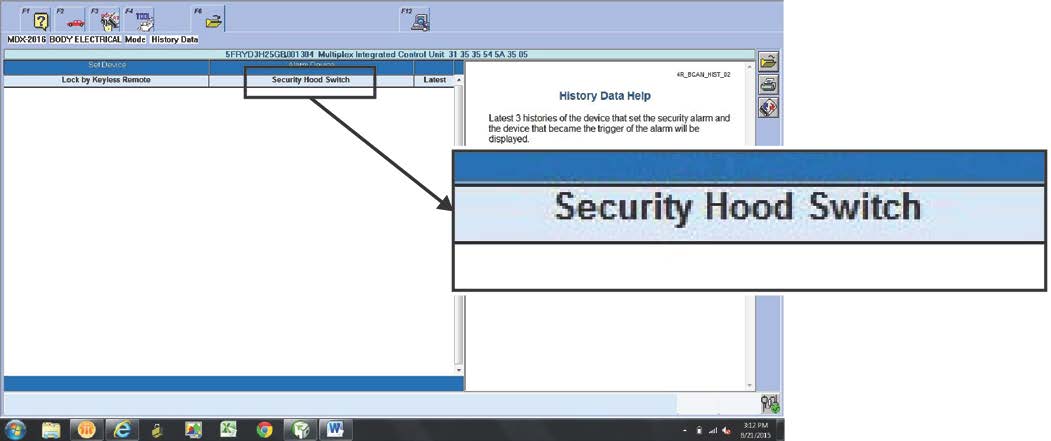
- If the client complaint is alarm goes off by itself, check the security system history data using the HDS. If the Alarm Device shows Security Hood Switch, go to REPAIR PROCEDURE. If the history data does not show Security Hood Switch, this bulletin does not apply.
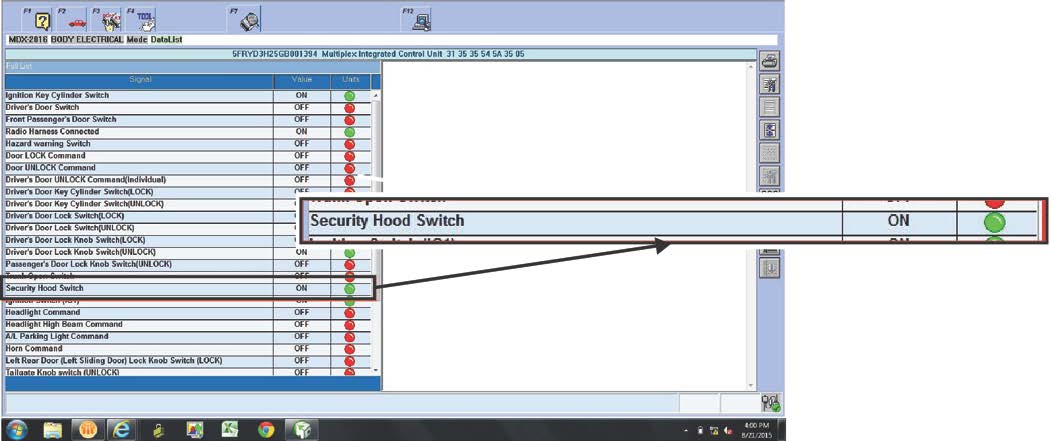
- If the client complaint is “Security system will not arm”, “Parking lights do not flash when setting security system”, or “No feedback beep when pressing the lock button twice”. Duplicate the complaint, then check the Body Electrical Data List using the HDS with the hood closed. If the Security Hood Switch signal reads ON (green) go to REPAIR PROCEDURE. If the Security Hood Switch OFF (red), this bulletin does not apply
REPAIR PROCEDURE
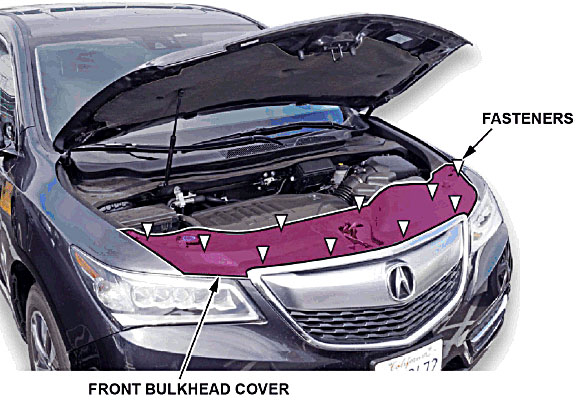
- Remove the front bulkhead cover. Starting on the passenger side, lift up the far edge of the cover.
- Using even, upward pressure, continue releasing the fasteners, working your way toward the driver’s side of the cover.
NOTE: Make sure all of the fasteners remain in place.
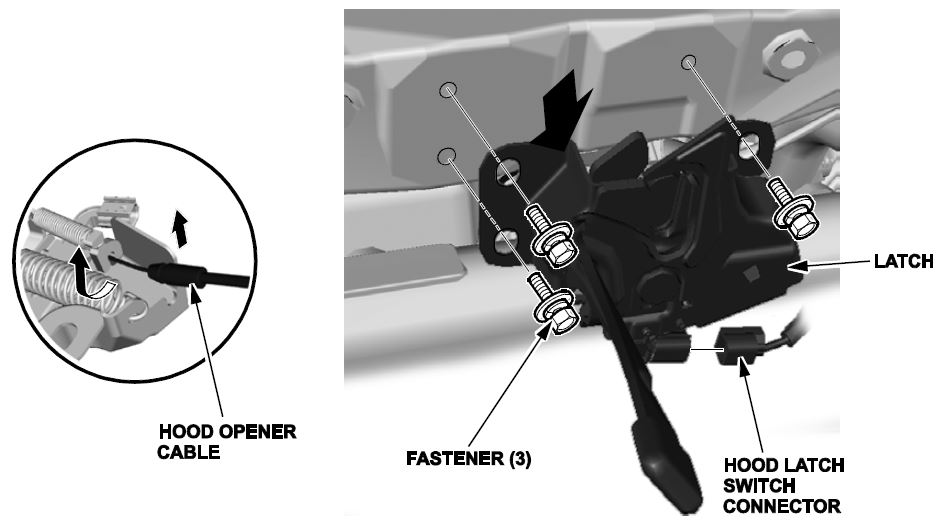
- Remove the hood latch:
- Disconnect the hood opener cable from the latch.
- Disconnect the hood latch switch connector.
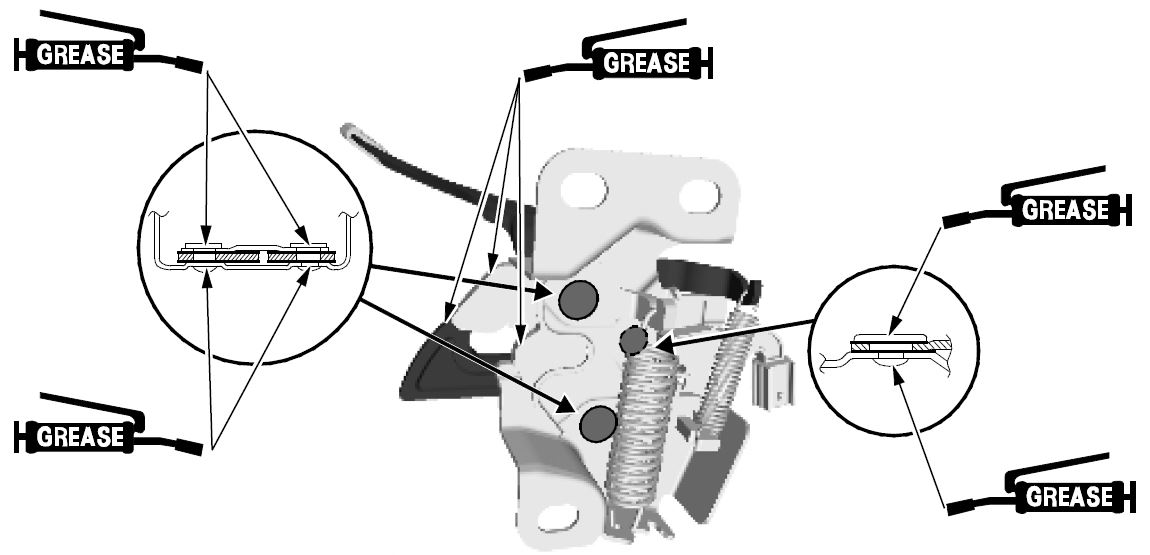
- Install the new hood latch in the reverse order of the removal, and apply multipurpose grease as indicated.
- Reinstall the bulkhead cover into position in the reverse order of removal, then press down firmly at each of the 10 fasteners locations until you hear a click.
END
 Loading...

