| “This site contains affiliate links for which OEMDTC may be compensated” |
Service Bulletin
B15-042
February 26 , 2016
02246 Version 3
Fluttering Noise From Behind Dashboard
Supersedes 15-042, Dated November 6, 2015; to revise the information highlighted in yellow.
AFFECTED VEHICLES
| Year | Model | Trim | VIN Range |
| 2015 | TLX L4 | ALL | 19UUB1…FA000001 thru 19UUB1…FA022558 |
| 2015 | TLX V6 2WD | ALL | 19UUB2…FA000001 thru 19UUB2…FA022490 |
| 2015 | TLX V6 AWD | ALL | 19UUB3…FA000001 thru 19UUB3…FA008262 |
REVISION SUMMARY
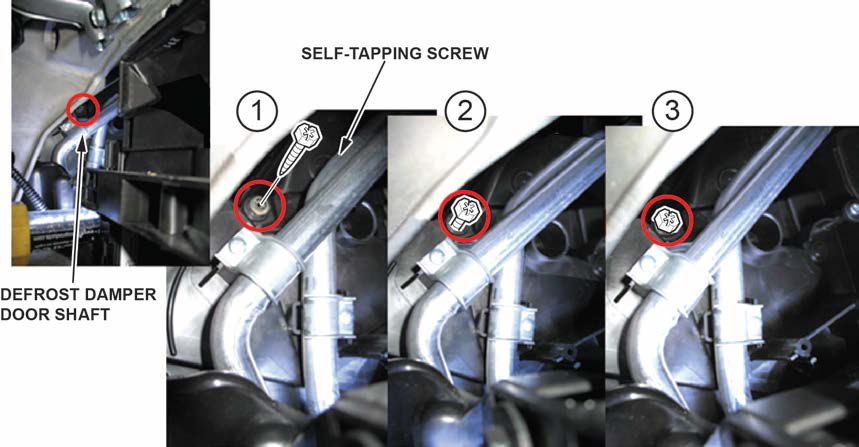
In step 3 of the REPAIR PROCEDURE, the illustration showing the self-tapping screw was revised to reflect the proper screw.
SYMPTOM
There is a fluttering noise from behind the dashboard with the HVAC set to floor or defrost mode, the blower set to maximum, and the temperature set to maximum heat.
POSSIBLE CAUSE
Under certain HVAC settings, the defrost damper door linkage can flutter. This can be initially triggered by an external impact, such as driving over a pot hole or down a rough road.
CORRECTIVE ACTION
Install a self-tapping screw into the defrost damper door shaft in the heater case.
PARTS INFORMATION
| Part Name | Part Number | Quantity |
| Self-Tapping Screw (5 x 16 mm) | 90132-SR3-003 | 1 |
WARRANTY CLAIM INFORMATION
The normal warranty applies.
| Operation Number | Description | Flat Rate Time | Template ID | Failed Part Number |
| 6131L8 | Install self-tapping screw into the defrost damper door shaft. | 0.5 hr | 15-042N | 79107-TZ3-A41 |
Defect Code: 06201
Symptom Code: 04201
Skill Level: Repair Technician
REPAIR PROCEDURE
NOTE: SRS components are located in this area. Review the SRS component locations and the precautions and procedures before doing repairs or service.
- Remove the glove box according to the service information.
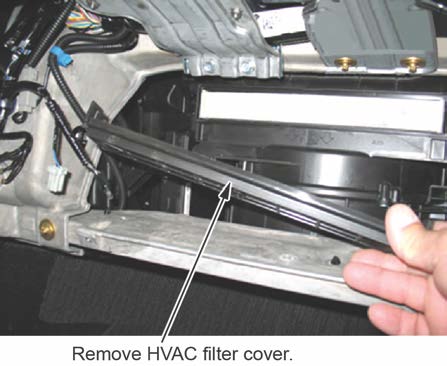
- Remove the HVAC filter cover.
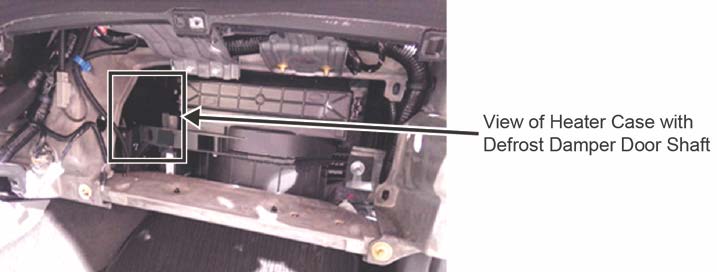
- Install the self-tapping screw (P/N 90132-SR3-003), into the defrost damper door shaft on the passenger side of the heater case. Start the screw by hand to minimize the chance of dropping and losing it. Tighten the screw until the head is seated against the plastic heater case.
NOTE: Do not over torque the screw or you can damage the heater case.
- Install all parts in the reverse order of removal.
 Loading...


