| “This site contains affiliate links for which OEMDTC may be compensated” |
A15-039
June 13, 2015
02010 Version 1
Remote Engine Starter Key FOB Panic Button Not Working
AFFECTED VEHICLES
| Year | Model | Trim | VIN Range |
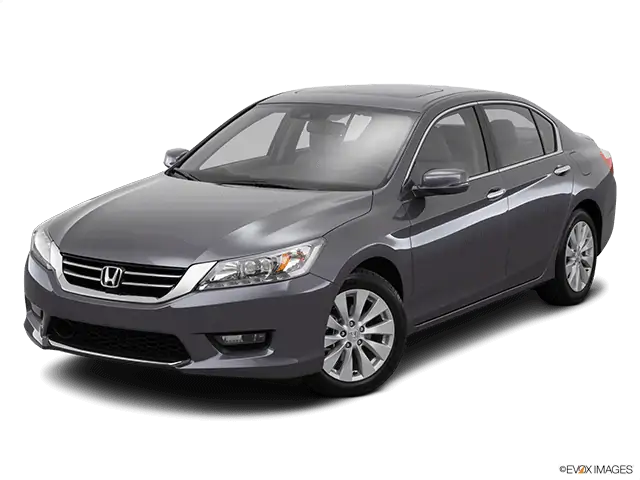
| 2015 | Accord | ALL with accessory remote engine starter | ALL |
SYMPTOM
The remote control engine starter key FOB panic feature is not working. Also, all four doors unlock when pushing the unlock button once instead of unlocking the driver’s door only.
POSSIBLE CAUSES
The remote engine starter key FOB is not programmed correctly.
CORRECTIVE ACTION
Replace the remote engine starter control unit.
PARTS INFORMATION
| Part Name | Part Number | Quantity |
| Remote Starter Control Unit | 08E91-T2A-1M002 | 1 |
| Adhesive Tape | 91902-TF0-J21 | 1 |
WARRANTY CLAIM INFORMATION
The normal warranty applies.
| Operation Number | Description | Flat Rate Time | Template ID | Failed Part Number |
| 1161H0 | Replace the remote engine starter control unit. | 0.5 hr | 15-039A | 08E91-T2A-1M002 |
Defect Code: 03214
Symptom Code: 03217
Skill Level: Repair Technician
REPAIR PROCEDURE
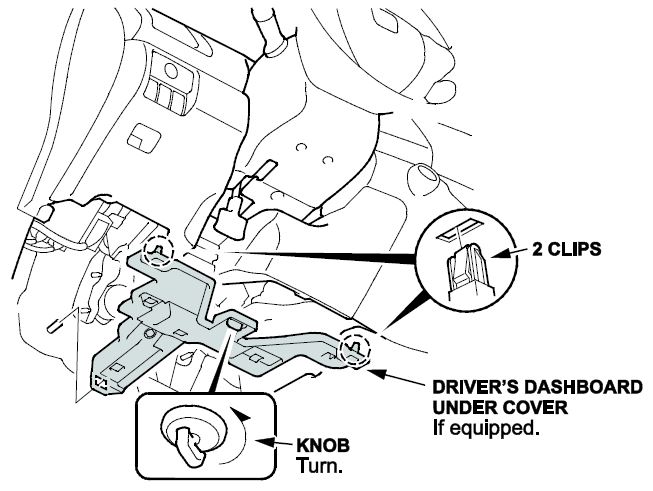
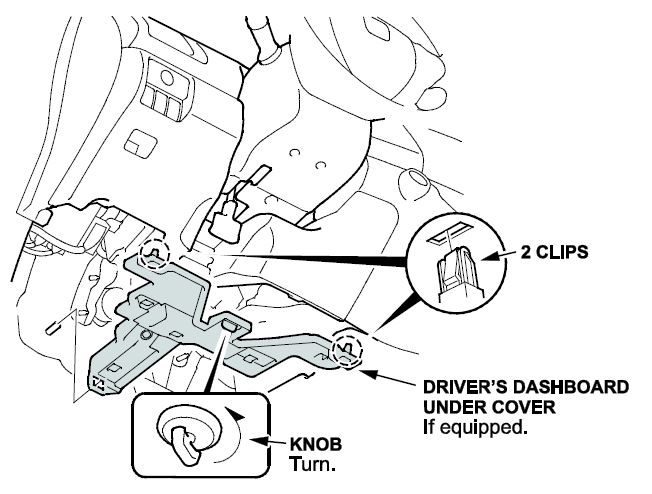
- Remove the driver’s dashboard undercover if equipped.
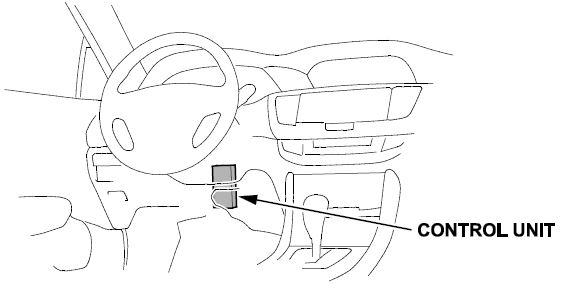
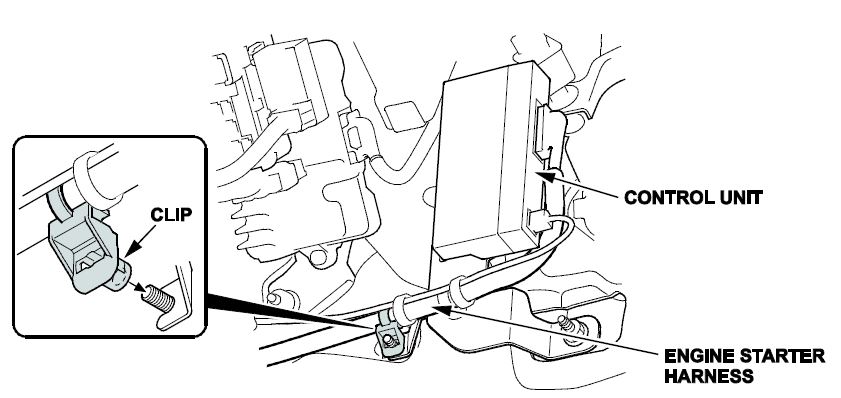
- Locate the remote engine starter control unit (control unit).
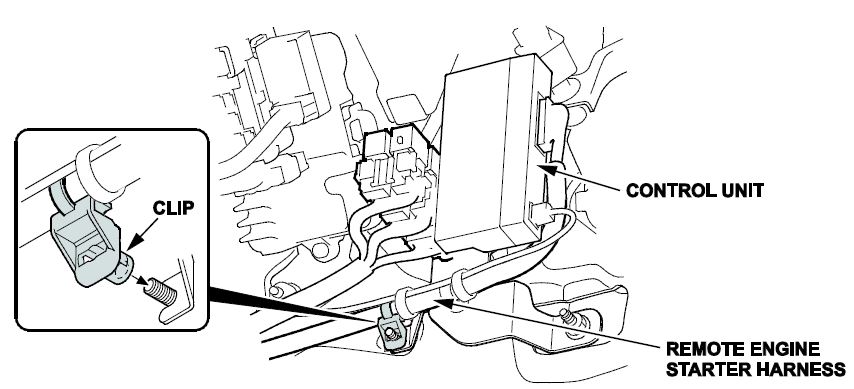
- Remove the remote engine starter harness clip from the vehicle bolt.
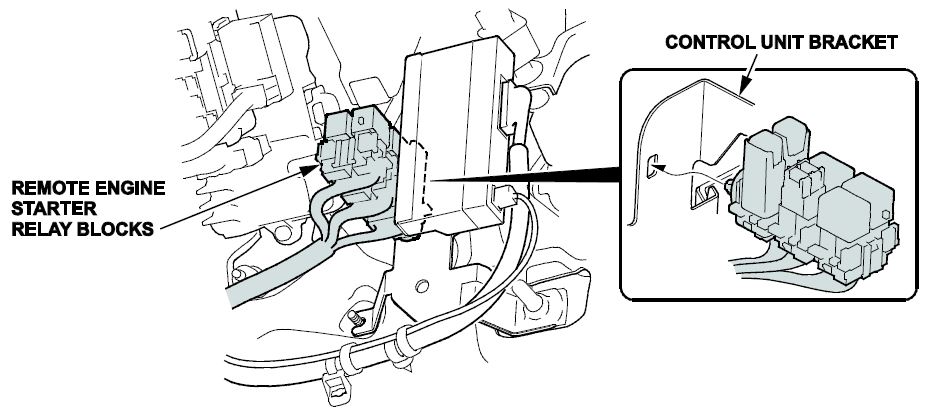
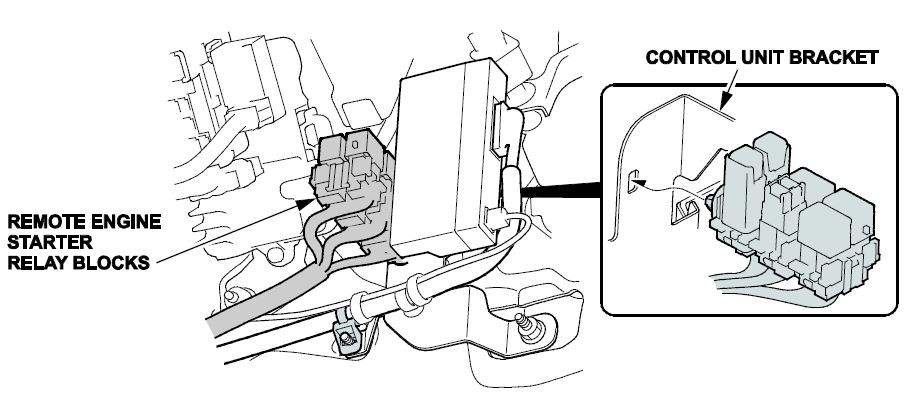
- Remove the remote engine starter relay blocks from the control unit bracket as shown.
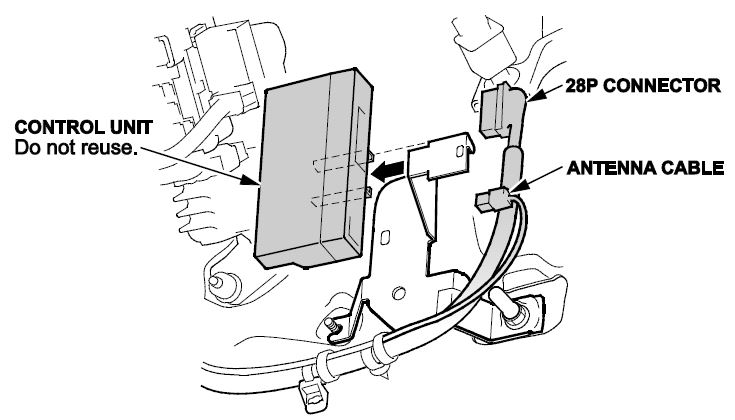
- Remove the old control unit from the bracket as shown, then unplug the 28P connector and antenna cable from the control unit.
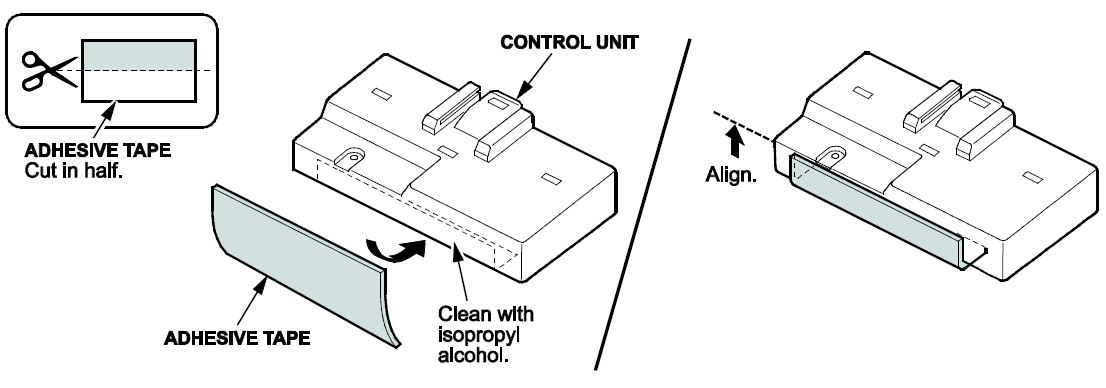
- Cut the adhesive tape in half and attach one piece to the control unit as shown.
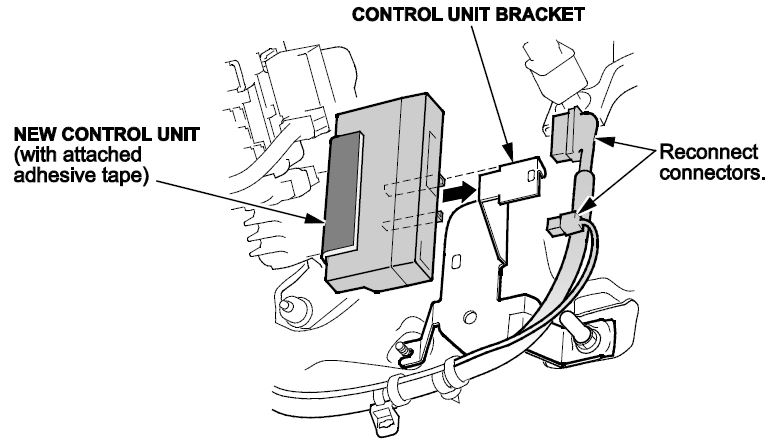
- Reconnect the connectors and reinstall the control unit to the bracket as shown.
- Reinstall the engine starter harness clip
- Reinstall the remote engine starter relay blocks to the control unit bracket.
- Reinstall the driver’s dashboard under cover if equipped.
REMOTE ENGINE STARTER REGISTRATION
NOTE: Register the engine starter after making sure the HDS has been upgraded to the latest version.
- Acquire the PCM code from the Interactive Network.
- Connect the HDS/MVCI tester to the OBD II data link connector, then turn the ignition to the ON (II) position.
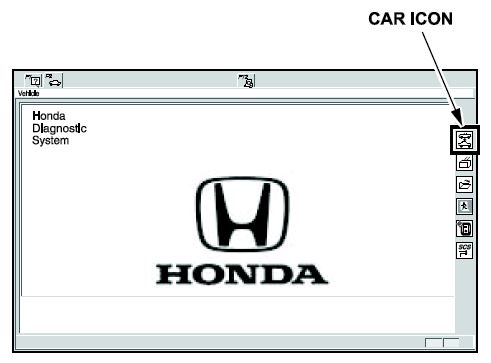
- Start the HDS, and click the car icon.
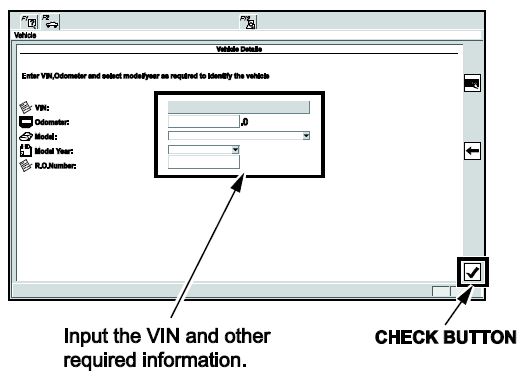
- Input the VIN and other required information into the HDS, then click the check button.
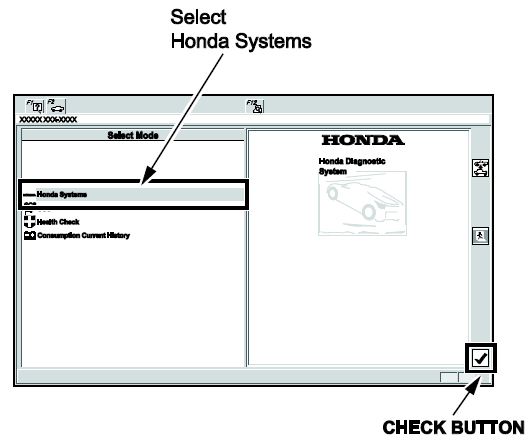
- Select Honda
 Systems, then click the check button.
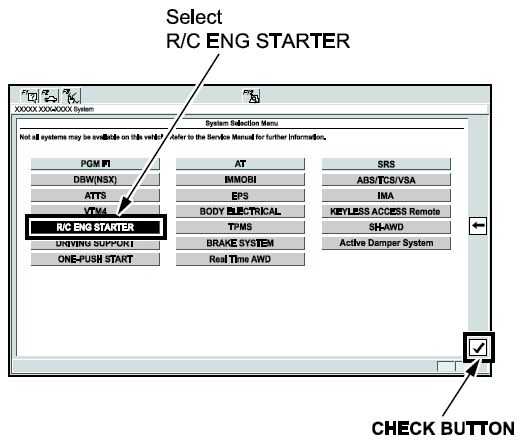
- Select R/C ENG STARTER, then click the check button.
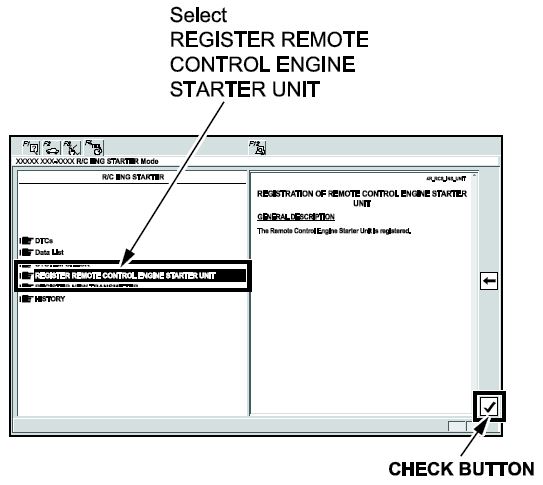
- Select REGISTER REMOTE CONTROL ENGINE STARTER UNIT, then click the check button.
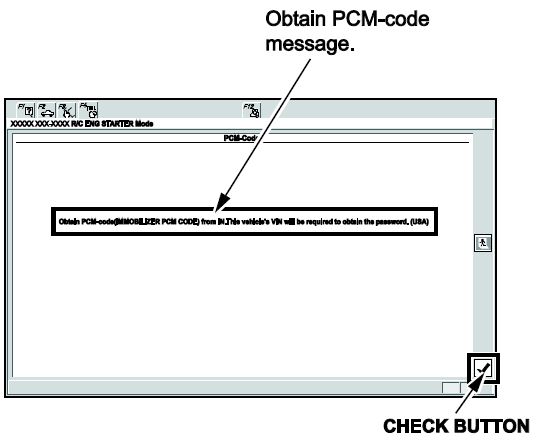
- The following message will display: Obtain PCM code (IMMOBILIZER PCM CODE) from the iN. This vehicle’s VIN will be required to obtain the password. (USA) Click the check button.
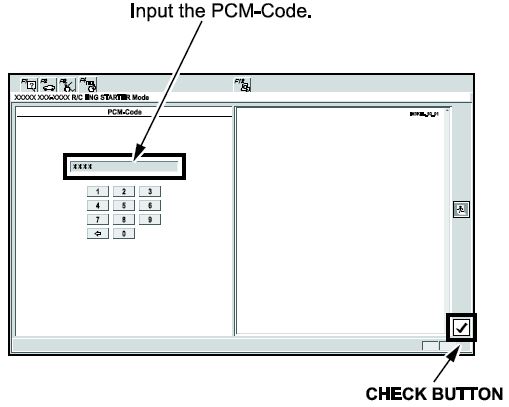
- Enter the PCM code, then click the check button.
NOTE: To ensure security, the PCM code (password) is changed every day, so it impossible to register the remote control engine starter if the dates of the PCM code acquisition and registration are different. The date of the HDS/MVCI tester should be the same.
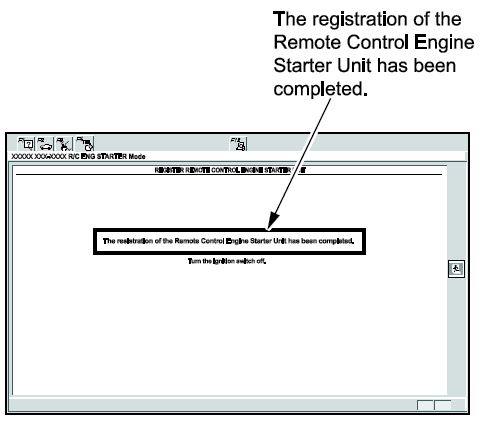
- The following message will display: The registration of the Remote Control Engine Starter Unit has been completed. Turn the ignition to OFF.
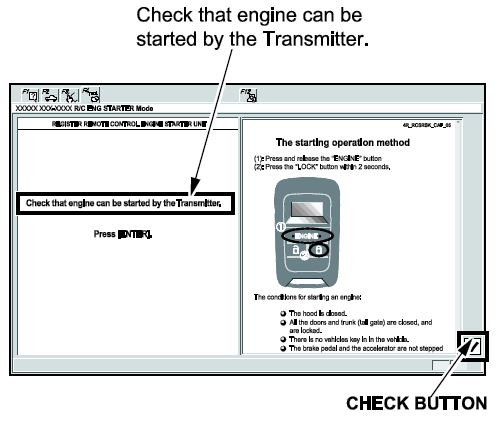
- This message will display: Check that engine can be started by the Transmitter. Click the check button.
CHECK THE OPERATION OF THE REMOTE CONTROL ENGINE STARTER
To start the engine remotely, make sure the following are done:
- The hood is closed.
- The shift lever is in park.
- Turn the ignition to OFF with the key outside the vehicle.
- All doors and trunk are closed and locked.
Inspection
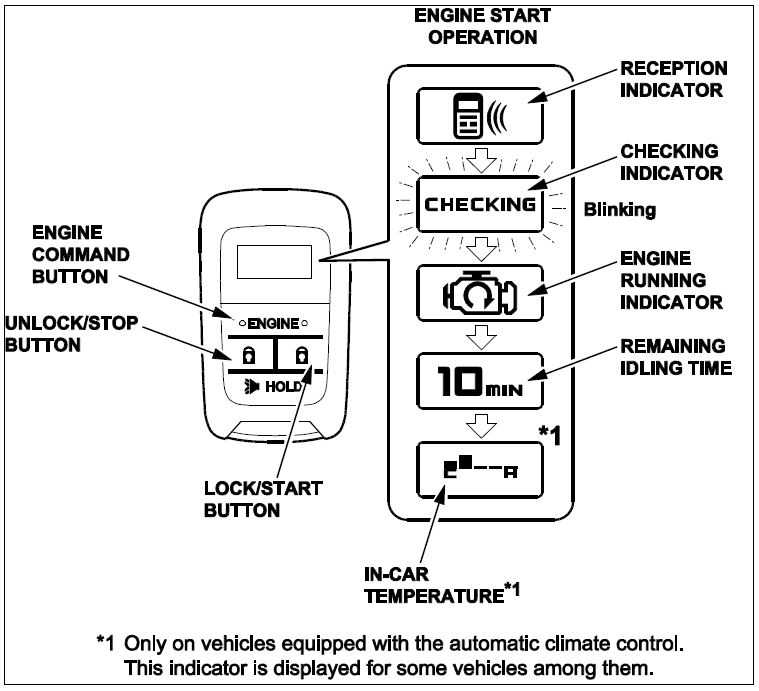
- Press the engine command button on the transmitter and release it. Within 2 seconds, press the lock/start button on the transmitter.
The engine should start.
- If the engine starts, go to step 13.
- If the engine does not start, make sure all of the operating conditions are met.
- Check the engine starter harness conditions.
- Connect the HDS/MVCI and check for an indicated failure.
(Refer to the appropriate Service Manual for details)
- Press the engine/command button on the transmitter and release, within 2 seconds, press the unlock/stop button. The engine should stop.
Does the engine stop?
If the engine stops, go to step 14.
If the engine does not stop, check the engine starter harness connections.
- After the engine has stopped, start the engine again, and check that the engine stops after each of the following conditions:
NOTE: After each test, the ignition must be cycled, or the driver’s door must be opened and closed.
- Move the shift lever out of the P position.
- Unlock or open the doors or trunk.
- Open the hood.
- Cycle the ignition switch.
- Press on the brake pedal.
- Check that the power windows and the moonroof do not function, and the shift lever does not move to any position when the vehicle system is started with the transmitter.
- Check that the engine does not start under “Operating Conditions” with the key left inside the vehicle.
- Start the vehicle system again, press the engine/command button on the transmitter two times, and check the vehicle condition on the display.
- Check the operation of the transmitter when the vehicle is 120 m (400 ft.) away and in direct sight.
- Press the unlock/stop button on the transmitter and verify that the doors unlock. Press the lock/start button, and verify that the doors lock.
NOTE: If the vehicle is equipped with the driving position memory system, make sure to shift the seat position of the driver’s seat to Driver with the transmitter.
- Check that the engine can start by the ignition switch and that the wiper and the headlight can be operated normally.
Does the vehicle system stop after each of these tests?
If the engine stops after each of these steps, the inspection is complete.
If the engine does not stop after any one of these tests, continue with normal trouble shooting.
END
 Loading...
 Systems, then click the check button.