| “This site contains affiliate links for which OEMDTC may be compensated” |
B15-023
May 23, 2015
01216 Version 1
HomeLink® System Has Weak or Limited Range
AFFECTED VEHICLES
| Year | Model | Trim | VIN range |
| 2014–16 | MDX | ALL | ALL |
| 2013–16 | RDX | ALL | ALL |
| 2014–16 | RLX | ALL | ALL |
| 2014 and 2016 | RLX Sport Hybrid | ALL | ALL |
SYMPTOM
The HomeLink transceiver, which communicates with the customer’s garage door opener, has weak or limited range.
POSSIBLE CAUSES
The HomeLink transceiver’s operating distance is limited.
CORRECTIVE ACTION
Relocate the HomeLink transceiver to improve operating distance.
PARTS INFORMATION
| Part Name | Part Number | Quantity | |
|---|---|---|---|
| Wire Harness Cushion | 91902-TZ5-A01 | 3 | |
REQUIRED MATERIALS
| Part Name | Part Number | Quantity |
| EPT Sealer (One roll repairs 12 vehicles.) | 06990-SA5-000 | 1/12 of a roll |
WARRANTY CLAIM INFORMATION
The normal warranty applies.
| Operation Number | Description | Flat Rate Time | Template ID | Failed Part Number |
| 0541A3 | Remove, wrap, and relocate the HomeLink transceiver. | 0.5 hr | 15-023N | 36610-TX4-A01 |
Defect Code: 03214
Symptom Code: 03217
Skill Level: Repair Technician
REPAIR PROCEDURE
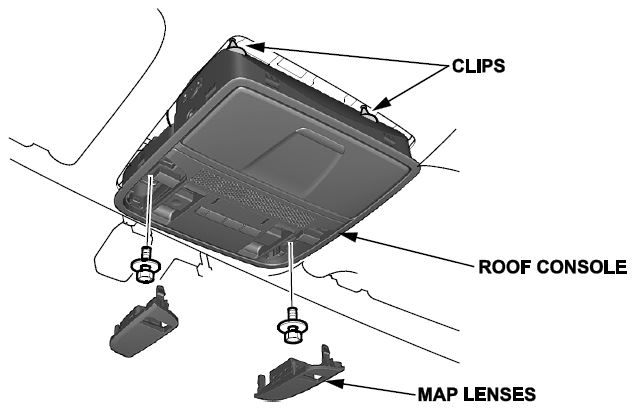
- Remove the map lenses, 2 bolts, and 2 clips holding the roof console and allow to hang.
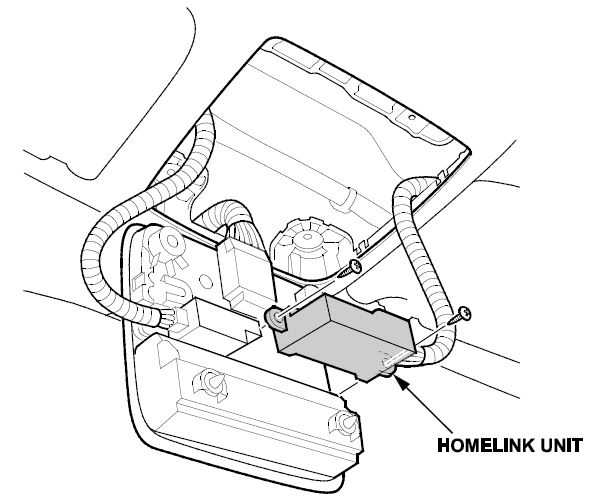
- While holding the roof console assembly, remove the screws from the HomeLink transceiver.
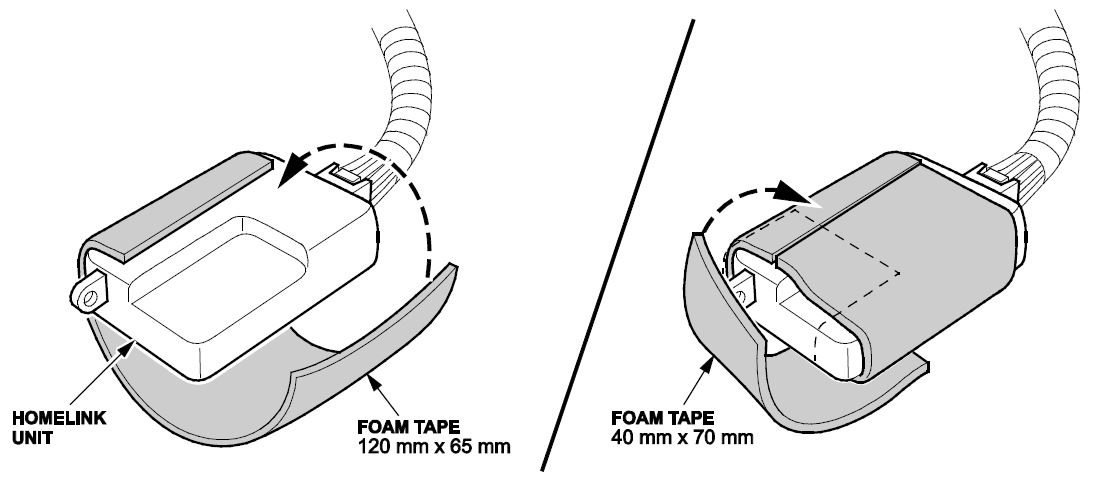
- Cut a piece of EPT Sealer to 120mm x 65mm and wrap the entire HomeLink transceiver, then cut another piece 40mm x 70mm and wrap the end of the unit.
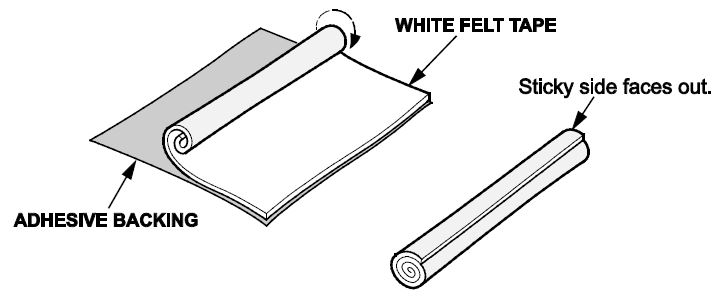
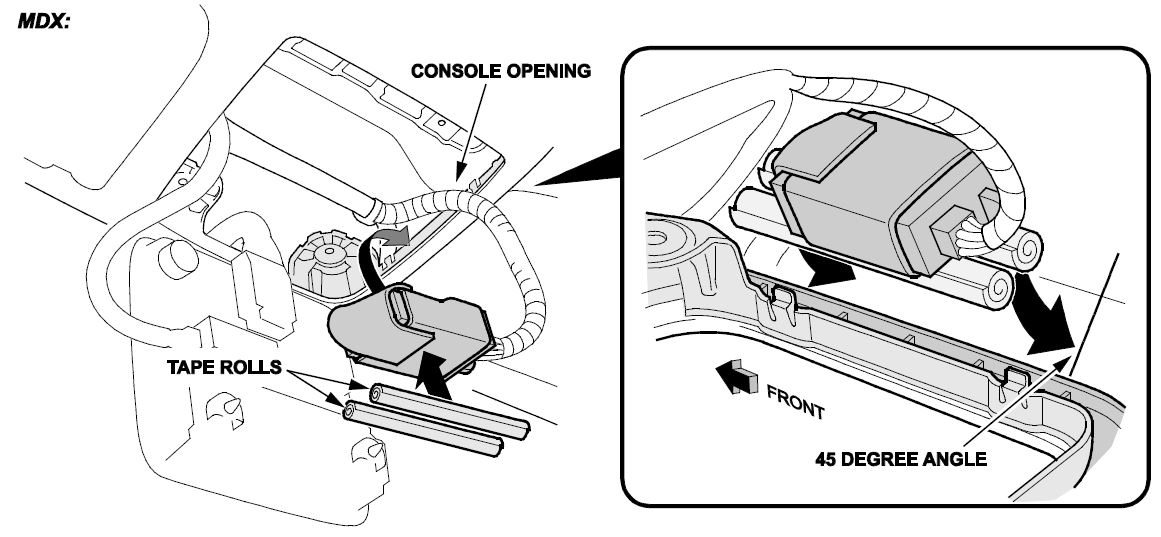
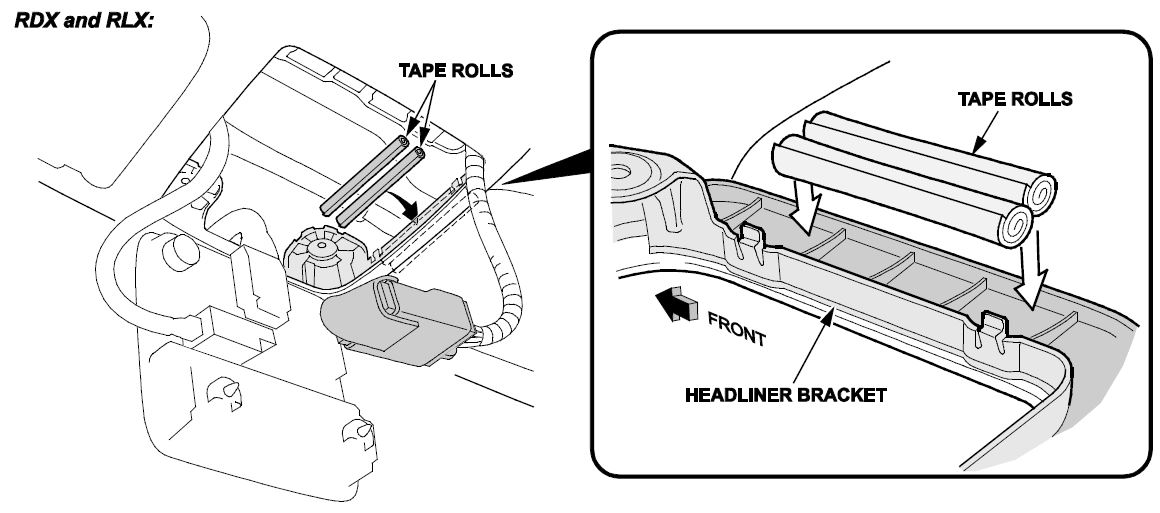
- Remove the backing from two pieces of white felt tape and roll them up with the sticky side out. For MDX go to step 5 and for RDX/RLX go to step 7.
- Stick the tape rolls to the HomeLink transceiver and stick it to the console opening at a 45 degree angle as shown.
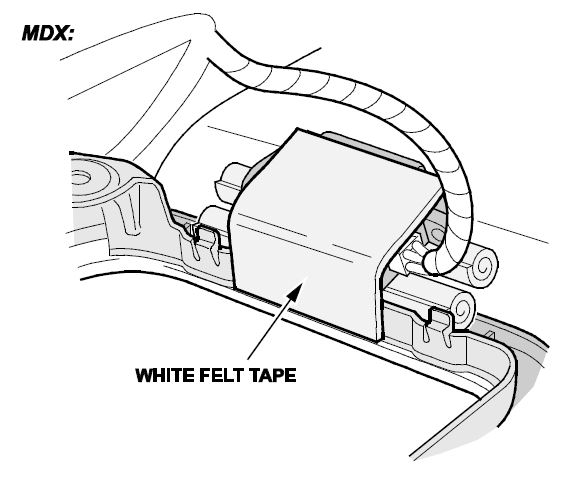
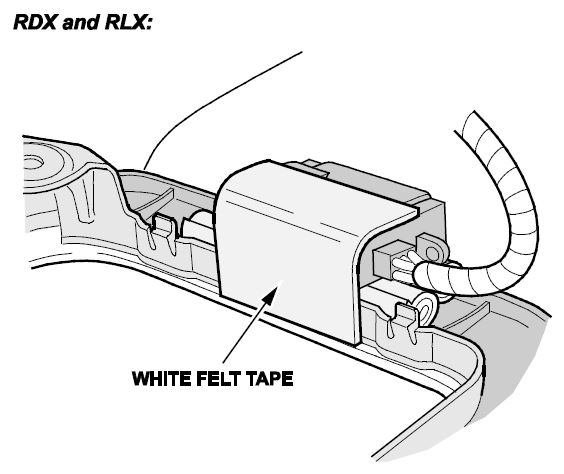
- Secure the transceiver to the roof console with a white felt tape as shown.
- Stick the tape rolls to the console opening as shown.
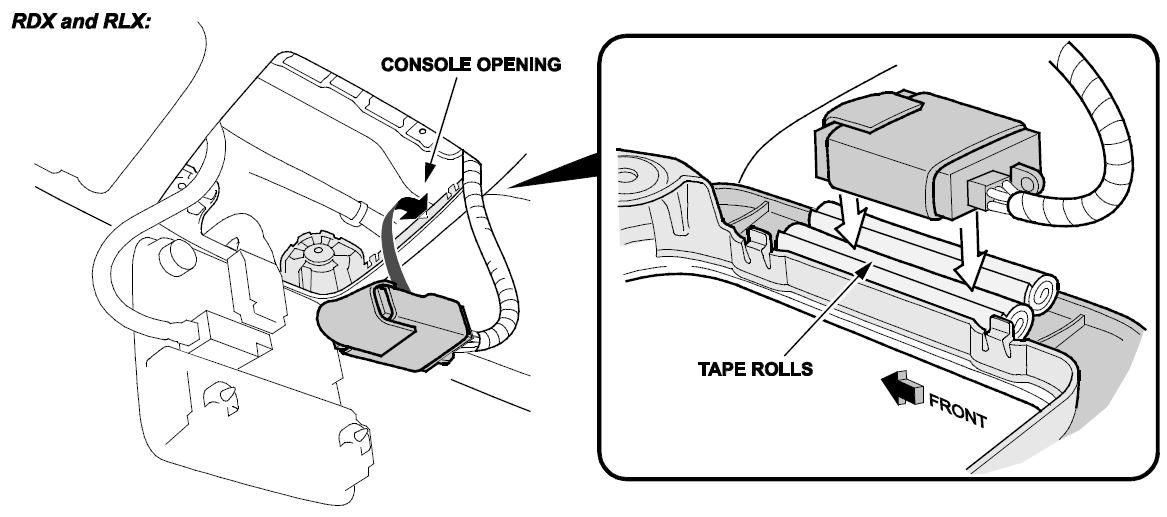
- Stick the transceiver to the tape rolls with good pressure.
- Secure the transceiver to the roof console with a white felt tape as shown.
- Reinstall the roof console and lenses in reverse order.
END
 Loading...
