| “This site contains affiliate links for which OEMDTC may be compensated” |
B04-001
March 19, 2004
Applies To:
2002–03 3.5 RL – ALL March 19, 2004
2002–03 NSX – ALL
2004 3.5 RL – From VIN JH4KA96..4C000001 thru JH4KA96..4C005021
2004 NSX – From VIN JH4NA..6.4T000001 thru JH4NA..6.4T000006
Fuel Fill Cap Binds and Possible MIL Comes On With DTC P1456
(Supersedes 04-001, Fuel Fill Cap Binds or MIL Comes On With DTC P1456, dated January 16, 2004)
SYMPTOM
The fuel fill cap is binding and, if not tightened fully, it may cause the MIL to come on and DTC P1456 (EVAP control system leakage, fuel tank system) to set.
PROBABLE CAUSE
The threads in the fuel fill pipe bind on the fuel fill cap.
CORRECTIVE ACTION
Replace the fuel fill pipe, and do an EVAP system function test with the HDS.
PARTS INFORMATION
| Fuel Fill Pipe: | |
| 2002–04 3.5 RL: P/N | 17660-SZ3-A50 |
| 2002–04 NSX: P/N | 17660-SL0-A50 |
WARRANTY CLAIM INFORMATION
In warranty: The normal warranty applies.
| OP# | Description | FRT |
| 323503 | Check for DTCs with the HDS | 0.3 |
| 323503B | Do an EVAP system function test with the HDS | 0.3 |
| Replace the fuel fill pipe: | ||
| 310104 | 2002–04 3.5 RL (Repair Procedure A) | 0.4 |
| 310104 | 2002–04 NSX (Repair Procedure B) | 0.5 |
Failed Part: P/N 17660-SZ3-A50
Defect Code: 03214
Symptom Code: 03203
Skill Level: Repair Technician
Out of warranty: Any repair performed after warranty expiration may be eligible for goodwill consideration by the District Parts and Service Manager or your Zone Office. You must request consideration, and get a decision, before starting work.
DIAGNOSIS
Remove the fuel fill cap, reinsert it, then tighten it. The cap should turn, without resistance, until its O-ring touches the fuel fill pipe.
- If the cap turns freely, this service bulletin does not apply; continue with normal Evaporative System troubleshooting. (See section 11 of the appropriate Acura
 Service Manual.)
 - If the cap binds or drags, go to REPAIR PROCEDURE.
REPAIR PROCEDURE A — 3.5RL
NOTE: Make sure the fuel tank is less than half full before starting this procedure.
- Raise the vehicle on a lift, and remove the left rear wheel.
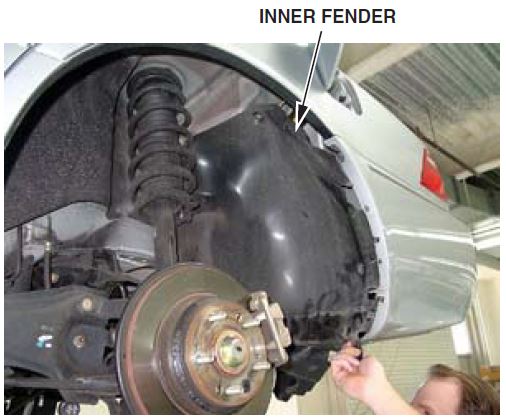
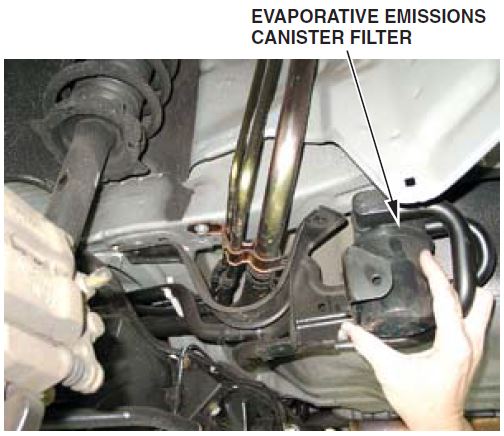
- Remove the splash guard, the inner fender, and the evaporative emissions canister filter.
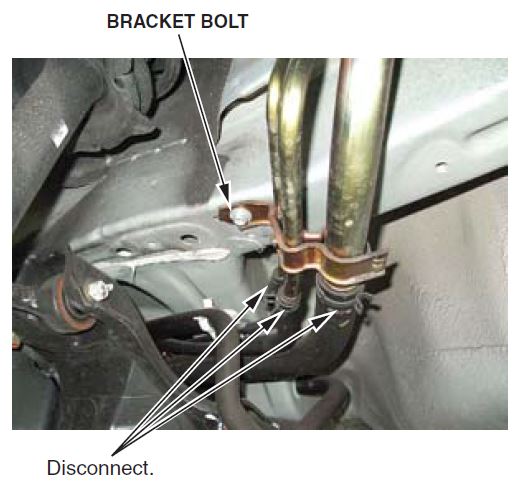
- Disconnect the three hoses from the fuel fill pipe.
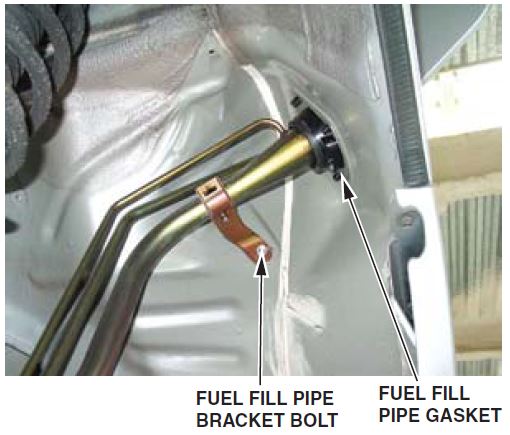
- Remove the two fuel fill pipe bracket bolts, the fuel fill pipe, and the gasket.
- Install the new fuel fill pipe with the original bolts and fill pipe gasket.
- Install the three hoses to the fuel fill pipe with the original clamps.
- Install the evaporative emissions canister filter, the splash guard, the inner fender, and the wheel.
- Connect the HDS to the vehicle’s DLC (data link connector), and do the EVAP function test:
- Check the results of the EVAP function test.
- If the vehicle passed the test, return it to the customer.
- If the vehicle failed the test, do the DTC P1456 troubleshooting in section 11 of the 1996–01 3.5 RL Service Manual, and the 2003 3.5 RL Service Manual Supplement.
REPAIR PROCEDURE B — NSX
- Raise the vehicle on a lift, and remove the left rear wheel.
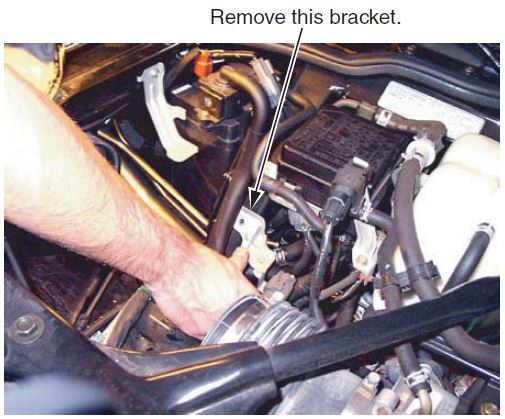
- Remove the air cleaner housing and the wiring harness bracket.
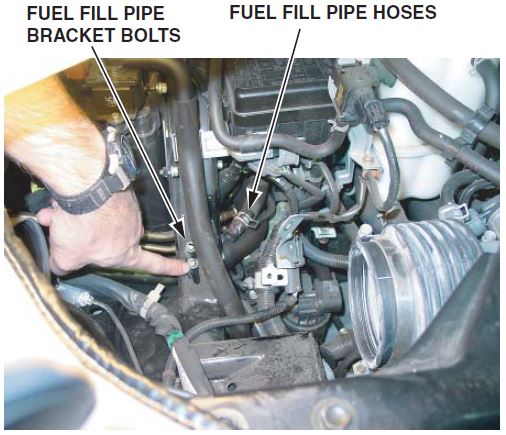
- Disconnect the fuel fill pipe hoses, and remove the fuel fill pipe bracket bolts.
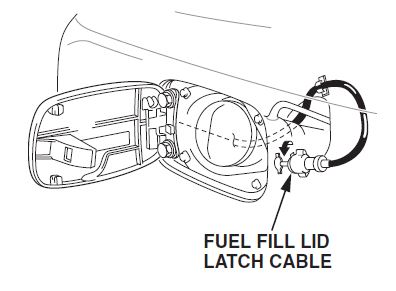
- Lower the driver’s side rear inner fender, and remove the fuel fill lid latch cable by turning it 90 degrees.
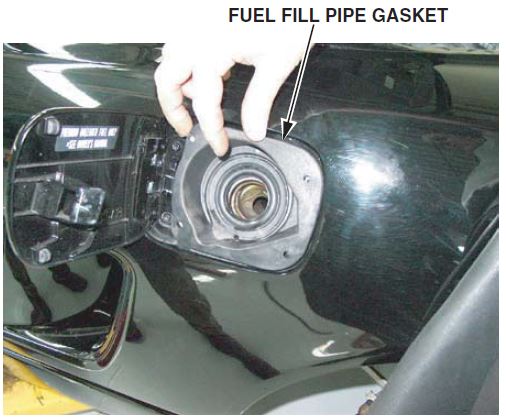
- Remove the fuel fill pipe gasket. Remove the fuel fill pipe through the fender opening.
- Install the new fuel fill pipe, the gasket, and the cable. Reinstall the air cleaner housing, the wiring harness bracket, and the wheel.
- Connect the HDS to the vehicle’s DLC (data link connector), and do the EVAP function test:
- Check the results of the EVAP function test.
- If the vehicle passed the test, return it to the customer.
- If the vehicle failed the test, do the DTC P1456 troubleshooting in section 11 of the 1997 NSX Service Manual, and the 2002 and 2003 NSX Service Manual Supplements.
 Loading...
