
November 29, 2021 NHTSA CAMPAIGN NUMBER: 21V932000
A hood that opens while driving can obstruct the driver’s view and increase the risk of a crash.
NHTSA Campaign Number: 21V932
Manufacturer Honda (American Honda Motor Co.)
Components STRUCTURE, LATCHES/LOCKS/LINKAGES
Potential Number of Units Affected 724,826
Summary
Honda (American Honda Motor Co.) is recalling certain 2019 Passport, 2016-2019 Pilot, and 2017-2020 Ridgeline vehicles. The hood latch striker may become damaged and separate from the hood, which can result in the hood opening while driving.
Remedy
Dealers will either repair the hood latch striker, or replace the hood if necessary, free of charge. Owner notification letters were mailed January 18, 2022. Owners may contact Honda customer service at 1-888-234-2138. Honda’s number for this recall is PBV.
Notes
Owners may also contact the National Highway Traffic Safety Administration Vehicle Safety Hotline at 1-888-327-4236 (TTY 1-800-424-9153), or go to www.nhtsa.gov.
Check if your Honda has a Recall
A21-086
December 10, 2021
Version 2
Safety Recall: Hood Vibration at Highway Speeds
Supersedes 21-086, dated November 30, 2021, to revise the information.
AFFECTED VEHICLES
| Year | Model | Trim | VIN Range |
| 2019 | Passport | ALL | Check the iN VIN status for eligibility |
| 2016–19 | Pilot | ALL | Check the iN VIN status for eligibility |
| 2017–20 | Ridgeline | ALL | Check the iN VIN status for eligibility |
REVISION SUMMARY
This service bulletin was extensively revised, American Honda recommends you read the entire bulletin.
BACKGROUND
Due to an improper hood to grill gap setting at the time of vehicle manufacturing, the hood latch may experience higher than expected load under certain driving conditions. Strong air pressure forced through this gap may cause the hood to vibrate which, over time, may cause the area surrounding the hood latch striker to crack and potentially dislodge, presenting a risk for the hood to open while driving and increasing the risk of a crash.
CUSTOMER NOTIFICATION
Owners of affected vehicles will be sent a notification of this campaign.
Do an iN VIN status inquiry to make sure the vehicle is shown as eligible.
Some vehicles affected by this campaign may be in your new or used vehicle inventory.
Failure to repair a vehicle subject to a recall or campaign may subject your dealership to claims or lawsuits from the customer or anyone else harmed as a result of such failure. Before selling a vehicle in inventory, always check if it is affected by a safety recall by conducting a VIN status inquiry.
CORRECTIVE ACTION
Follow the inspection procedure to determine if the hood is repairable. If any of the inspection areas fail, replace the hood.
NOTE: Below is a simplified flow chart that depicts the overall inspection and repair. Refer to each respective section following the flow chart for inspection and repair details.
PARTS INFORMATION For Hood Repair
| Part Name | Part Number | Quantity |
| Hood Striker Repair Kit (Contains (1) Striker Plate and (3) 6 MM Bolts and Washers). | 60110-TG7-305 | 1 |
| Spot Weld repair Kit (Contains (1) Rivet and (1) Washer). | 06601-TG7-305 | 1 |
For Hood Replacement
| Part Name | Part Number | Quantity |
| Hood Component | 60100-TG7-A92ZZ | 1 |
| Emission Label (Must Replace) (Due to P/N variation between models/years, you may add the label P/N in the replacement parts section of the template) | Refer to Parts Bulletin 18-0021 for ordering instructions. | 1 |
| Air Conditioner Label – (Must Replace)
(Check by VIN in the Parts Catalog for Proper Application) | 80050-TG7-A00 | 1 |
| Air Conditioner Label – (Must Replace)
(Check by VIN in the Parts Catalog for Proper Application) | 80050-T6Z-A00 | 1 |
| Air Conditioner Label – (Must Replace)
(Check by VIN in the Parts Catalog for Proper Application) | 80050-TYR-A00 | 1 |
| Rubber Hood Seal (If Needed) | 74146-TG7-A01 | 1 |
| Hood Cushion (If Needed) | 91601-SYC-J00 | 2 |
| Hood Cushion (If Needed) | 91603-S9A-003 | 3 |
| Insulator Clip (If Needed) | 91502-TZ5-A01 | 8 |
TOOLS INFORMATION
| Part Name | Part Number | Quantity |
| Striker and Spot Weld Inspection Template kit
(Contains 5 Inspection Templates, and 10 Fender Clips) | 07AAJ-TG7A100 | 1 |
| Metric Rotabroach Master Hole Cutting Kit | BLR11201SO | 1 |
| Rivet Gun/Installer | Has been auto-shipped to each dealer. The brand and model number may vary. | 1 |
| Deburring Tool | DEBUR300 | 1 |
INSPECTION PROCEDURE A
1. Park the vehicle on a level surface and set the parking brake.
2. Open the hood, then mount the support rod in the hood for support.
3. Inspect the hood striker area for cracks.
- If there are no cracks, go to INSPECTION PROCEDURE B.
- If there are cracks, go to Step 4.
4. Install the inspection template onto the hood striker as shown, then use a permanent marker to trace the areas around each striker mounting bolt.
5. Remove the template, then visually inspect the length and location of the crack(s).
- If the crack(s) are within or touching the lines you traced, go to INSPECTION PROCEDURE B.
- If the crack(s) are beyond or outside the lines you traced, take clear photos, then go to REPAIR PROCEDURE C.
INSPECTION PROCEDURE B
1. Locate the 2 spot welds on the hood frame as shown.
2. Inspect for a crack(s) at each spot weld.
- If no crack(s) are present, go to REPAIR PROCEDURE A.
- If there is full separation at the spot weld, take clear photos, then go to REPAIR PROCEDURE C.
- If a crack(s) are present, but the spot weld hasn’t fully separated, go to Step 3.
3. Use the spot weld inspection circle on the inspection template to determine a pass/fail condition.
4. Align the center mark of the template with the center-point of the spot weld.
- If the length of the crack(s) are within the spot weld inspection circle, go to REPAIR PROCEDURE B, followed by REPAIR PROCEDURE A.
- If the length of the crack(s) are beyond the spot weld inspection circle, take clear photos, then go to REPAIR PROCEDURE C.
REPAIR PROCEDURE A
1. Remove and discard the 3 bolts securing the striker to the hood frame.
2. Position the striker plate onto the hood frame and temporarily install the 2 fender clips supplied with the template kit to align the hood striker and the striker plate.
3. Thread 2 of the new bolts into the striker plate until they are snug, then remove the 2 fender clips. Thread the remaining bolt and torque the bolts to 8 N.m (8 lb-ft).
REPAIR PROCEDURE B
1. Mark the center point of the spot weld using a center punch.
2. Drill the spot weld using a 7mm Rotabroach bit, then remove any metal shavings or burrs using the Deburring Tool.
NOTE: Place a suitable cover over the engine bay to catch any metal shavings to prevent them from falling into the engine bay.
3. Install the mandrel end of the rivet into the Riveting Tool.
4. Place the supplied washer onto the rivet body, then insert the rivet into the hole you made on the hood.
5. Use one hand to support the hood, then push firmly with the rivet in place. Squeeze the tool/trigger to fasten the rivet.
NOTE: Do not use the tool in the conditions shown below. Doing so causes incorrect fastening.
REPAIR PROCEDURE C
NOTE:
- Prior authorization must be approved by your DPSM before doing any work related to replacing the hood. To request authorization, do the following:
- Take clear photos of the cracks beyond or outside the lines drawn on the hood striker.
- Take clear photos of the spot weld fully separated.
- Take clear photos of the template spot weld inspection circle that shows the spot weld cracks beyond the template spot weld circle.
- Submit to your DPSM for approval, photos of the hood defect(s) and door jamb label that shows the VIN and attach a Honda and Acura Certified Collision Repair Shop estimate.
- All work must be completed by a Honda and Acura Certified Collision Repair Shop.
- Refer to Service Bulletin 16-065, Material Requirements for Warranty and Goodwill Paint Repairs, for a list of approved paints and materials that must be used for warranty repairs.
- Give your warranty clerk the Honda and Acura Certified Collision Repair Shop receipt. For the warranty claim to be paid, a copy of the Honda and Acura Certified Collision Repair Shop invoice must be included in the warranty claim.
1. Have a new replacement hood installed and refinished by a Honda and Acura Certified Collision Repair Shop.
2. Remove the hood insulator from the original hood.
3. Remove the hood seal.
4. Install the hood insulator.
NOTE: Replace the insulator if it is torn/missing sections and replace any stressed or damaged clips.
5. Install the hood seal.
NOTE: Replace the hood seal if it is torn/missing sections and replace any stressed or damaged clips.
6. Do the following steps to adjust the hood:
- Slightly loosen the hood hinge mounting bolts and the hood latch mounting bolts.
- Adjust the hood alignment in the following sequence.
- Adjust the hood right and left, as well as forward and rearward, by using the elongated holes in the hood hinges.
- Turn the hood edge cushions, in or out as necessary, making sure the hood fit flush with the body at the front and side edges.
- Adjust the hood latch to obtain the proper height at the forward edge, and move the latch right or left until the striker is centered in the latch.
- Tighten each bolt to the specified torque.
- Check that the hood opens properly and closes securely.
- Inspect the resting position of the hood seal. Ensure that the hood seal is making contact along the front grille.
- Apply touch-up paint to the hinge mounting bolts and around the hinges, and let the paint dry.
7. Apply multipurpose grease to the hood latch and the hood hinges as indicated by the arrows.
8. Apply new labels as shown and in the following locations.
- Air Conditioner Label.
- Emission Label.
EMISSION LABEL ORDERING INFORMATION
The controlled Parts Order screen in the iN is used to order emission labels. To order, you are required to supply the VIN, the vehicle owner’s first and last name, and the name of a contact person at your dealership. It is very important that the VIN and other information be accurate. This information forms the basis for locating customers should it become necessary to do so in the future.
Vehicle Application: Under no circumstances may an emission label be installed on any vehicle other than the one whose VIN is indicated in the order. Emission labels that are ordered but not installed must be returned to AHM. Refer to the “Controlled Parts Return Policy” section in the Parts System Guide. Failure to follow this directive could subject the dealer to enforcement activity and fines.
Required Information: Orders for emission labels must include the customer’s first and last name and the vehicle’s complete VIN. A part number is not required when ordering emission labels. The correct label will be issued automatically based on the VIN.
END
DEFECT INFORMATION REPORT
573.6(c)(1)
| Name of manufacturer: | Honda Development and Manufacturing of America, LLC |
| Manufacturer’s agent: | Jeff Chang American Honda Motor Co., Inc. 1919 Torrance Blvd. Torrance, CA 90501-2746 |
573.6(c)(2)
Identification of potentially affected vehicles:
| Make/Model | Model Year | Dates of Manufacture | Number of Vehicles |
| Honda Passport | 2019 | 11/08/2017 – 04/09/2019 | 18,704 |
| Honda Pilot | 2016 | 05/21/2014 – 11/07/2016 | 185,832 |
| Honda Pilot | 2017 | 10/20/2016 – 12/05/2017 | 153,503 |
| Honda Pilot | 2018 | 12/05/2017 – 07/16/2018 | 107,321 |
| Honda Pilot | 2019 | 09/18/2017 – 04/09/2019 | 110,653 |
| Honda Ridgeline | 2017 | 05/08/2015 – 08/31/2017 | 49,490 |
| Honda Ridgeline | 2018 | 07/27/2017– 03/07/2018 | 21,381 |
| Honda Ridgeline | 2019 | 01/09/2018 – 11/19/2019 | 58,235 |
| Honda Ridgeline | 2020 | 04/02/2019 – 08/27/2020 | 19,707 |
Description of the basis for the determination of the recall population:
The recall population was determined based on manufacturing records. The production range reflects all possible vehicles that could experience the problem.
Description of how the vehicles being recalled differ from similar vehicles not included in the recall:
Similar vehicles produced outside the specified manufacturing range above had adhesive applied to the hood latch striker and the hood latch height and front seal were set to specification.
Identification of affected components:
| Component: | Hood Comp., Engine |
| Part No.: | 60100-TG7-A91 |
| Country of Origin: | U.S. |
573.6(c)(3)
Total number of potentially affected vehicles: 724,826
573.6(c)(4)
Percentage of affected vehicles that contain the defect: 100%
573.6(c)(5)
Defect description:
Gaps in the front seal between the hood and grill allow for air entry, potentially resulting in hood vibration at highway speeds. Over time the hood vibration could form stress fractures along the hood latch striker and separate the hood latch striker from the hood. A separated hood latch striker may allow the hood to open, obstructing the driver’s view and increasing the risk of a crash. Hood vibration noises or a loose hood are potential warnings of a failing hood latch striker.
573.6(c)(6)
Chronology:
July 2016
Stress fractures were found on the hood latch striker during durability testing of a prototype Ridgeline. After adhesive was applied to a prototype vehicle’s hood latch striker, the vehicle passed durability testing; thereafter, adhesive was applied to the hood latch striker in mass production of similarly designed vehicles as a quality improvement effort. No quality investigations were initiated as there were no market concerns of hood latch striker durability from similarly designed vehicles.
April 2017
After receiving some non-safety related market concerns, Honda launched an investigation for hood vibration/noises and/or loose hood.
December 2017
A technical service bulletin (17-083) was launched to address hood vibration and/or loose hood by adjusting the hood alignment.
February 2019
Corrosion was found in the engine compartment during corrosion testing of the upcoming Passport. Salt water intrusion indicated gaps between the hood and grill.
April 2019
On-line checks and adjustments were implemented to Passport and Pilot mass production to ensure hood latch height and that the front seal between hood and grill was set to specification.
August 2019
Online checks and adjustments were implemented to Ridgeline mass production to ensure hood latch height and that the front seal between hood and grill was set to specification.
September 2019
Honda initiated another investigation into hood vibration/noises due to stress fractures in hood latch strikers.
March 2021
Honda confirmed complete hood latch striker separation in the field.
August 2021
Re-creation testing confirmed progressive stress fractures in the hood latch striker can result in separation from the hood.
October 2021
Review of previous mass production quality improvement efforts (adhesive application in July 2016 and checks/adjustments of the hood latch height and front seal in April – August 2019) judged enough toughness to prevent separation of the hood latch striker from stress fractures. Vehicles built prior to the implementation of both these mass production quality improvement efforts may not have enough toughness to prevent hood latch striker separation.
November 19, 2021
Honda determined that a defect related to motor vehicle safety existed and decided to conduct a safety recall.
As of November 19, 2021, Honda has received 116 warranty claims and no reports of crashes or injuries related to this issue.
573.6(c)(8)(i)
Program for remedying the defect:
Registered owners of all affected vehicles will be contacted by mail and asked to bring their vehicle to an authorized Honda dealer. Depending on the condition of the hood latch striker, the dealer may repair the hood and install a striker support plate, or completely replace the hood with a new part. The hood repair or replacement will be performed for free.
Owners who have paid to have these repairs completed at their own expense will be eligible for reimbursement, in accord with the recall reimbursement plan on file with NHTSA.
573.6(c)(8)(ii)
The notification date to dealers: November 30, 2021
The estimated date to start notifications to owners: January 17, 2022
573.6(c)(10)
Representative copies of all notices, bulletins and other communications:
A copy of the dealer service bulletin, the final customer notification letter and other dealer communication will be submitted to your office as soon as possible.
A draft of the owner notification letter will be submitted to your office as soon as possible.
573.6(c)(11)
Manufacturer’s campaign number: PBV
9 Affected Products
Vehicles
| MAKE | MODEL | YEAR |
| HONDA | PASSPORT | 2019 |
| HONDA | PILOT | 2016-2019 |
| HONDA | RIDGELINE | 2017-2020 |
21 Associated Documents
Recall Acknowledgement
Chronology
RMISC-21V932-8984.pdf 62.434KB
Manufacturer Notices(to Dealers,etc) – Stop Sale/Safety Recall: 2016-20 Multi-Model Honda Hood Latch Striker Inspection
RCMN-21V932-7343.pdf 196.103KB
Remedy Instructions and TSB
RCRIT-21V932-0246.pdf 1047.86KB
Miscellaneous Document – Part 573, Defect Information Report
RMISC-21V932-2040.pdf 148.775KB
Defect Notice 573 Report
RCLRPT-21V932-1035.PDF 217.914KB
Miscellaneous Document – 573.6(c)(6)Chronology
RMISC-21V932-5291.pdf 42.584KB
ISSUED Owner Notification Letter(Part 577) – January 2022
RCONL-21V932-0413.pdf 36.755KB
Remedy Instructions and TSB
RCRIT-21V932-1964.pdf 1074.704KB
Remedy Instructions and TSB
RCRIT-21V932-9828.pdf 692.07KB
Manufacturer Notices(to Dealers,etc) – Hood Repair Kit 06601-TG7-305; 16-19M Pilot, 17-20M Ridgeline, 19M Passport Hood: December 1, 2021
Manufacturer Notices(to Dealers,etc) – Part Return Request 16-19M Pilot, 17-20M Ridgeline, 19M Passport Hood/ 60100-T: December 1, 2021
RCMN-21V932-8539.pdf 106.115KB
Manufacturer Notices(to Dealers,etc) – Hood Repair Kit 06601-TG7-305; 16-19M Pilot, 17-20M Ridgeline, 19M Passport Hood: December 1, 2021
RCMN-21V932-3567.pdf 133.651KB
Manufacturer Notices(to Dealers,etc) – Part Return Request 16-19M Pilot, 17-20M Ridgeline, 19M Passport Hood/ 60100-T: December 1, 2021
RCMN-21V932-4458.pdf 106.459KB
Statement by American Honda Regarding Hood Striker Recall: 2019 Passport, 2016-2019 Pilot and 2017-2020 Ridgeline: December 2, 2021
RMISC-21V932-3991.pdf 87.043KB
Recall 573 Report – December 9, 2021
RCLRPT-21V932-1863.PDF 217.906KB
Recall 573 Report – December 16, 2021
RCLRPT-21V932-4127.PDF 217.938KB
Miscellaneous Document – Amended Defect Information Report W/O PII December 9, 2021
RMISC-21V932-0851.pdf 44.219KB
Recall Quarterly Report #1, 2022-1
RCLQRT-21V932-5859.PDF 211.148KB
Recall Quarterly Report #2, 2022-2
RCLQRT-21V932-9397.PDF 211.256KB
Recall Quarterly Report #3, 2022-3
RCLQRT-21V932-4351.PDF 211.343KB
Latest Recalls Documents

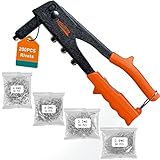
- 【4 Interchangeable Rivet Heads】Our professional riveter tool comes with 4 tool-free interchangeable rivet heads:3/32"(2.4mm), 1/8" (3.2mm), 5/32"(4mm), and 3/16"(4.8mm).Other types of rivet heads placed on the handle, which creates more convenient to use and save more space.And each size is equipped with 50 pcs rivets, which meets all your needs while riveting
- 【Easy to Use】Sleeve knurled unibody design and guide mouth knurling design can be removed tool-free for easy change or maintenance. When working, no other tools are needed, you can easily change the size you want, simple operation and easy to carry. For thinner nails, we can choose to operate with one hand. If operated with two hands, the rivet will be carried out faster and more accurately. But for thicker nails, we need to use more strength
- 【Durable & Solid】High quality aluminum alloy body, reinforced carbon steel heat treatment handle increase the rivet gun body strength and service lifeThe ergonomic double-curved handle design makes working more labor-saving, and the PVC handle sleeve provides protection for your hands from harm, and maximum fit and comfort
- 【Wide Application】Our WETOLS professional rivet gun kit can handle all three type of rivets: aluminum, steel, and stainless steel rivets to adapt to various riveting operations, such as construction, maintenance or hand-made, etc. 4.8mm Rivet head is not recommended for use with steel and stainless steel rivets
- 【What's Included】This WETOLS rivet gun kit includes: Rivet Gun*1, Aluminum Rivets*200( 50 pcs each size) , Twist Drill*4, User Manual*1, Sturdy Blow Molded Case*1, Worry-Free-24-Months-Warranty. Do not hesitate to contact us if you encounter any questions when using WETOLS single hand riveter, we are happy to assist you
- 🔨【With 200 Pcs Rivets】Meiwaltee rivet gun kit comes with 200 pcs aluminum rivets, 4 interchangeable Nosepieces and a Wrench, 3/32 inches(2.4mm), 1/8 inches(3.2mm), 5/32inches(4.0mm), and 3/16 inches(4.8mm), each size comes with 50 pcs rivets.
- 🔨【More Sturdy And Durable】Meiwaltee pop rivet gun is made of heat-treated 0.08inch(2MM) thickened carbon steel. note: be sure to match right interchangeable heads and rivets size to work to prevent from the jam.
- 🔨【Ergonomic, Non-slip Handles】Our grip handles are comfortable and can provide proper leverage to apply pressure to squeeze the rivet. If your single hand is small and have limited strength, you can use two hands to rivet.
- 🔨【DIY, Wide Application】Meiwaltee pop rivet tool kit is suitable for small DIY projects or fixes. You can rivet plastic, metal sheets, wood and all kinds of things around the house. Whether you're a novice or seasoned riveter, this rivet gun will accomplish your needs.
- 🔨【Note】Not recommended for use with 3/16 in.(5mm) Dia all-steel rivets, stainless steel rivets are not for use with manually operated rivet tools. Generally speaking, our rivet gun can work smoothly.Please use the correct rivet to match the correct rivet head during work. If you insert a large rivet into a small rivet joint and it gets stuck accidentally, please snap off the head of the rivet first and attach a 4.8mm rivet head so that the spike bar stuck inside will automatically fall out.

- 【Complete Rivet Tool Kit】All components of this rivet tool kit are stored in one portable carry case, including a manual pop riveter, 4 matched twist drill bits, 430 aluminum rivets and an extra pair of gloves. It works great for home maintenance, metal processing and sheet metal installation, ideal for newbies and veteran operators alike.
- 【Convenient Operation】The riveter is pre-installed with 4 color-coded nosepieces (3/32", 1/8", 5/32", 3/16") for clear size identification. No extra tools are needed for replacement, and the detachable nozzle enables easy removal of blockages.
- 【Sturdy Material】The pop rivet tool features a lightweight aluminum frame. Its jaws are made of SCM435 chromoly alloy steel with HRC52-63 hardness, clamping rivets firmly without slipping or chipping. The handles are built with phosphated anti-rust 45# carbon steel, free of deformation after thousands of riveting cycles.
- 【Ergonomic Design】The riveter comes with thickened non-slip PVC soft grip and automatic rebound structure, delivering comfortable holding and smooth reset after each pull. The safety lock makes it easy to store and carry.
- 【Portable Storage】The rivet tool kit comes with a thick custom blow-molded case with dedicated slots for the riveter, drill bits and rivets, plus individual rivet boxes to stop small parts from scattering. The hard case shields tools during transport or workshop storage and prevents metal rust over long-term storage.
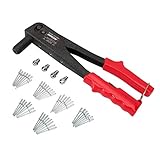
- Designed to work with 3/32 in. to 5/32 in. Dia rivets for general purpose rivet jobs
- Extended nose makes work easier in hard-to-reach places making it a great tool for general purpose rivet tasks, such as gutters, furniture and canvas works
- Manual riveter provides portable fastening:includes 4 interchangeable heads so that you have everything you need to start riveting
- Not recommended for use with 3/16 in.(5mm) Dia all-steel rivets; stainless steel rivets are not for use with manually operated rivet tools
- Wide application: Metal work, Gutter, Automotive and other common projects Whether you're a novice or seasoned riveter, this gun will accomplish your needs

- ✅HIGH QUALITY - The blind rivets are made of Aluminum Grip and Steel Mandrel. It's strong and corrosion-resistant for long-lasting use in any environment. Hand Riveter is made of high quality steel with rubber handle.
- ✅SIZE & QUANTITY - This 225pcs assortment kit includes 6 different sizes blind rivets and 1 hand riveter for you to deal with multiple works. It includes 3/16"x1/2" (25pcs), 3/16"x3/8" (30pcs), 5/32"x1/2"(25pcs), 1/8"x3/8" (40pcs), 1/8"x1/4" (45pcs) and 3/32"x1/4" (60pcs). Please refer to picture 2 for specifications.
- ✅STURDY HAND RIVETER - The rivet tool is equipped with 4 replaceable nosepieces, 1 head wrench and handle lock, which is lightweight and convenient to carry with. It includes 3/32" (2.4mm), 1/8" (3.2mm), 5/32" (4.0mm) and 3/16" (4.8mm), meeting most of your rivet needs.
- ✅PACKING - 225pcs 6 sizes packed in a sturdy transparent plastic case, easy to store and can reused as a storage box. Together with rivet gun tool packed in a paper box.
- ✅WIDE APPLICATION - Our rivets are very strong and very suitable for indoor and outdoor use. They are perfect for you when you need them most. Ideal for joining various metal sheets and pipes. For DIY home use, commercial, automotive, aviation, plumbing, elevators, instruments, furniture, etc.
SEOCONTENT-START
For more information: [email protected] For Immediate Release Statement by American Honda Regarding Hood Striker Recall: 2019 Passport, 2016-2019 Pilot and 2017-2020 Ridgeline • Approximately 725,000 vehicles are affected in the United States • Hood striker area will be inspected and reinforced. If related hood damage is found beyond the area of the striker, the hood will be replaced for free • No reported crashes or injuries related to this issue TORRANCE, Calif. – Dec. 2, 2021 – American Honda will voluntarily recall approximately 725,000 Passport (2019), Pilot (2016-2019) and Ridgeline (2017-2020) vehicles in the United States to reinforce each vehicle’s hood striker area and inspect the hood for potential related damage. If related damage is found outside of the hood striker area, that hood will be replaced for free. No related crashes or injuries have been reported in relation to this issue. The gap between a closed hood and the upper grill of certain vehicles may be too large to allow full contact between the hood and the rubber seal meant to prevent air flow and reduce vibration between the two surfaces. Over time with high-speed highway driving, excessive movement of the hood caused by air flow through the gap may lead to damage to the hood striker and, potentially, to the hood itself. Such damage could ultimately lead to unexpected hood opening while driving, increasing the risk of a crash. Honda is announcing this recall to encourage each owner of an affected vehicle to take it to an authorized dealer as soon as they receive notification of this recall from Honda. Mailed notification to owners will begin in mid-Jan. 2022. Owners can also determine if their specific vehicles are included in the recall by visiting www.recalls.honda.com or by calling (888) 234-2138. # # #
**************************************************************************************************************
November 29, 2021 Ms. Anne Collins Associate Administrator for Enforcement National Highway Traffic Safety Administration Attn: Recall Management Division (NVS-215) 1200 New Jersey Avenue, SE Washington, D.C. 20590 Re: Part 573, Defect Information Report 2016-2020 Model Year Honda Passport, Pilot, and Ridgeline Hood Latch Striker Dear Ms. Collins: In accordance with the National Traffic and Motor Vehicle Safety Act and 49 CFR Part 573 Defect and Noncompliance and Responsibility Reports, Honda is submitting the enclosed Defect Information Report regarding a safety recall of certain 2016-2020 model year Honda Passport, Pilot, and Ridgeline vehicles to address a defect with the hood latch striker. If you have any questions about this report, please feel free to contact me. Sincerely, AMERICAN HONDA MOTOR CO., INC. Jeff Chang Senior Manager Product Regulatory Office JC:wt American Honda Motor Co., Inc. 1919 Torrance Boulevard Torrance, CA 90501-2746 Phone (310) 783-2000 DEFECT INFORMATION REPORT 573.6(c)(1) Name of manufacturer: Honda Development and Manufacturing of America, LLC Manufacturer’s agent: Jeff Chang American Honda Motor Co., Inc. 1919 Torrance Blvd. Torrance, CA 90501-2746 573.6(c)(2) Identification of potentially affected vehicles: Description of the basis for the determination of the recall population: The recall population was determined based on manufacturing records. The production range reflects all possible vehicles that could experience the problem. Description of how the vehicles being recalled differ from similar vehicles not included in the recall: Similar vehicles produced outside the specified manufacturing range above had adhesive applied to the hood latch striker and the hood latch height and front seal were set to specification. Identification of affected components: Component: Hood Comp., Engine Part No.: 60100-TG7-A91 Country of Origin: U.S. 573.6(c)(3) Total number of potentially affected vehicles: 724,826 573.6(c)(4) Percentage of affected vehicles that contain the defect: 100% Make/Model Model Year Dates of Manufacture Number of Vehicles Honda Passport 2019 11/08/2017 – 04/09/2019 18,704 Honda Pilot 2016 05/21/2014 – 11/07/2016 185,832 Honda Pilot 2017 10/20/2016 – 12/05/2017 153,503 Honda Pilot 2018 12/05/2017 – 07/16/2018 107,321 Honda Pilot 2019 09/18/2017 – 04/09/2019 110,653 Honda Ridgeline 2017 05/08/2015 – 08/31/2017 49,490 Honda Ridgeline 2018 07/27/2017– 03/07/2018 21,381 Honda Ridgeline 2019 01/09/2018 – 11/19/2019 58,235 Honda Ridgeline 2020 04/02/2019 – 08/27/2020 19,707 573.6(c)(5) Defect description: Gaps in the front seal between the hood and grill allow for air entry, potentially resulting in hood vibration at highway speeds. Over time the hood vibration could form stress fractures along the hood latch striker and separate the hood latch striker from the hood. A separated hood latch striker may allow the hood to open, obstructing the driver’s view and increasing the risk of a crash. Hood vibration noises or a loose hood are potential warnings of a failing hood latch striker. 573.6(c)(6) Chronology: July 2016 Stress fractures were found on the hood latch striker during durability testing of a prototype Ridgeline. After adhesive was applied to a prototype vehicle’s hood latch striker, the vehicle passed durability testing; thereafter, adhesive was applied to the hood latch striker in mass production of similarly designed vehicles as a quality improvement effort. No quality investigations were initiated as there were no market concerns of hood latch striker durability from similarly designed vehicles. April 2017 After receiving some non-safety related market concerns, Honda launched an investigation for hood vibration/noises and/or loose hood. December 2017 A technical service bulletin (17-083) was launched to address hood vibration and/or loose hood by adjusting the hood alignment. February 2019 Corrosion was found in the engine compartment during corrosion testing of the upcoming Passport. Salt water intrusion indicated gaps between the hood and grill. April 2019 On-line checks and adjustments were implemented to Passport and Pilot mass production to ensure hood latch height and that the front seal between hood and grill was set to specification. August 2019 Online checks and adjustments were implemented to Ridgeline mass production to ensure hood latch height and that the front seal between hood and grill was set to specification. September 2019 Honda initiated another investigation into hood vibration/noises due to stress fractures in hood latch strikers. March 2021 Honda confirmed complete hood latch striker separation in the field. August 2021 Re-creation testing confirmed progressive stress fractures in the hood latch striker can result in separation from the hood. October 2021 Review of previous mass production quality improvement efforts (adhesive application in July 2016 and checks/adjustments of the hood latch height and front seal in April – August 2019) judged enough toughness to prevent separation of the hood latch striker from stress fractures. Vehicles built prior to the implementation of both these mass production quality improvement efforts may not have enough toughness to prevent hood latch striker separation. November 19, 2021 Honda determined that a defect related to motor vehicle safety existed and decided to conduct a safety recall. As of November 19, 2021, Honda has received 116 warranty claims and no reports of crashes or injuries related to this issue. 573.6(c)(8)(i) Program for remedying the defect: Registered owners of all affected vehicles will be contacted by mail and asked to bring their vehicle to an authorized Honda dealer. Depending on the condition of the hood latch striker, the dealer may repair the hood and install a striker support plate, or completely replace the hood with a new part. The hood repair or replacement will be performed for free. Owners who have paid to have these repairs completed at their own expense will be eligible for reimbursement, in accord with the recall reimbursement plan on file with NHTSA. 573.6(c)(8)(ii) The notification date to dealers: November 30, 2021 The estimated date to start notifications to owners: January 17, 2022 573.6(c)(10) Representative copies of all notices, bulletins and other communications: A copy of the dealer service bulletin, the final customer notification letter and other dealer communication will be submitted to your office as soon as possible. A draft of the owner notification letter will be submitted to your office as soon as possible. 573.6(c)(11) Manufacturer’s campaign number: PBV
**************************************************************************************************************
December 9, 2021 Ms. Anne Collins Associate Administrator for Enforcement National Highway Traffic Safety Administration Attn: Recall Management Division (NVS-215) 1200 New Jersey Avenue, SE Washington, D.C. 20590 Re: NHTSA Recall No. 21V-932 Part 573, Amended Defect Information Report 2016-2020 Model Year Honda Passport, Pilot, and Ridgeline Hood Latch Striker Dear Ms. Collins: In accordance with the National Traffic and Motor Vehicle Safety Act and 49 CFR Part 573 Defect and Noncompliance and Responsibility Reports, Honda is submitting the enclosed amended Defect Information Report regarding NHTSA recall number 21V-932 originally submitted on November 29, 2021. The amendment updates the chronology to include the date range of information received that were the basis for the determination that the defect related to motor vehicle safety. The amendment also corrects the date for the previous August 2019 chronology entry to reflect August 2020. If you have any questions about this report, please feel free to contact me. Sincerely, AMERICAN HONDA MOTOR CO., INC. Jeff Chang Senior Manager Product Regulatory Office JC:wvt American Honda Motor Co., Inc. 1919 Torrance Boulevard Torrance, CA 90501-2746 Phone (310) 783-2000 Amended Defect Information Report 573.6(c)(6) Chronology: July 2016 Stress fractures were found on the hood latch striker during durability testing of a prototype Ridgeline. After adhesive was applied to a prototype vehicle’s hood latch striker, the vehicle passed durability testing; thereafter, adhesive was applied to the hood latch striker in mass production of similarly designed vehicles as a quality improvement effort. No quality investigations were initiated as there were no market concerns of hood latch striker durability from similarly designed vehicles. April 2017 After receiving some non-safety related market concerns, Honda launched an investigation for hood vibration/noises and/or loose hood. December 2017 A technical service bulletin (17-083) was launched to address hood vibration and/or loose hood by adjusting the hood alignment. February 2019 Corrosion was found in the engine compartment during corrosion testing of the upcoming Passport. Salt water intrusion indicated gaps between the hood and grill. April 2019 On-line checks and adjustments were implemented to Passport and Pilot mass production to ensure hood latch height and that the front seal between hood and grill was set to specification. September 2019 Honda initiated another investigation into hood vibration/noises due to stress fractures in hood latch strikers. August 2020 Online checks and adjustments were implemented to Ridgeline mass production to ensure hood latch height and that the front seal between hood and grill was set to specification. March 2021 Honda confirmed complete hood latch striker separation in the field. August 2021 Re-creation testing confirmed progressive stress fractures in the hood latch striker can result in separation from the hood. October 2021 Review of previous mass production quality improvement efforts (adhesive application in July 2016 and checks/adjustments of the hood latch height and front seal in April 2019 and August 2020) judged enough toughness to prevent separation of the hood latch striker from stress fractures. Vehicles built prior to the implementation of both these mass production quality improvement efforts may not have enough toughness to prevent hood latch striker separation. November 19, 2021 Honda determined that a defect related to motor vehicle safety existed and decided to conduct a safety recall. As of November 19, 2021, Honda has received 116 warranty claims from October 18, 2016 through October 8, 2021, and no reports of crashes, injuries or deaths related to this issue.
**************************************************************************************************************
CUSTOMER INFORMATION: The information in this bulletin is intended for use only by skilled technicians who have the proper tools, equipment, and training to correctly and safely maintain your vehicle. These procedures should not be attempted by “do-it-yourselfers,” and you should not assume this bulletin applies to your vehicle, or that your vehicle has the condition described. To determine whether this information applies, contact an authorized Honda automobile dealer. © 2021 American Honda Motor Co., Inc. – All Rights Reserved Page 1 of 3 Service Bulletin 17-083 December 10, 2021 Version 3 Hood Flutter or Vibration at Highway Speeds Supersedes 17-083, dated September 18, 2018, to revise the information highlighted in yellow. AFFECTED VEHICLES Year Model Trim Level VIN Range 2016–19 Pilot ALL ALL 2017–20 Ridgeline ALL ALL 2019 Passport ALL ALL REVISION SUMMARY • Under AFFECTED VEHICLES, the year range was updated for Pilot, Ridgeline and Passport was added. • Under WARRANTY CLAIM INFORMATION, the Flat Rate Time for Operation Number A was updated. • Under REPAIR PROCEDURE, a note was added before Step 1, Step 3 image was updated, and Step 4 was added. SYMPTOM The hood flutters or vibrates at highway speeds. CORRECTIVE ACTION Adjust the hood edge cushions to slightly touch the hood while still maintaining proper hood alignment. Inspect the adhesive between the hood skin and the support structure. Apply 3M ULTRAPRO Autobody sealant between hood skin and support structure skin. PARTS INFORMATION Part Name Part Number Quantity 3M Ultrapro Autobody Sealant 08302 (Commercially Available) 1 (One tube can repair up to 3 vehicles) REQUIRED MATERIALS Part Name Part Number Quantity Insulator Clip 91502-TZ5-A01 8 Page 2 of 3 WARRANTY CLAIM INFORMATION The normal warranty applies. Operation Number Description Flat Rate Time Defect Code Symptom Code Template ID Failed Part Number 812003 Adjust the hood edge cushions. (Includes inspection) 0.3 hr 07406 06201 A17083A 60100-TG7-A90ZZ 812003 Adjust the hood edge cushions. (Includes inspection) 0.3 hr 07406 04201 A17083B 60100-TG7-A90ZZ A Apply 3M Ultrapro Autobody Sealant 0.2 hr Skill Level: Repair Technician REPAIR PROCEDURE NOTE: Before continuing on with this repair procedure please perform a VIN Inquiry to see if the vehicle qualifies for Service Bulletin 21-086, Safety Recall: Hood Vibration at Highway Speeds. If it qualifies for the safety recall, make sure the safety recall is completed first. Once completed, continue with the repair procedure provided below. If it doesn’t qualify, continue with the repair procedure below. 1. Turn the hood edge cushions, in or out as necessary, so they touch slightly against the hood. NOTE: Some vehicles left the factory with the hood edge cushions in their lowest height profile, which allows the hood to pivot off the center latch and bounce from side to side. 2. Open the hood and remove the hood insulator (8 clips). Page 3 of 3 3. Inspect the areas shown designated with red boxes for adhesive separation between the hood skin and the support. Updated Image: 4. If separation is found, apply 3M Ultrapro sealant between the frame and the hood skin. • Insert the tube tip between the hood skin and frame at the area of concern. • Apply the amount of sealant needed just to where the sealant comes out to the edge of the frame. • Ensure that there is a consistent amount of sealant touching both the hood skin and frame. 5. Reinstall the hood insulator and replace any stressed or damage clips. END
**************************************************************************************************************
Service Bulletin 21-086 December 10, 2021 Version 2 Safety Recall: Hood Vibration at Highway Speeds Supersedes 21-086, dated November 30, 2021, to revise the information. AFFECTED VEHICLES Year Model Trim VIN Range 2019 Passport ALL Check the iN VIN status for eligibility 2016–19 Pilot ALL Check the iN VIN status for eligibility 2017–20 Ridgeline ALL Check the iN VIN status for eligibility REVISION SUMMARY This service bulletin was extensively revised, American Honda recommends you read the entire bulletin. BACKGROUND Due to an improper hood to grill gap setting at the time of vehicle manufacturing, the hood latch may experience higher than expected load under certain driving conditions. Strong air pressure forced through this gap may cause the hood to vibrate which, over time, may cause the area surrounding the hood latch striker to crack and potentially dislodge, presenting a risk for the hood to open while driving and increasing the risk of a crash. CUSTOMER NOTIFICATION Owners of affected vehicles will be sent a notification of this campaign. Do an iN VIN status inquiry to make sure the vehicle is shown as eligible. Some vehicles affected by this campaign may be in your new or used vehicle inventory. Failure to repair a vehicle subject to a recall or campaign may subject your dealership to claims or lawsuits from the customer or anyone else harmed as a result of such failure. Before selling a vehicle in inventory, always check if it is affected by a safety recall by conducting a VIN status inquiry. CUSTOMER INFORMATION:The information in this bulletin is intended for use only by skilled technicians who have the proper tools, equipment, and training to correctly and safely maintain your vehicle. These procedures should not be attempted by “do-it-yourselfers,” and you should not assume this bulletin applies to your vehicle, or that your vehicle has the condition described. To determine whether this information applies, contact an authorized Honda automobile dealer. © 2021 American Honda Motor Co., Inc. — All Rights Reserved Page 1 of 17 CORRECTIVE ACTION Follow the inspection procedure to determine if the hood is repairable. If any of the inspection areas fail, replace the hood. NOTE: Below is a simplified flow chart that depicts the overall inspection and repair. Refer to each respective section following the flow chart for inspection and repair details. Page 2 of 17 PARTS INFORMATION For Hood Repair Part Name Part Number Quantity Hood Striker Repair Kit (Contains (1) Striker Plate and (3) 6 MM Bolts and Washers). 60110-TG7-305 1 Spot Weld repair Kit (Contains (1) Rivet and (1) Washer). 06601-TG7-305 1 For Hood Replacement Part Name Part Number Quantity Hood Component 60100-TG7-A92ZZ 1 Emission Label (Must Replace) (Due to P/N variation between models/years, you may add the label P/N in the replacement parts section of the template) Refer to Parts Bulletin 18-0021 for ordering instructions. 1 Air Conditioner Label – (Must Replace) (Check by VIN in the Parts Catalog for Proper Application) 80050-TG7-A00 1 Air Conditioner Label – (Must Replace) (Check by VIN in the Parts Catalog for Proper Application) 80050-T6Z-A00 1 Air Conditioner Label – (Must Replace) (Check by VIN in the Parts Catalog for Proper Application) 80050-TYR-A00 1 Rubber Hood Seal (If Needed) 74146-TG7-A01 1 Hood Cushion (If Needed) 91601-SYC-J00 2 Hood Cushion (If Needed) 91603-S9A-003 3 Insulator Clip (If Needed) 91502-TZ5-A01 8 TOOLS INFORMATION Part Name Part Number Quantity Striker and Spot Weld Inspection Template kit (Contains 5 Inspection Templates, and 10 Fender Clips) 07AAJ-TG7A100 1 Metric Rotabroach Master Hole Cutting Kit BLR11201SO 1 Rivet Gun/Installer Has been auto-shipped to each dealer. The brand and model number may vary. 1 Deburring Tool DEBUR300 1 Page 3 of 17 WARRANTY CLAIM INFORMATION Operation Number Description Flat Rate Time Defect Code Symptom Code Template ID Failed Part Number 8120B1 Inspect the hood striker and spot weld(s). 0.3 hr 6FD00 PBV00 A21086A 60100-TG7-A90ZZ 8120B1A Install striker plate only. 0.1 hr 8120B1 Inspect the hood striker and spot weld(s). 0.3 hr 6FD00 PBV00 A21086B 60100-TG7-A90ZZ 8120B1A Install striker plate only. 0.1 hr 8120B1B Do one spot weld repair – Add. 0.1 hr 8120B1 Inspect the hood striker and spot weld(s). 0.3 hr 6FD00 PBV00 A21086C 60100-TG7-A90ZZ 8120B1A Install striker plate only. 0.1 hr 8120B1B Do one spot weld repair – Add. 0.1 hr 8120B1C Do a second spot weld repair – Add. 0.1 hr For Hood Replacement 8125A3 Dealer planning and DTC check (Includes hood striker and spot weld(s) inspection. 0.9 hr 6FD00 PBV00 A21086D 60100-TG7-A90ZZ NOTE: • Prior authorization must be approved by your DPSM before doing any work related to replacing the hood. To request authorization, do the following. • Take clear photos of the cracks beyond or outside the lines drawn on the hood striker. • Take clear photos of the spot weld fully separated. • Take clear photos of the template spot weld inspection circle that shows the spot weld cracks beyond the template spot weld circle. • Submit to your DPSM for approval, photos of the hood defect(s) and the door jamb label that shows the VIN and attach a Honda and Acura Certified Collision Repair Shop estimate. • To submit a warranty claim, select the B2 sublet code in the Sublet information field. • Make sure to upload clear photos showing the cracked areas of the hood and provide close ups as needed to illustrate the defect. Include a photo of the door jamb label that shows the VIN with the warranty claim Page 4 of 17 • Upload a copy of the Honda and Acura Certified Collision Repair Shop final invoice with the warranty claim prior to submittal. INSPECTION PROCEDURE A 1. Park the vehicle on a level surface and set the parking brake. 2. Open the hood, then mount the support rod in the hood for support. 3. Inspect the hood striker area for cracks. • If there are no cracks, go to INSPECTION PROCEDURE B. • If there are cracks, go to Step 4. 4. Install the inspection template onto the hood striker as shown, then use a permanent marker to trace the areas around each striker mounting bolt. 5. Remove the template, then visually inspect the length and location of the crack(s). • If the crack(s) are within or touching the lines you traced, go to INSPECTION PROCEDURE B. • If the crack(s) are beyond or outside the lines you traced, take clear photos, then go to REPAIR PROCEDURE C. Page 5 of 17 INSPECTION PROCEDURE B 1. Locate the 2 spot welds on the hood frame as shown. 2. Inspect for a crack(s) at each spot weld. • If no crack(s) are present, go to REPAIR PROCEDURE A. • If there is full separation at the spot weld, take clear photos, then go to REPAIR PROCEDURE C. • If a crack(s) are present, but the spot weld hasn’t fully separated, go to Step 3. 3. Use the spot weld inspection circle on the inspection template to determine a pass/fail condition. Page 6 of 17 4. Align the center mark of the template with the center-point of the spot weld. • If the length of the crack(s) are within the spot weld inspection circle, go to REPAIR PROCEDURE B, followed by REPAIR PROCEDURE A. Page 7 of 17 • If the length of the crack(s) are beyond the spot weld inspection circle, take clear photos, then go to REPAIR PROCEDURE C. Page 8 of 17 REPAIR PROCEDURE A 1. Remove and discard the 3 bolts securing the striker to the hood frame. 2. Position the striker plate onto the hood frame and temporarily install the 2 fender clips supplied with the template kit to align the hood striker and the striker plate. Page 9 of 17 3. Thread 2 of the new bolts into the striker plate until they are snug, then remove the 2 fender clips. Thread the remaining bolt and torque the bolts to 10.8 N.m (8 lb-ft). Page 10 of 17 REPAIR PROCEDURE B 1. Mark the center point of the spot weld using a center punch. 2. Drill the spot weld using a 7mm Rotabroach bit, then remove any metal shavings or burrs using the Deburring Tool. NOTE: Place a suitable cover over the engine bay to catch any metal shavings to prevent them from falling into the engine bay. Page 11 of 17 3. Install the mandrel end of the rivet into the Riveting Tool. 4. Place the supplied washer onto the rivet body, then insert the rivet into the hole you made on the hood. Page 12 of 17 5. Use one hand to support the hood, then push firmly with the rivet in place. Squeeze the tool/trigger to fasten the rivet. NOTE: Do not use the tool in the conditions shown below. Doing so causes incorrect fastening. Page 13 of 17 REPAIR PROCEDURE C NOTE: • Prior authorization must be approved by your DPSM before doing any work related to replacing the hood. To request authorization, do the following: • Take clear photos of the cracks beyond or outside the lines drawn on the hood striker. • Take clear photos of the spot weld fully separated. • Take clear photos of the template spot weld inspection circle that shows the spot weld cracks beyond the template spot weld circle. • Submit to your DPSM for approval, photos of the hood defect(s) and door jamb label that shows the VIN and attach a Honda and Acura Certified Collision Repair Shop estimate. • All work must be completed by a Honda and Acura Certified Collision Repair Shop. • Refer to Service Bulletin 16-065, Material Requirements for Warranty and Goodwill Paint Repairs, for a list of approved paints and materials that must be used for warranty repairs. • Give your warranty clerk the Honda and Acura Certified Collision Repair Shop receipt. For the warranty claim to be paid, a copy of the Honda and Acura Certified Collision Repair Shop invoice must be included in the warranty claim. 1. Have a new replacement hood installed and refinished by a Honda and Acura Certified Collision Repair Shop. 2. Remove the hood insulator from the original hood. 3. Remove the hood seal. 4. Install the hood insulator. NOTE: Replace the insulator if it is torn/missing sections and replace any stressed or damaged clips. Page 14 of 17 5. Install the hood seal. NOTE: Replace the hood seal if it is torn/missing sections and replace any stressed or damaged clips. 6. Do the following steps to adjust the hood: • Slightly loosen the hood hinge mounting bolts and the hood latch mounting bolts. • Adjust the hood alignment in the following sequence. • Adjust the hood right and left, as well as forward and rearward, by using the elongated holes in the hood hinges. • Turn the hood edge cushions, in or out as necessary, making sure the hood fit flush with the body at the front and side edges. • Adjust the hood latch to obtain the proper height at the forward edge, and move the latch right or left until the striker is centered in the latch. • Tighten each bolt to the specified torque. • Check that the hood opens properly and closes securely. • Inspect the resting position of the hood seal. Ensure that the hood seal is making contact along the front grille. • Apply touch-up paint to the hinge mounting bolts and around the hinges, and let the paint dry. Page 15 of 17 7. Apply multipurpose grease to the hood latch and the hood hinges as indicated by the arrows. 8. Apply new labels as shown and in the following locations. • Air Conditioner Label. • Emission Label. Page 16 of 17 EMISSION LABEL ORDERING INFORMATION The controlled Parts Order screen in the iN is used to order emission labels. To order, you are required to supply the VIN, the vehicle owner’s first and last name, and the name of a contact person at your dealership. It is very important that the VIN and other information be accurate. This information forms the basis for locating customers should it become necessary to do so in the future. Vehicle Application: Under no circumstances may an emission label be installed on any vehicle other than the one whose VIN is indicated in the order. Emission labels that are ordered but not installed must be returned to AHM. Refer to the “Controlled Parts Return Policy” section in the Parts System Guide. Failure to follow this directive could subject the dealer to enforcement activity and fines. Required Information: Orders for emission labels must include the customer’s first and last name and the vehicle’s complete VIN. A part number is not required when ordering emission labels. The correct label will be issued automatically based on the VIN. END Page 17 of 17
**************************************************************************************************************
IMPORTANT SAFETY RECALL This notice applies to your vehicle: <XXXXXXXXXXXXXXXX> January 2022 Dear <First Name Last Name>, This notice is sent to you in accordance with the National Traffic and Motor Vehicle Safety Act. Honda has decided that a defect which relates to motor vehicle safety exists in certain 2019 model year Passport, 2016–2019 model year Pilot, and 2017–2020 model year Ridgeline vehicles. Why my vehicle is under recall: The gaps between the hood and grill allow for air entry, potentially resulting in hood vibration at highway speeds. Over time the hood striker can be damaged and may lead to the hood opening while driving, obstructing the driver’s view and increasing the risk of a crash. Hood vibration noises or a loose hood are potential warnings of a failing hood latch striker. What Honda will do: Your Honda dealer will either repair the hood and install a striker support plate, or completely replace the hood with a new part. The hood repair or replacement will be performed for FREE. Honda estimates that the repair will take approximately 45 minutes to complete. If replacement is necessary, then the process will take approximately 1 hour to complete in addition to the time needed at a Honda Certified Collision repair shop, which can vary. Your dealer can provide you with a better estimate of the overall time for this service visit, as it may be necessary to make your vehicle available for a longer period of time. What we need you to do: Please call any authorized Honda dealer and schedule an appointment to have your vehicle repaired for FREE. If you are not the only driver of this vehicle, please advise all other drivers and passengers of this important information. • Check recall information for your vehicle by accessing the Honda Recall Lookup tool at www.recalls.honda.com and entering your Vehicle Identification Number (VIN). • If you have questions or concerns, we encourage you to: ❍ call American Honda’s Customer Support & Campaign Center at 1-888-234-2138 Monday through Friday, 6:00 a.m. to 5:00 p.m., Pacific Time; or ❍ contact your local Honda automobile dealer; or ❍ email or chat by going to www.owners.honda.com/help/customer-relations; or ❍ visit Twitter @HondaCustSvc; or ❍ visit www.recalls.honda.com to use “Ask Dave”, our 24/7 virtual agent. If you paid out of pocket to have these specific recall repairs performed on your vehicle, you may be eligible for reimbursement; please contact American Honda’s Customer Support & Campaign Center at 1-888-234-2138 to determine potential eligibility and for instructions on how to request reimbursement. If you no longer own this vehicle or if any of the information is not correct, please complete and return the enclosed prepaid Information Change Card as soon as possible. If you are a lessor of this vehicle, federal regulations require you to forward this notice to your lessee within ten days. If you believe that American Honda or the dealer has failed or is unable to remedy the defect in your vehicle, without charge and within a reasonable period of time (60 days from the date you first contact the dealer for a repair appointment), you may submit a complaint to the Administrator, National Highway Traffic Safety Administration (NHTSA), 1200 New Jersey Ave., SE, Washington, DC 20590. Alternatively, you may call the NHTSA toll-free Vehicle Safety Hotline at 1-888-327-4236 (TTY 1-800-424-9153), or go to http://www.safercar.gov. We sincerely apologize for any inconvenience this recall may cause, but please be assured that your safety is our first concern. Sincerely, American Honda Motor Co., Inc. AUTOMOBILE DIVISION American Honda Motor Co., Inc. 1919 Torrance Blvd., – P.O. Box 2215 Torrance, CA 90509-9870 6FD CO-18779 NHTSA Recall Number: 21V-932 Honda Campaign Number: PBV Service Bulletin Number: 21-086 6FD CO-18779 CAMPAÑA DE SEGURIDAD IMPORTANTE Esta notificación aplica a su vehículo: <XXXXXXXXXXXXXXXX> Enero del 2022 Estimado <First Name Last Name>, Esta notificación ha sido enviada a usted de acuerdo con el decreto de la oficina de Administración Nacional de Seguridad del Tráfico en las Carreteras (National Highway Traffic Safety Administration o NHTSA por sus siglas en inglés). Honda ha determinado que existe un defecto el cual está relacionado con la seguridad del vehículo en algunos vehículos modelo Passport año modelo 2019, Pilot año modelo 2016–2019 y Ridgeline año modelo 2017–2020. ¿Por qué mi vehículo está bajo El espacio entre el capó y la rejilla permite que ingrese aire, posiblemente esta campaña de seguridad?: ocasionando vibración en el capó a velocidades de carretera. Con el paso del tiempo el retén del capó puede dañarse y puede conllevar a que se abra el capó mientras se conduce, obstruyendo la vista del conductor y aumentando el riesgo de una colisión. Los ruidos de vibración del capó o un capó suelto son advertencias potenciales de un retén del pestillo del capó con falla. ¿Qué hará Honda?: Su concesionario Honda reparará el capó e instalará una placa de apoyo en el retén o reemplazará completamente el capó con una pieza nueva. La reparación o el reemplazo del capó será realizado de forma GRATUITA. Honda estima que la reparación tomará aproximadamente 45 minutos para completar. Si el reemplazo es necesario, el proceso tomará aproximadamente 1 hora para completar además del tiempo necesario en un taller de reparación de colisión certificado Honda, lo cual puede variar. Su concesionario le puede ofrecer un mejor estimado del tiempo total de esta visita de servicio, ya que pudiera ser necesario que su vehículo esté disponible por un periodo más largo. ¿Qué necesitamos que Por favor llame a cualquier concesionario autorizado Honda y programe una usted haga?: cita para la reparación de su vehículo de forma GRATUITA. Si usted no es el único conductor de este vehículo, por favor informe a todos los conductores y pasajeros sobre esta información importante. • Verifique la información de la campaña de seguridad de su vehículo ingresando en la herramienta Honda Recall Lookup en www.recalls.honda.com e ingresando su Número de identificación del vehículo (VIN). • Si usted tiene preguntas o inquietudes, le recomendamos que: ❍ llame al Centro de Apoyo al Cliente y Campañas de American Honda al 1-888-234-2138 de lunes a viernes, 6:00 a.m. a 5:00 p.m., hora del Pacífico; o ❍ comuníquese con su concesionario de automóviles Honda local; o ❍ envíe un correo electrónico o chat por medio de www.owners.honda.com/help/customer-relations; o ❍ visite Twitter @HondaCustSvc; o ❍ visite www.recalls.honda.com. Si usted ha pagado por realizar las reparaciones de la campaña de seguridad específica en su vehículo, usted puede ser elegible para el reembolso, por favor comuníquese con el Centro de Apoyo al Cliente y Campañas de American Honda al 1-888-234-2138 para determinar la elegibilidad potencial y para las instrucciones sobre cómo solicitar el reembolso. Si ya no es el propietario de este vehículo o si alguna información no está correcta, por favor complete, firme y devuelva lo más pronto posible la Tarjeta de Cambio de Información anexa, con el porte pagado. Si usted es el arrendador de este vehículo, las regulaciones federales requieren que usted envié una copia de esta notificación a su arrendatario en un lapso de diez días. Si usted cree que American Honda o el concesionario ha fallado o no le es posible reparar el defecto en su vehículo, sin cobro alguno y dentro de un período de tiempo razonable (60 días desde la fecha en que usted contactó por primera vez el concesionario para la cita de la reparación), usted puede enviar una queja a: Administrator, National Highway Traffic Safety Administration (NHTSA), 1200 New Jersey Ave., SE, Washington, DC 20590. Alternativamente, usted también puede comunicarse con el número de llamada sin costo (Toll-free) Vehicle Safety Hotline de NHTSA al 1-888-327-4236 (TTY 1-800-424-9153), o visitar la página http://www.safercar.gov. Sinceramente le pedimos disculpas por cualquier inconveniente que pueda haberle causado esta campaña de seguridad, pero por favor tenga por seguro que su seguridad es nuestra primera preocupación. Atentamente, American Honda Motor Co., Inc. AUTOMOBILE DIVISION American Honda Motor Co., Inc. 1919 Torrance Blvd., – P.O. Box 2215 Torrance, CA 90509-9870 Número de campaña de seguridad NHTSA: 21V-932 Número de campaña de Honda: PBV Número de boletín de servicio: 21-086
**************************************************************************************************************
Next Unread Message View Message American Honda is and issuing a STOP SALE NOTICE on certain Engine Hoods for 16-19M Pilot, 17-20M Ridgeline, 19M Passport. Effective immediately all dealers that have inventory of the below parts are asked to stop installing and return parts back to American Honda. Return Request for PN’s 60100-TG7-A90ZZ Check your current inventory and return any inventory of these parts to American Honda immediately. 60100-TG7-A90ZZ Return Request Process: You must return all pre counter-measured ENGINE HOODS (P/N 60100-TG7-A90ZZ) in your inventory. No Shipment Listing or Invoice is required for this return. These returns will not be charged against your SRA credit. Return iN OAR Procedure 1. Complete the iN OAR procedures. 2. Use Reason Code “R” with eleven zeros for the Shipper Number. 3. Use Item Number “9999.” 4. Enter “Engine Hood Return” in the Remarks Section. 5. When approved, an “Authorization Return Document” via mail will be received. 6. Return defective P/N 60100-TG7-A90ZZ back to American Honda. Order adjustment requests (OARs) must be submitted by 12/17/21. If your dealership incurs freight costs for parts return, please send the following information to obtain reimbursement [email protected] Copy of Return Authorization Form Copy of the freight bill Freight Amount Comments: “Requesting freight reimbursement for STOP SALE Parts” Thank you, American Honda Motor Co., Inc. Parts Operations Sent on 12 01 2021 Expires on 02 28 2022 From Parts Division Subject Part Return Request – 16-19M Pilot, 17-20M Ridgeline, 19M Passport Hood/ 60100-T INTERACTIVE NETWORK American Honda Motor Co., Inc. Page 1 of 1
**************************************************************************************************************
View Message DATE: November 30, 2021 TO: All Honda Sales, Service, & Parts Managers, and Personnel FROM: Brad Ortloff, Manager of Auto Campaigns and Recalls Re: Stop Sale/Safety Recall: 2016-20 Multi-Model Honda Hood Latch Striker Inspection On November 29, 2021, American Honda notified NHTSA of a stop sale and safety recall for certain 2019 Passport, 2016-2019 Pilot, and 2017-2020 Ridgeline units for improperly adjusted front hoods. Under certain conditions, the hood striker can be damaged and may ultimately lead to the hood opening while driving, increasing the risk of a crash. Refer to your eResponsibility report or perform an iN VIN status inquiry to determine which units in your inventory are affected. Failure to inspect and repair a vehicle as necessary prior to sale may subject your dealership to claims or lawsuits. BACKGROUND Due to an improper hood to grill gap seting during manufacturing, the hood latch may experience a higher than expected load under certain driving conditions. Strong air pressure forced through this gap may cause the hood to vibrate, which over time, may cause the area surrounding the hood latch striker to crack and potentially dislodge, presenting a risk for the hood to open while driving. REPAIR Reinforce the hood latch. In very rare instances, hood replacement may be necessary. Please refer to the Service Bulletin for the specific repair procedure. PARTS Parts will be available through normal ordering but will be limited to one piece per order due to the low expectancy of hood replacements needed. TOOLS One air riveter will be allocated to each dealer with a scheduled delivered by November 30, 2021. SERVICE BULLETIN Service bulletin 21-086, Safety Recall: Hood Vibration at Highway Speeds wasposted to the Service Information System (SIS) as of November 30, 2021. It includes inspection, repair, parts, and warranty information related to this recall. CUSTOMER NOTIFICATION American Honda expects to complete customer notification by mid-January 2022. Sent on 11 30 2021 Expires on 01 18 2022 From Brad Ortloff, Manager of Auto Campaigns and Recalls Subject Stop Sale/Safety Recall: 2016-20 Multi-Model Honda Hood Latch Striker Inspection INTERACTIVE NETWORK American Honda Motor Co., Inc. Page 1 of 2 As always, be sure to perform an iN VIN status inquiry for all vehicles passing through your dealership to determine eligibility for any open campaigns. INTERACTIVE NETWORK American Honda Motor Co., Inc. Page 2 of 2
**************************************************************************************************************
Next Unread Message View Message On November 30, 2021, American Honda announced a Safety Recall for certain 16-19M Pilot, 17-20M Ridgeline, 19M Passport vehicles. This Safety Recall is for vehicles that have improperly adjusted front hoods. Under certain conditions, the hood may open while driving, increasing the risk of a crash. Demand on the Rivet Kits (06601-TG7-305) used in inspection process B noted in Service Bullen 21-086 Safety Recall: Hood Vibration at Highway Speeds has been much higher than anticipated. This Rivet kit repair is required in limited cases based on inspection of the hood. American Honda is working with our supplier to make additional parts available. To allow for as many repairs as possible, effective immediately, December 1st, parts are no longer available for open dealer ordering. American Honda is continuing to work with our supplier and we hope to have this situation resolved by early in 2022. After completed inspection, if Rivet Kit 06601-TG7-305 is required for repair, please contact your local dealer analyst (844-510-7778) or DPSM and provide VIN number so the part can be ordered/shipped. Additional details and information will be shared as it becomes available. Thank you, American Honda Motor Co., Inc. Sent on 12 01 2021 Expires on 12 20 2021 From Parts Division Subject Hood Repair Kit 06601-TG7-305; 16-19M Pilot, 17-20M Ridgeline, 19M Passport Hood INTERACTIVE NETWORK American Honda Motor Co., Inc. Page 1 of 1
**************************************************************************************************************
Next Unread Message View Message American Honda is and issuing a STOP SALE NOTICE on certain Engine Hoods for 16-19M Pilot, 17-20M Ridgeline, 19M Passport. Effective immediately all dealers that have inventory of the below parts are asked to stop installing and return parts back to American Honda. Return Request for PN’s 60100-TG7-A90ZZ Check your current inventory and return any inventory of these parts to American Honda immediately. 60100-TG7-A90ZZ Return Request Process: You must return all pre counter-measured ENGINE HOODS (P/N 60100-TG7-A90ZZ) in your inventory. No Shipment Listing or Invoice is required for this return. These returns will not be charged against your SRA credit. Return iN OAR Procedure 1. Complete the iN OAR procedures. 2. Use Reason Code “R” with eleven zeros for the Shipper Number. 3. Use Item Number “9999.” 4. Enter “Engine Hood Return” in the Remarks Section. 5. When approved, an “Authorization Return Document” via mail will be received. 6. Return defective P/N 60100-TG7-A90ZZ back to American Honda. Order adjustment requests (OARs) must be submitted by 12/17/21. If your dealership incurs freight costs for parts return, please send the following information to obtain reimbursement [email protected] Copy of Return Authorization Form Copy of the freight bill Freight Amount Comments: “Requesting freight reimbursement for STOP SALE Parts” Thank you, American Honda Motor Co., Inc. Parts Operations Sent on 12 01 2021 Expires on 02 28 2022 From Parts Division Subject Part Return Request – 16-19M Pilot, 17-20M Ridgeline, 19M Passport Hood/ 60100-T INTERACTIVE NETWORK American Honda Motor Co., Inc. Page 1 of 1
**************************************************************************************************************
Next Unread Message View Message On November 30, 2021, American Honda announced a Safety Recall for certain 16-19M Pilot, 17-20M Ridgeline, 19M Passport vehicles. This Safety Recall is for vehicles that have improperly adjusted front hoods. Under certain conditions, the hood may open while driving, increasing the risk of a crash. Demand on the Rivet Kits (06601-TG7-305) used in inspection process B noted in Service Bulletin 21-086 Safety Recall: Hood Vibration at Highway Speeds has been much higher than anticipated. This Rivet kit repair is required in limited cases based on inspection of the hood. American Honda is working with our supplier to make additional parts available. To allow for as many repairs as possible, effective immediately, December 1st, parts are no longer available for open dealer ordering. American Honda is continuing to work with our supplier and we hope to have this situation resolved by early in 2022. After completed inspection, if Rivet Kit 06601-TG7-305 is required for repair, please contact your local dealer analyst (844-510-7778) or DPSM and provide VIN number so the part can be ordered/shipped. Additional details and information will be shared as it becomes available. Thank you, American Honda Motor Co., Inc. Sent on 12 01 2021 Expires on 12 20 2021 From Parts Division Subject Hood Repair Kit 06601-TG7-305; 16-19M Pilot, 17-20M Ridgeline, 19M Passport Hood INTERACTIVE NETWORK American Honda Motor Co., Inc. Page 1 of 1
**************************************************************************************************************
OMB Control No.: 2127-0004 Part 573 Safety Recall Report 21V-932 The information contained in this report was submitted pursuant to 49 CFR §573 Manufacturer Name : Honda (American Honda Motor Co.) Submission Date : DEC 16, 2021 NHTSA Recall No. : 21V-932 Manufacturer Recall No. : PBV Manufacturer Information : Manufacturer Name : Honda (American Honda Motor Co.) Address : 1919 Torrance Blvd. Torrance CA 90501 Company phone : 1-888-234-2138 Population : Number of potentially involved : 724,826 Estimated percentage with defect : 100 % Vehicle Information : Vehicle 1 : 2020-2020 Honda Ridgeline Vehicle Type : Body Style : Power Train : NR Descriptive Information : The recall population was determined based on manufacturing records. The production range reflects all possible vehicles that could experience the problem. Similar vehicles produced outside the specified manufacturing range above had adhesive applied to the hood latch striker and the hood latch height and front seal were set to specification. The number of affected units is 19,707. Production Dates : APR 02, 2019 – AUG 27, 2020 VIN Range 1 : Begin : NR End : NR Not sequential Vehicle 2 : 2019-2019 Honda Passport Vehicle Type : Body Style : Power Train : NR Descriptive Information : The recall population was determined based on manufacturing records. The production range reflects all possible vehicles that could experience the problem. Similar vehicles produced outside the specified manufacturing range above had adhesive applied to the hood latch striker and the hood latch height and front seal were set to specification. The number of affected units is 18,704. Production Dates : NOV 08, 2017 – APR 09, 2019 VIN Range 1 : Begin : NR End : NR Not sequential Part 573 Safety Recall Report 21V-932 Page 2 The information contained in this report was submitted pursuant to 49 CFR §573 Vehicle 3 : 2016-2016 Honda Pilot Vehicle Type : Body Style : Power Train : NR Descriptive Information : The recall population was determined based on manufacturing records. The production range reflects all possible vehicles that could experience the problem. Similar vehicles produced outside the specified manufacturing range above had adhesive applied to the hood latch striker and the hood latch height and front seal were set to specification. The number of affected units is 185,832. Production Dates : MAY 21, 2014 – NOV 07, 2016 VIN Range 1 : Begin : NR End : NR Not sequential Vehicle 4 : 2017-2017 Honda Pilot Vehicle Type : Body Style : Power Train : NR Descriptive Information : The recall population was determined based on manufacturing records. The production range reflects all possible vehicles that could experience the problem. Similar vehicles produced outside the specified manufacturing range above had adhesive applied to the hood latch striker and the hood latch height and front seal were set to specification. The number of affected units is 153,503. Production Dates : OCT 20, 2016 – DEC 05, 2017 VIN Range 1 : Begin : NR End : NR Not sequential Vehicle 5 : 2019-2019 Honda Ridgeline Vehicle Type : Body Style : Power Train : NR Descriptive Information : The recall population was determined based on manufacturing records. The production range reflects all possible vehicles that could experience the problem. Similar vehicles produced outside the specified manufacturing range above had adhesive applied to the hood latch striker and the hood latch height and front seal were set to specification. The number of affected units is 58,235. Production Dates : JAN 09, 2018 – NOV 19, 2019 VIN Range 1 : Begin : NR End : NR Not sequential Part 573 Safety Recall Report 21V-932 Page 3 The information contained in this report was submitted pursuant to 49 CFR §573 Vehicle 6 : 2019-2019 Honda Pilot Vehicle Type : Body Style : Power Train : NR Descriptive Information : The recall population was determined based on manufacturing records. The production range reflects all possible vehicles that could experience the problem. Similar vehicles produced outside the specified manufacturing range above had adhesive applied to the hood latch striker and the hood latch height and front seal were set to specification. The number of affected units is 110,653. Production Dates : SEP 18, 2017 – APR 09, 2019 VIN Range 1 : Begin : NR End : NR Not sequential Vehicle 7 : 2017-2017 Honda Ridgeline Vehicle Type : Body Style : Power Train : NR Descriptive Information : The recall population was determined based on manufacturing records. The production range reflects all possible vehicles that could experience the problem. Similar vehicles produced outside the specified manufacturing range above had adhesive applied to the hood latch striker and the hood latch height and front seal were set to specification. The number of affected units is 49,490. Production Dates : MAY 08, 2015 – AUG 31, 2017 VIN Range 1 : Begin : NR End : NR Not sequential Vehicle 8 : 2018-2018 Honda Ridgeline Vehicle Type : Body Style : Power Train : NR Descriptive Information : The recall population was determined based on manufacturing records. The production range reflects all possible vehicles that could experience the problem. Similar vehicles produced outside the specified manufacturing range above had adhesive applied to the hood latch striker and the hood latch height and front seal were set to specification. The number of affected units is 21,381. Production Dates : JUL 27, 2017 – MAR 07, 2018 VIN Range 1 : Begin : NR End : NR Not sequential Part 573 Safety Recall Report 21V-932 Page 4 The information contained in this report was submitted pursuant to 49 CFR §573 Vehicle 9 : 2018-2018 Honda Pilot Vehicle Type : Body Style : Power Train : NR Descriptive Information : The recall population was determined based on manufacturing records. The production range reflects all possible vehicles that could experience the problem. Similar vehicles produced outside the specified manufacturing range above had adhesive applied to the hood latch striker and the hood latch height and front seal were set to specification. The number of affected units is 107,321. Production Dates : DEC 05, 2017 – JUL 16, 2018 VIN Range 1 : Begin : NR End : NR Not sequential Description of Defect : Description of the Defect : Gaps in the front seal between the hood and grill allow for air entry, potentially resulting in hood vibration at highway speeds. Over time the hood vibration could form stress fractures along the hood latch striker and separate the hood latch striker from the hood. FMVSS 1 : NR FMVSS 2 : NR Description of the Safety Risk : A separated hood latch striker may allow the hood to open, obstructing the driver’s view and increasing the risk of a crash. Description of the Cause : NR Identification of Any Warning that can Occur : Hood vibration noises or a loose hood are potential warnings of a failing hood latch striker. Involved Components : Component Name 1 : Hood Comp., Engine Component Description : Hood Comp., Engine Component Part Number : 60100-TG7-A91 Supplier Identification : Component Manufacturer Name : NR Part 573 Safety Recall Report 21V-932 Page 5 The information contained in this report was submitted pursuant to 49 CFR §573 Address : NR NR Country : United States Chronology : See attached chronology dated December 9, 2021. Description of Remedy : Description of Remedy Program : Registered owners of all affected vehicles will be contacted by mail and asked to bring their vehicle to an authorized Honda dealer. Depending on the condition of the hood latch striker, the dealer may repair the hood and install a striker support plate, or completely replace the hood with a new part. The hood repair or replacement will be performed for free. Owners who have paid to have these repairs completed at their own expense will be eligible for reimbursement, in accord with the recall reimbursement plan on file with NHTSA. How Remedy Component Differs from Recalled Component : NR Identify How/When Recall Condition was Corrected in Production : NR Recall Schedule : Description of Recall Schedule : Dealer notification is expected to begin on or around November 30, 2021. Owner notification is expected to begin on or around January 18, 2022. Planned Dealer Notification Date : NOV 30, 2021 – NR Planned Owner Notification Date : JAN 18, 2022 – NR * NR – Not Reported
**************************************************************************************************************
OMB Control No.: 2127-0004 Part 573 Safety Recall Report 21V-932 The information contained in this report was submitted pursuant to 49 CFR §573 Manufacturer Name : Honda (American Honda Motor Co.) Submission Date : DEC 09, 2021 NHTSA Recall No. : 21V-932 Manufacturer Recall No. : PBV Manufacturer Information : Manufacturer Name : Honda (American Honda Motor Co.) Address : 1919 Torrance Blvd. Torrance CA 90501 Company phone : 1-888-234-2138 Population : Number of potentially involved : 724,826 Estimated percentage with defect : 100 % Vehicle Information : Vehicle 1 : 2019-2019 Honda Passport Vehicle Type : Body Style : Power Train : NR Descriptive Information : The recall population was determined based on manufacturing records. The production range reflects all possible vehicles that could experience the problem. Similar vehicles produced outside the specified manufacturing range above had adhesive applied to the hood latch striker and the hood latch height and front seal were set to specification. The number of affected units is 18,704. Production Dates : NOV 08, 2017 – APR 09, 2019 VIN Range 1 : Begin : NR End : NR Not sequential Vehicle 2 : 2016-2016 Honda Pilot Vehicle Type : Body Style : Power Train : NR Descriptive Information : The recall population was determined based on manufacturing records. The production range reflects all possible vehicles that could experience the problem. Similar vehicles produced outside the specified manufacturing range above had adhesive applied to the hood latch striker and the hood latch height and front seal were set to specification. The number of affected units is 185,832. Production Dates : MAY 21, 2014 – NOV 07, 2016 VIN Range 1 : Begin : NR End : NR Not sequential Part 573 Safety Recall Report 21V-932 Page 2 The information contained in this report was submitted pursuant to 49 CFR §573 Vehicle 3 : 2017-2017 Honda Pilot Vehicle Type : Body Style : Power Train : NR Descriptive Information : The recall population was determined based on manufacturing records. The production range reflects all possible vehicles that could experience the problem. Similar vehicles produced outside the specified manufacturing range above had adhesive applied to the hood latch striker and the hood latch height and front seal were set to specification. The number of affected units is 153,503. Production Dates : OCT 20, 2016 – DEC 05, 2017 VIN Range 1 : Begin : NR End : NR Not sequential Vehicle 4 : 2018-2018 Honda Pilot Vehicle Type : Body Style : Power Train : NR Descriptive Information : The recall population was determined based on manufacturing records. The production range reflects all possible vehicles that could experience the problem. Similar vehicles produced outside the specified manufacturing range above had adhesive applied to the hood latch striker and the hood latch height and front seal were set to specification. The number of affected units is 107,321. Production Dates : DEC 05, 2017 – JUL 16, 2018 VIN Range 1 : Begin : NR End : NR Not sequential Vehicle 5 : 2019-2019 Honda Pilot Vehicle Type : Body Style : Power Train : NR Descriptive Information : The recall population was determined based on manufacturing records. The production range reflects all possible vehicles that could experience the problem. Similar vehicles produced outside the specified manufacturing range above had adhesive applied to the hood latch striker and the hood latch height and front seal were set to specification. The number of affected units is 110,653. Production Dates : SEP 18, 2017 – APR 09, 2019 VIN Range 1 : Begin : NR End : NR Not sequential Part 573 Safety Recall Report 21V-932 Page 3 The information contained in this report was submitted pursuant to 49 CFR §573 Vehicle 6 : 2017-2017 Honda Ridgeline Vehicle Type : Body Style : Power Train : NR Descriptive Information : The recall population was determined based on manufacturing records. The production range reflects all possible vehicles that could experience the problem. Similar vehicles produced outside the specified manufacturing range above had adhesive applied to the hood latch striker and the hood latch height and front seal were set to specification. The number of affected units is 49,490. Production Dates : MAY 08, 2015 – AUG 31, 2017 VIN Range 1 : Begin : NR End : NR Not sequential Vehicle 7 : 2018-2018 Honda Ridgeline Vehicle Type : Body Style : Power Train : NR Descriptive Information : The recall population was determined based on manufacturing records. The production range reflects all possible vehicles that could experience the problem. Similar vehicles produced outside the specified manufacturing range above had adhesive applied to the hood latch striker and the hood latch height and front seal were set to specification. The number of affected units is 21,381. Production Dates : JUL 27, 2017 – MAR 07, 2018 VIN Range 1 : Begin : NR End : NR Not sequential Vehicle 8 : 2019-2019 Honda Ridgeline Vehicle Type : Body Style : Power Train : NR Descriptive Information : The recall population was determined based on manufacturing records. The production range reflects all possible vehicles that could experience the problem. Similar vehicles produced outside the specified manufacturing range above had adhesive applied to the hood latch striker and the hood latch height and front seal were set to specification. The number of affected units is 58,235. Production Dates : JAN 09, 2018 – NOV 19, 2019 VIN Range 1 : Begin : NR End : NR Not sequential Part 573 Safety Recall Report 21V-932 Page 4 The information contained in this report was submitted pursuant to 49 CFR §573 Vehicle 9 : 2020-2020 Honda Ridgeline Vehicle Type : Body Style : Power Train : NR Descriptive Information : The recall population was determined based on manufacturing records. The production range reflects all possible vehicles that could experience the problem. Similar vehicles produced outside the specified manufacturing range above had adhesive applied to the hood latch striker and the hood latch height and front seal were set to specification. The number of affected units is 19,707. Production Dates : APR 02, 2019 – AUG 27, 2020 VIN Range 1 : Begin : NR End : NR Not sequential Description of Defect : Description of the Defect : Gaps in the front seal between the hood and grill allow for air entry, potentially resulting in hood vibration at highway speeds. Over time the hood vibration could form stress fractures along the hood latch striker and separate the hood latch striker from the hood. FMVSS 1 : NR FMVSS 2 : NR Description of the Safety Risk : A separated hood latch striker may allow the hood to open, obstructing the driver’s view and increasing the risk of a crash. Description of the Cause : NR Identification of Any Warning that can Occur : Hood vibration noises or a loose hood are potential warnings of a failing hood latch striker. Involved Components : Component Name 1 : Hood Comp., Engine Component Description : Hood Comp., Engine Component Part Number : 60100-TG7-A91 Supplier Identification : Component Manufacturer Name : NR Part 573 Safety Recall Report 21V-932 Page 5 The information contained in this report was submitted pursuant to 49 CFR §573 Address : NR NR Country : United States Chronology : See attached chronology dated December 9, 2021. Description of Remedy : Description of Remedy Program : Registered owners of all affected vehicles will be contacted by mail and asked to bring their vehicle to an authorized Honda dealer. Depending on the condition of the hood latch striker, the dealer may repair the hood and install a striker support plate, or completely replace the hood with a new part. The hood repair or replacement will be performed for free. Owners who have paid to have these repairs completed at their own expense will be eligible for reimbursement, in accord with the recall reimbursement plan on file with NHTSA. How Remedy Component Differs from Recalled Component : NR Identify How/When Recall Condition was Corrected in Production : NR Recall Schedule : Description of Recall Schedule : Dealer notification is expected to begin on or around November 30, 2021. Owner notification is expected to begin on or around January 17, 2022. Planned Dealer Notification Date : NOV 30, 2021 – NR Planned Owner Notification Date : JAN 17, 2022 – NR * NR – Not Reported
**************************************************************************************************************
OMB Control No.: 2127-0004 Part 573 Safety Recall Report 21V-932 The information contained in this report was submitted pursuant to 49 CFR §573 Manufacturer Name : Honda (American Honda Motor Co.) Submission Date : NOV 29, 2021 NHTSA Recall No. : 21V-932 Manufacturer Recall No. : PBV Manufacturer Information : Manufacturer Name : Honda (American Honda Motor Co.) Address : 1919 Torrance Blvd. Torrance CA 90501 Company phone : 1-888-234-2138 Population : Number of potentially involved : 724,826 Estimated percentage with defect : 100 % Vehicle Information : Vehicle 1 : 2019-2019 Honda Passport Vehicle Type : Body Style : Power Train : NR Descriptive Information : The recall population was determined based on manufacturing records. The production range reflects all possible vehicles that could experience the problem. Similar vehicles produced outside the specified manufacturing range above had adhesive applied to the hood latch striker and the hood latch height and front seal were set to specification. The number of affected units is 18,704. Production Dates : NOV 08, 2017 – APR 09, 2019 VIN Range 1 : Begin : NR End : NR Not sequential Vehicle 2 : 2017-2017 Honda Pilot Vehicle Type : Body Style : Power Train : NR Descriptive Information : The recall population was determined based on manufacturing records. The production range reflects all possible vehicles that could experience the problem. Similar vehicles produced outside the specified manufacturing range above had adhesive applied to the hood latch striker and the hood latch height and front seal were set to specification. The number of affected units is 153,503. Production Dates : OCT 20, 2016 – DEC 05, 2017 VIN Range 1 : Begin : NR End : NR Not sequential Part 573 Safety Recall Report 21V-932 Page 2 The information contained in this report was submitted pursuant to 49 CFR §573 Vehicle 3 : 2018-2018 Honda Pilot Vehicle Type : Body Style : Power Train : NR Descriptive Information : The recall population was determined based on manufacturing records. The production range reflects all possible vehicles that could experience the problem. Similar vehicles produced outside the specified manufacturing range above had adhesive applied to the hood latch striker and the hood latch height and front seal were set to specification. The number of affected units is 107,321. Production Dates : DEC 05, 2017 – JUL 16, 2018 VIN Range 1 : Begin : NR End : NR Not sequential Vehicle 4 : 2019-2019 Honda Pilot Vehicle Type : Body Style : Power Train : NR Descriptive Information : The recall population was determined based on manufacturing records. The production range reflects all possible vehicles that could experience the problem. Similar vehicles produced outside the specified manufacturing range above had adhesive applied to the hood latch striker and the hood latch height and front seal were set to specification. The number of affected units is 110,653. Production Dates : SEP 18, 2017 – APR 09, 2019 VIN Range 1 : Begin : NR End : NR Not sequential Vehicle 5 : 2016-2016 Honda Pilot Vehicle Type : Body Style : Power Train : NR Descriptive Information : The recall population was determined based on manufacturing records. The production range reflects all possible vehicles that could experience the problem. Similar vehicles produced outside the specified manufacturing range above had adhesive applied to the hood latch striker and the hood latch height and front seal were set to specification. The number of affected units is 185,832. Production Dates : MAY 21, 2014 – NOV 07, 2016 VIN Range 1 : Begin : NR End : NR Not sequential Part 573 Safety Recall Report 21V-932 Page 3 The information contained in this report was submitted pursuant to 49 CFR §573 Vehicle 6 : 2017-2017 Honda Ridgeline Vehicle Type : Body Style : Power Train : NR Descriptive Information : The recall population was determined based on manufacturing records. The production range reflects all possible vehicles that could experience the problem. Similar vehicles produced outside the specified manufacturing range above had adhesive applied to the hood latch striker and the hood latch height and front seal were set to specification. The number of affected units is 49,490. Production Dates : MAY 08, 2015 – AUG 31, 2017 VIN Range 1 : Begin : NR End : NR Not sequential Vehicle 7 : 2018-2018 Honda Ridgeline Vehicle Type : Body Style : Power Train : NR Descriptive Information : The recall population was determined based on manufacturing records. The production range reflects all possible vehicles that could experience the problem. Similar vehicles produced outside the specified manufacturing range above had adhesive applied to the hood latch striker and the hood latch height and front seal were set to specification. The number of affected units is 21,381. Production Dates : JUL 27, 2017 – MAR 07, 2018 VIN Range 1 : Begin : NR End : NR Not sequential Vehicle 8 : 2019-2019 Honda Ridgeline Vehicle Type : Body Style : Power Train : NR Descriptive Information : The recall population was determined based on manufacturing records. The production range reflects all possible vehicles that could experience the problem. Similar vehicles produced outside the specified manufacturing range above had adhesive applied to the hood latch striker and the hood latch height and front seal were set to specification. The number of affected units is 58,235. Production Dates : JAN 09, 2018 – NOV 19, 2019 VIN Range 1 : Begin : NR End : NR Not sequential Part 573 Safety Recall Report 21V-932 Page 4 The information contained in this report was submitted pursuant to 49 CFR §573 Vehicle 9 : 2020-2020 Honda Ridgeline Vehicle Type : Body Style : Power Train : NR Descriptive Information : The recall population was determined based on manufacturing records. The production range reflects all possible vehicles that could experience the problem. Similar vehicles produced outside the specified manufacturing range above had adhesive applied to the hood latch striker and the hood latch height and front seal were set to specification. The number of affected units is 19,707. Production Dates : APR 02, 2019 – AUG 27, 2020 VIN Range 1 : Begin : NR End : NR Not sequential Description of Defect : Description of the Defect : Gaps in the front seal between the hood and grill allow for air entry, potentially resulting in hood vibration at highway speeds. Over time the hood vibration could form stress fractures along the hood latch striker and separate the hood latch striker from the hood. FMVSS 1 : NR FMVSS 2 : NR Description of the Safety Risk : A separated hood latch striker may allow the hood to open, obstructing the driver’s view and increasing the risk of a crash. Description of the Cause : NR Identification of Any Warning that can Occur : Hood vibration noises or a loose hood are potential warnings of a failing hood latch striker. Involved Components : Component Name 1 : Hood Comp., Engine Component Description : Hood Comp., Engine Component Part Number : 60100-TG7-A91 Supplier Identification : Component Manufacturer Name : NR Part 573 Safety Recall Report 21V-932 Page 5 The information contained in this report was submitted pursuant to 49 CFR §573 Address : NR NR Country : United States Chronology : See attached chronology dated November 29, 2021. Description of Remedy : Description of Remedy Program : Registered owners of all affected vehicles will be contacted by mail and asked to bring their vehicle to an authorized Honda dealer. Depending on the condition of the hood latch striker, the dealer may repair the hood and install a striker support plate, or completely replace the hood with a new part. The hood repair or replacement will be performed for free. Owners who have paid to have these repairs completed at their own expense will be eligible for reimbursement, in accord with the recall reimbursement plan on file with NHTSA. How Remedy Component Differs from Recalled Component : NR Identify How/When Recall Condition was Corrected in Production : NR Recall Schedule : Description of Recall Schedule : Dealer notification is expected to begin on or around November 30, 2021. Owner notification is expected to begin on or around January 17, 2022. Planned Dealer Notification Date : NOV 30, 2021 – NR Planned Owner Notification Date : JAN 17, 2022 – NR * NR – Not Reported
**************************************************************************************************************
SEOCONTENT-END
This product presentation was made with AAWP plugin.