
NHTSA ID Number: 10190292
Manufacturer Communication Number: A21-038
Summary
Service Bulletin – Due to the possibility of early deterioration of the high-voltage battery, American Honda is extending the warranty coverage on these batteries to 12 years from the original date of purchase or 200,000 miles, whichever comes first.
1 Affected Product
Vehicle
| MAKE | MODEL | YEAR |
| HONDA | ACCORD PLUG-IN HYBRID | 2014 |
BACKGROUND
Due to the possibility of early deterioration of the high-voltage battery, American Honda is extending the warranty coverage on these batteries to 12 years from the original date of purchase or 200,000 miles, whichever comes first.
CUSTOMER NOTIFICATION
Owners of affected vehicles will be sent a notification of this campaign.
Do an iN VIN status inquiry to make sure the vehicle is shown as eligible.
CORRECTIVE ACTION
Do an inspection and if necessary, replace the high-voltage battery pack.
NOTE: Update the high-voltage battery BCM software before doing this repair. Refer to service bulletin 21-037, Emissions Recall: 2014 Accord Plug-In Hybrid (PHEV) Battery Software Update.
PARTS INFORMATION
NOTE: Each 2014 Accord Plug-In Hybrid replacement high-voltage lithium ion battery assembly order includes the loan of a special tool kit that includes the tools required for the battery replacement procedure. For battery ordering, handling, and return information, Refer to Parts Information Bulletin 13-0003, Lithium Ion Battery Exchange Program, 2014 Accord Plug-In.
| Part Name | Quantity | Part Number |
| High-Voltage Battery Pack | 1 | 1D100-5K0-A00 |
| Flange Bolt (8 x 20 mm) | 8 | 90081-T3V-A00 |
| Flange Bolt (8 x 45 mm) | 2 | 90082-T3V-A00 |
| Flange Bolt (10 x 50 mm) | 2 | 90101-T3V-A00 |
|
| ||
TOOL INFORMATION
NOTE: Each 2014 Accord Plug-In Hybrid replacement high-voltage lithium ion battery assembly order includes the loan of a special tool kit that includes the tools required for the battery replacement procedure. For tool handling and return information, Refer to 14-011, High Voltage Lithium Ion Battery Replacement Equipment (2014 Accord Plug-In).
| Tool Name | Part Number | Quantity |
| Accord PHEV Battery R&R Equipment Loan Kit | 07PHEVBATOLKIT | 1 |
INSPECTION PROCEDURE
Do an all DTC check and confirm DTC P0A7F (High Voltage Battery Capacity Serious Deterioration). If the DTC is found, clear the DTC, and charge the HV battery to 100% SOC. Drive the vehicle at approximately 30mph for at least 5 minutes. If the DTC recodes, replace the high voltage battery. If the DTC does not recode, follow normal system troubleshooting.
REPAIR PROCEDURE
- Turn off the main switch to the high voltage circuit. Refer to the service information.
- From the cabin side, remove the right side cover, and disconnect the high voltage connectors and battery lead caps.
- Disconnect the left lower IPU harness connectors.
- Disconnect the right lower IPU harness connector.
- Disconnect the IPU upper harness connectors and remove the harness clamp.
- Remove the ground cable.
- Disconnect the high voltage motor power inverter module cable connector and remove the harness clamp.
- Remove the harness clamp, then disconnect the D/V 12 volt plus cable and the ground cable.
- Remove the junction board cover.
- Remove the right air inlet trim.
- Remove the right battery inlet duct, and DC-DC inlet duct.
- Disconnect the high voltage cable terminals, and remove the harness clamps.
NOTE: Take note of the color bands on the cables red and blue and their positions before disconnecting the cables.
- Remove the trunk floor cover, the trunk rear trim panel, the trunk tool box, the trunk front trim panel, and the trunk rear side trim panel. Refer to the service information.
- From the trunk side, remove the IPU guard.
- Remove the DC-DC fan outlet duct, the rear DC-DC inlet duct, and the harness clamp.
- Remove the bolts that hold the battery pack upper component from the cabin side.
- From the trunk side remove the bolts, then carefully remove the battery pack upper component from the trunk.
- Battery Pack A removal: From the cabin side, disconnect the high voltage motor power inverter module cable terminals and remove the harness clamps, then remove the junction board connector bracket.
NOTE: Take note of the color bands on the cables red and blue and their positions before disconnecting the cables.
- Disconnect the right lower IPU harness connector and remove the junction board connector bracket.
- Disconnect the battery system leak sensor connector and remove the junction board.
- From the trunk side, remove the charge rail plates and the battery insulator.
NOTE: Squeeze inward on the ends of the charge rail plates to release the lock tabs.
- Remove the left battery outlet duct and the right battery outlet duct.
- From the cabin side, disconnect the right IPU lower harness connector and remove the harness clamps.
- Disconnect the right side wire harness connector.
- Remove the upper front bracket and the harness clamps.
- From the trunk side, disconnect the left IPU lower harness connector.
- From the cabin side, remove the left IPU upper mounting bracket and the right IPU upper mounting bracket.
- To remove battery pack A, remove the 6 battery mounting bolts. There will be an additional 6 battery mounting bolts that cannot be removed, loosen them and lift-up the bolts one at time and install an 80 mm long slit plastic tube around each of the bolts. Refer to the service information for images.
NOTE:
- The slit plastic tubes are included in the Accord PHEV Battery R&R Equipment Loan Kit (07PHEVBATOLKIT).
- The plastic tubes keep the mounting bolts up and out of way to allow battery pack A to slide out.
- Place fender covers over the rear fenders and the trunk opening to avoid damaging the vehicle. Attach the battery removal/installation carrier onto battery pack A. Loosely tighten the bolts. Install the carrier adapter mount with the “A” mark side to the right rear battery pack mount. Loosely tighten the bolts, then tighten the five bolts to 4 N·m (18 lb·ft)
- Install the inside handle to the battery removal/installation carrier and install the pin. Set the battery removal/installation table in the trunk area with the table legs extended.
- With the help of an assistant on the inside of the vehicle, carefully lift and transfer battery pack A onto the battery removal/installation table. Remove the inside handle from the battery pack removal/installation carrier.
- With the help of an assistant at the rear of the vehicle, carefully lift the battery pack A and remove it from the trunk area. Set the battery pack on the work surface provided with the Accord PHEV Battery R&R Equipment Loan Kit (07PHEVBATOLKIT).
- Battery Pack B removal: From the cabin side, remove the DC cable bracket.
- Disconnect the leak sensor connector and remove the leak sensor.
- Disconnect the left side wire harness connector and remove the left IPU side cover.
- Remove the left air inlet trim and the left battery inlet duct.
- From the trunk side, remove the IPU lower mounting brackets.
- From the cabin side, remove the IPU center frame bolts and the harness clamp.
- From the trunk side, remove the IPU rear cross member bolts.
- Place fender covers over the rear fenders and the trunk opening to avoid damaging the vehicle. Attach the battery removal/installation carrier onto battery pack. Loosely tighten the bolts. Install the carrier adapter mount with the “B” mark side to right rear battery pack mount. Loosely tighten the bolts then tighten the five bolts to 4 N·m (18 lb·ft).
- Install the inside handle to the battery removal/installation carrier and install the pin. Set the battery removal/installation table in the trunk area as shown (table legs folded).
- With the help of an assistant on the inside of the vehicle, carefully lift and transfer battery pack B onto the battery removal/installation table. Remove the inside handle from the battery pack removal/installation carrier.
- With the help of an assistant at the rear of the vehicle, carefully lift the battery pack B and remove it from the trunk area. Set the battery pack on the work surface provided with the Accord PHEV Battery R&R Equipment Loan Kit (07PHEVBATOLKIT).
- If needed, flip the battery pack upside-down, and remove the IPU center frame.
- Transfer over the IPU harnesses from the old battery packs to the new battery packs.
- First install battery pack B, then battery pack A in the reverse order of removal.
Note: Make sure to torque all bolts to the torque specification shown in the service information.
- Install the remaining parts in the reverse order of removal.
- Turn on the main switch to the high voltage circuit. Refer to the service information.
- Do an all DTC check.
- Do a Battery Condition Monitor Module Reset. Refer to the service information.
- Fully charge the high-voltage battery then, test-drive the vehicle and confirm no DTCs are set.
END
SEOCONTENT-START
Service Bulletin 21-038
April 3, 2021
Version 2
Warranty Extension: 2014 Accord Plug-In Hybrid (PHEV) High Voltage Battery Pack Deterioration
Supersedes 21-038, dated March 26, 2021, See REVISION SUMMARY.
AFFECTED VEHICLES
| Year | Model | Trim | VIN Range |
| 2014 | Accord Plug-In Hybrid (PHEV) | ALL | Check the iN VIN status for eligibility. |
REVISON SUMMARY
Under REPAIR PROCEDURE, Images have been added.
WARRANTY CLAIM INFORMATION
| Operation Number | Description | Flat Rate Time | Defect Code | Symptom Code | Template
ID |
Failed Part Number |
| 1185B8 | All DTC Check
(includes charging and test-drive). |
0.6 hr. | 6B600 | NA700 | A21038A | 1D100-5K0-A00 |
| A | Replace the high voltage battery pack. | 3.5 hr. |
Skill Level: Repair Technician
SEOCONTENT-END
1 Associated Document
Manufacturer Communications
A21-038
April 3, 2021
Version 2
MC-10190292-0001.pdf 3000.489KB
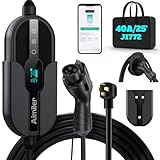
- ❤ [Equipped with Nema 14-50 plug, Compatible with 110-120V Nema 5-15p to 14-50r EV Adapter(Not packaged) or the other EV Adapter Cable]: Suggest install the 240V Nema 14-50 plug-in socket. [Kindly Note When Using the 5-15P Adapter]: 1. The RV Adapter cable doesn't work for EV chargers, please order the correct EV adapter cable. 2. It will become slow level 1 ev charging and some cars may drop to 12A, the max charging rate is 1.32-1.8kW(110V*12A-120V*15A).
- ❤ [Features a J1772 Connector for All North America J1772 EVs/PHEVs. For Tesla EVs/Nacs Connector Cars, This will Require an j1772 to Tesla Adapter]: Compatible with Ford, GM, Nissan, Audi, Kia, Honda, BMW, Kia, Hyundai, Gmc, Chevy, etc. [Not fits for Tesla cars/Nac connector cars-Kia EV6 2025/EV9,Ariya 2025&2025 loniq 5(J1772 to Tesla adapter needed)]. [7X Faster Charging with ETL, FCC Listed, Meets the Safety Criteria Defined by: SAE J1772, UL2231-1/-2, UL 991, UL 2231, UL 2251, UL1998 and UL 2594]: Say goodbye to slow level 1 ev charger, enjoy safe charging and 7X faster charging.
- ❤ [Up to 9.6kWh High Speed Charging, Adjustable Amperage from 16A to 40A & Requires a 20A to 50A circuit]: Maximum current output of 40 Amps for 50A circuit breaker, 32 Amps for 40A circuit breaker, or 24 Amps for 30A circuit breaker (Please pull out the charging gun, long press "A" button to change the current). You can also adjust the current/amperage by APP before the charging.
- ❤ [2 Operating Modes: Plug-charge(The Default Setting) or APP Start Mode & Smart Touch Screen]: The LED Screen Clearly show the Amperage, charging speed, input voltage, delay time, etc. For the touch buttons: 1. Pull out the charging gun before press the button, otherwise no respond; 2. Long press "Ⓐ" or "Time" button to adjust the amperage from 16A to 40A freely or Set the charging start time; 3. You can do "factory reset" if doesn't charging.
- ❤ [Smart WIFI APP, You can Set the Charging Period]: Check the charging cost, history, fully-charged notification, track the charging status, during off-peak period, etc. ❤ [Wi-Fi Reset/Factory Reset Function, Add New Device Quickly]: If you can't find your device or you have replaced a new phone, just pull out the charging gun, simultaneously long press the Ⓐ button and time adjustment button on the product screen until it shows "Factory Reset", then re-start your device. (Kind note: Switch the router from dual brand (2.4 GHz & 5 GHz) to only 2.4 GHz for the first connection.)


- Flex Level 1 EV Charger - The EVDANCE Level 1 electric car charger is compatible with J1772 electric vehicles and plug-in hybrid vehicles (North American Standard). *Tesla requires a SAE J1772 adapter.
- Convenient to Use - This charger has both NEMA 6-20 plug for 16A 240V charging (3.68kW, 10-12 mi/h) and a NEMA 6-20 to 5-15 plug adapter for 12A 120V charging (1.44kW, 2-5 mi/h). The included bag makes it easier to carry on the go. It also has a 25ft cable length, you can use it flexibly from anywhere in the garage or driveway.
- Check Your Outlet Type -This charger works with standard 120V NEMA 5-15/5-20 outlets (2-5 mph charging speed) and 240V NEMA 6-20 outlets (10-12 mph) . It's not compatible with NEMA 6-15/10-30/14-30/14-50/6-50 outlets – you'll need a NEMA 14-50/14-30/10-30/6-50 to 6-20 adapter (sold separately) to connect.
- Compatible EV Models -This EV charger works with most major electric vehicles, including Ford, Chevrolet, Hyundai, Audi, Nissan Ariya, Rivian R1S, Kia, and others. However, it's not compatible with Mini Cooper Electric Hardtop,Toyota Prus Prime/Z4X/RAV4Prime, Porsche Taycan Base/4S/Turbo/Turbo S or Tesla models (Tesla requires a J1772 to Tesla Adapter, sold separately). For a full list of compatible models, check out the Full Compatibility List on our product page.
- Indication Displays - LED display that can tell you the status as well as indicate errors while charging your electric vehicle.
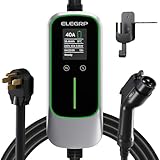
- Fast & Adjustable Charging: Up to 9.6 kW (37 mph), 7x faster than Level 1, with 5 current levels (16/20/24/32/40A) to match home capacity, plus 1–12H timing delay for off-peak charging, reducing costs and easing range anxiety
- Plug & Extended Reach: NEMA 14-50 plug fits 240V outlets for true plug-and-play use, while the 25FT cable offers flexible reach across garages and driveways, eliminating the need to reposition vehicles for easier daily charging
- ETL Certified & ELEGRP PBE Protection: Fully ETL certified, ELEGRP’s exclusive PBE technology combines full-link overheat protection with a triple-layer safety system, ensuring safer, more efficient charging. Includes a 2-year warranty
- All-Weather Indoor & Outdoor Use: IP67-rated for durability in rain, snow, and extreme temps (-21°F to 121°F), with a portable design that supports home, travel, and outdoor charging, delivering reliable performance anywhere
- Universal Compatibility: Works seamlessly with Mercedes, Chevy, Ford, Mustang Mach-E, Cadillac, Hyundai Ioniq, Kia EV6/EV9, Nissan Leaf, Chevy Bolt, Chrysler Pacifica Hybrid, and all PHEV/BEV. Tesla compatible with NACS adapter (sold separately)

- Charge with Confidence: ChargePoint builds reliable, flexible EV charging stations for home, business, and fleets. Get 24/7 support and access to hundreds of thousands of North American charging locations
- Charge Smart: With the user-friendly ChargePoint Mobile App, you can control your electric car charger, manage reminders, connect to smart home devices, find stations, get data and charging info, and access the latest features
- Vast Network: Wherever you go, ChargePoint’s network includes 274k+ stations across North America and Europe and 565k+ roaming partner stations
- Safe & Durable: Rely on this UL-certified EV charger for safe home charging. It can be installed indoors or outdoors by an electrician and includes a cold-resistant cable
- Fast & Powerful: This EV charger charges 9× faster than a 120V outlet, delivering up to 45 mi/hr., dependent upon your vehicle. It features a J1772 connector for all non-Tesla EVs and plugs into a 240V outlet with a 14-50 receptacle, requiring a 40A or 50A circuit. For Tesla EVs, this will require an adapter

- ✅【Fast & Adjustable Charging Power – Up to 7.68kWh, 16A–32A Output】This Level 2 portable EV charger delivers up to 32A and 7.68kWh for fast, efficient charging. Easily adjust current based on your home circuit: 32A for 40A, 24A for 30A, or 16A for 20A breakers. Simply long-press the “A” button to change amperage when pluged in,You can easily adjust the current (16A/24A/32A) to match your home circuit — no electrician required.
- ✅【Wide Compatibility – J1772 Connector for All Non-Tesla EVs】Equipped with a standard SAE J1772 plug, this EV charger works with most North American electric vehicles and plug-in hybrids, including models from Ford, GM, Nissan, Kia, Hyundai, BMW, and more. Tesla vehicles require a J1772-to-Tesla adapter (not included).
- ✅【Smart LED Screen】You Can View real-time charging data on the LED screen: amperage, voltage, speed, and delay settings. Stay fully informed with the built-in LED display that shows real-time charging data, including amperage, voltage, charging speed, and delay settings,Easily schedule your charging sessions during off-peak hours to save on electricity bills, set custom delays, It’s all about charging smarter, not just faster
- ✅ 【Smart Charging for Long-Term EV Care】: EVDANCE Level 2 EV charger offers flexible amperage settings ranging from 10A to 32A (10A/16A/20A/24A/32A). With a simple touch of the "A" button, you can easily select the appropriate charging speed to suit your specific needs. Lower amperage charging can reduce heat and extend battery health over time. Choose the current that suits your car and charging scenario — fast when you need it, gentle when you don’t.
- ✅【Built for Safety & Durability 】The EV charger is designed to handle tough environments with NEMA Type 4/IP66-grade protection against dust and water. While it’s not recommended for installation in direct sunlight or heavy rain, it performs reliably in garages, carports, and covered outdoor areas. The 25-foot military-grade charging cable features a drop-resistant plug tested to withstand over 10,000 insertions — built to last, wherever you charge.
This product presentation was made with AAWP plugin.