| “This site contains affiliate links for which OEMDTC may be compensated” |
B08-052
July 7, 2009
Applies To: 2009 TSX – ALL
MIL Comes On With DTC P2422
(Supersedes 08-052, dated November 14, 2008, to revise the information marked by the black bars)
REVISION SUMMARY
Under PARTS INFORMATION, the part number for the the Fuel Drain Spring was changed.
SYMPTOM
The MIL comes on with DTC P2422 (EVAP canister vent shut valve close malfunction).
PROBABLE CAUSE
Spider webs are clogging the EVAP canister vent hose or the drain box.
CORRECTIVE ACTION
Clean the spider webs out of the EVAP canister vent hose or the drain box, and install a spring in the drain box.
PARTS INFORMATION
| P/N | |
| Fuel Drain Spring: | 17745-TA0-A01 |
WARRANTY CLAIM INFORMATION
In warranty: The normal warranty applies.
Operation Number: 1200A1
Flat Rate Time: 0.3 hour
Failed Part: P/N 17743-TA0-A01
Defect Code: 05401
Symptom Code: 03203
Template ID: 08-052B
Skill Level: Repair Technician
Out of warranty: Any repair performed after warranty expiration may be eligible for goodwill consideration by the District Parts and Service Manager or your Zone Office. You must request consideration, and get a decision, before starting work.
| WARNING |
| Certain types of spiders are poisonous and you could be severely injured if bitten.
Always wear gloves to protect your hands, and avoid physical contact with any spiders that you find when performing these procedures. |
REPAIR PROCEDURE
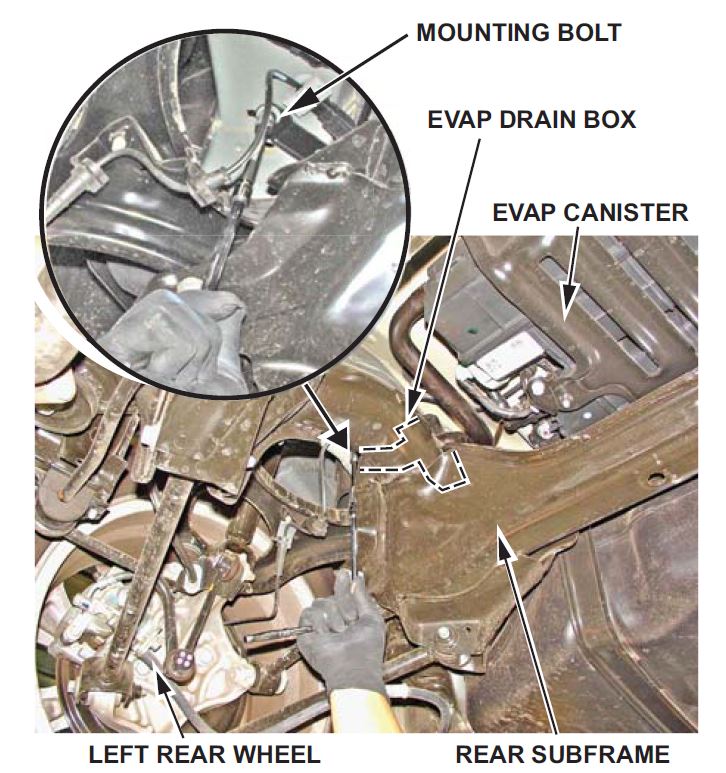
- Put the vehicle on a lift. Locate the mounting bolt for the EVAP drain box above the driver’s side rear subframe, and remove the bolt.
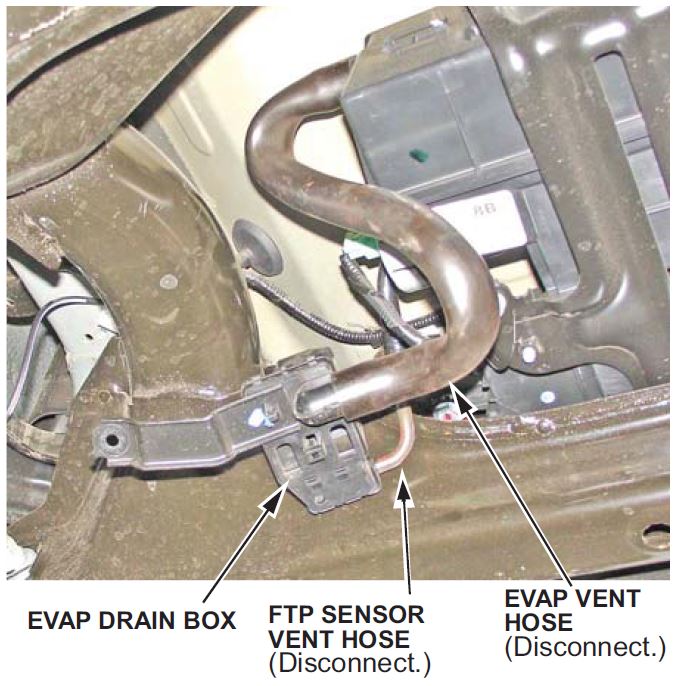
- Pull down the drain box, then disconnect the fuel tank pressure (FTP) sensor vent hose from the drain box, and disconnect the EVAP vent hose from the EVAP canister.
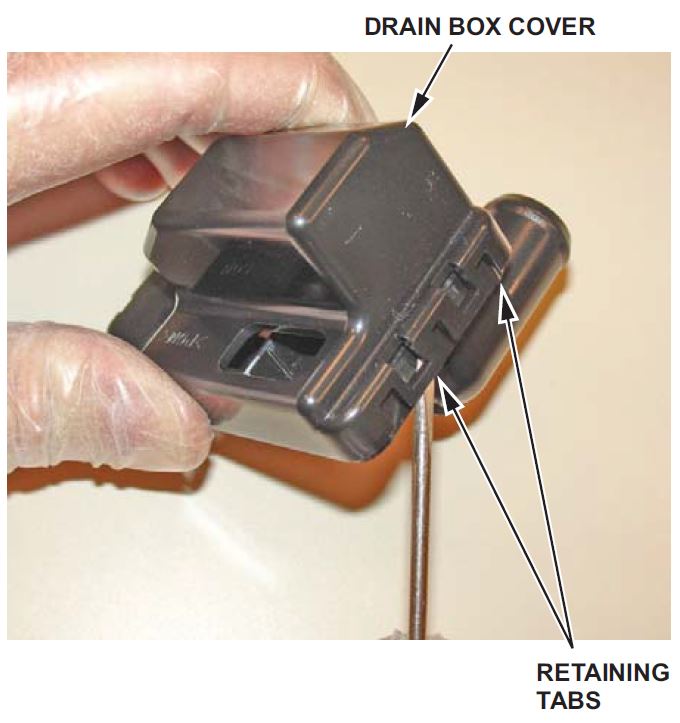
- Remove the EVAP vent hose from the drain box, then remove the drain box cover by prying open the retaining tabs with a small screwdriver.
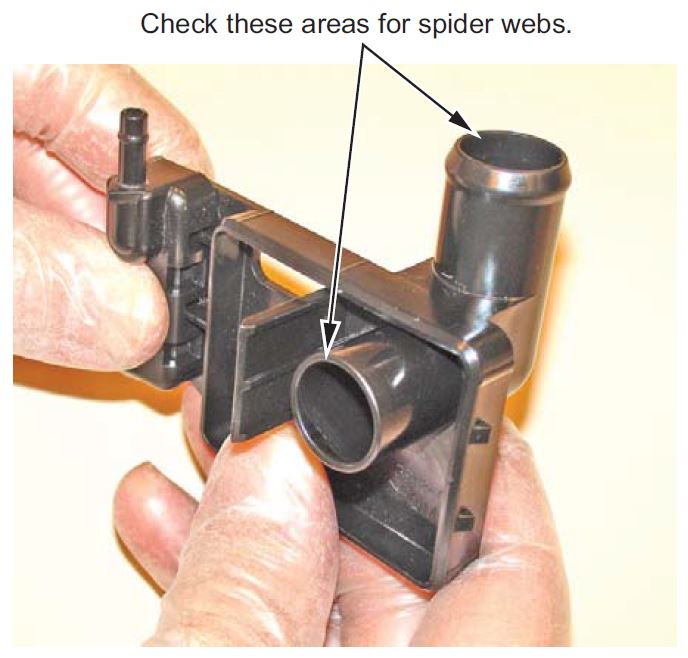
- Inspect the EVAP vent hose and the drain box.
Are there spider webs in the drain box or in the EVAP vent hose?
Yes – Go to step 5.
No – Go to step 6.
- Clean the spider webs out of the drain box and the EVAP vent hose with compressed air or a small cleaning brush.
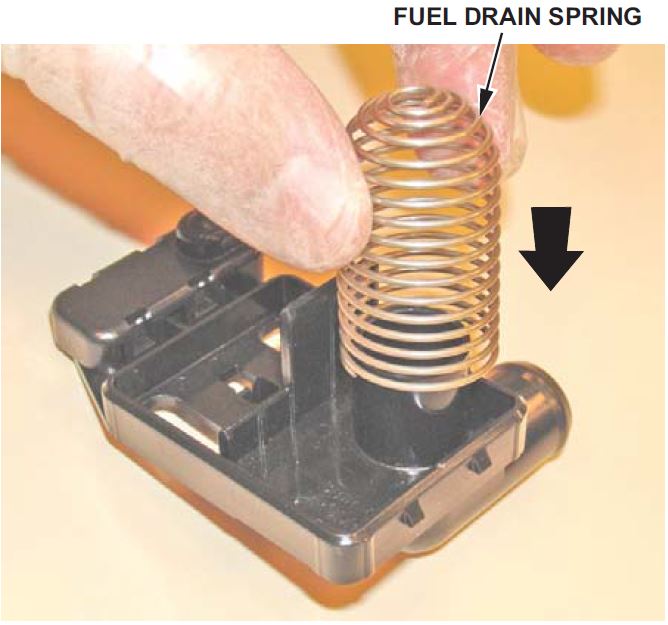
- Install the fuel drain spring over the EVAP vent hose port in the drain box as shown, then reinstall the drain box cover.
NOTE: If any of the drain box cover retaining tabs the vehicle.
- Reinstall the drain box and the EVAP vent hose on the vehicle.
- Use the HDS to clear the DTC, then run the EVAP system function test.
Does the vehicle pass the EVAP system function test?
Yes – The repair is complete.
No – There are other problems with the EVAP system. Continue with normal troubleshooting procedures.
 Loading...
