| “This site contains affiliate links for which OEMDTC may be compensated” |
B08-023
August 29, 2009
Applies To: 2007–09 RDX – ALL
Windshield Washer Reservoir Leaks
(Supersedes 08-023, dated April 29, 2008, to revise the information marked by the black bars)
REVISION SUMMARY
- In Applies To and CORRECTIVE ACTION, all 2009 models were added.
- Under REPAIR PROCEDURE – 2007 MODELS – ALL, 2008 MODELS, From VIN 5J8TB1…8A000001 thru 5J8TB1…8A016848, step 9 was added.
- REPAIR PROCEDURE – 2008 MODELS from VIN 5J8TB1…8A016849 thru 5J8TB1…8A099999, 2009 MODELS – ALL was added.
- Under WARRANTY CLAIM INFORMATION, the second repair procedure information was added.
SYMPTOM
Windshield washer fluid leaks out of the reservoir by the right front wheel.
PROBABLE CAUSE
The orientation of the washer reservoir filler neck prevents the filler neck grommet from sealing the neck opening in the washer fluid reservoir.
CORRECTIVE ACTION
- ALL 2007 models and some 2008 models: Replace the washer reservoir filler neck with an updated part, and realign the washer reservoir
- Some 2008 models and ALL 2009 models: Remove the right front inner fender, and realign the washer reservoir.
PARTS INFORMATION
| P/N | |
| Washer Reservoir Filler Neck: | 76805-STK-A01 |
| Filler Neck Grommet: | 76808-STK-A01 |
WARRANTY CLAIM INFORMATION
In warranty: The normal warranty applies.
| OP# | Description | FRT |
| 7421A8 | Repair Procedure for all 2007 and some 2008 models | 0.3 |
| 7420A1 | Repair Procedure for some 2008 and all 2009 models | 0.1 |
Failed Part: P/N 76805-STK-A01
Defect Code: 07408
Symptom Code: 03220
Skill Level: Repair Technician
Out of warranty: Any repair performed after warranty expiration may be eligible for goodwill consideration by the District Parts and Service Manager or your Zone Office. You must request consideration, and get a decision, before starting work.
REPAIR PROCEDURE – 2007 MODELS – ALL, 2008 MODELS FROM VIN 5J8TB1…8A00001 THRU 5J8TB1…8A16848
- Put the vehicle on a lift, and turn the ignition switch to ACC (I) to unlock the steering column.
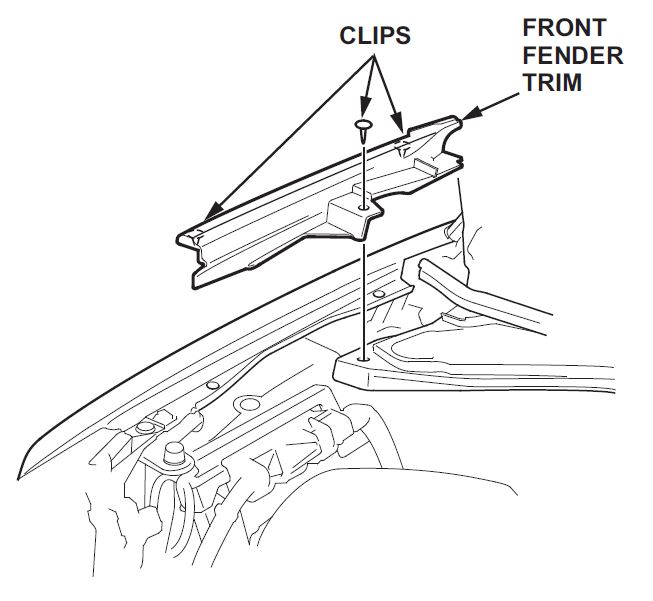
- Gently pull up the passenger’s side front fender trim to release the clips, then remove the trim.
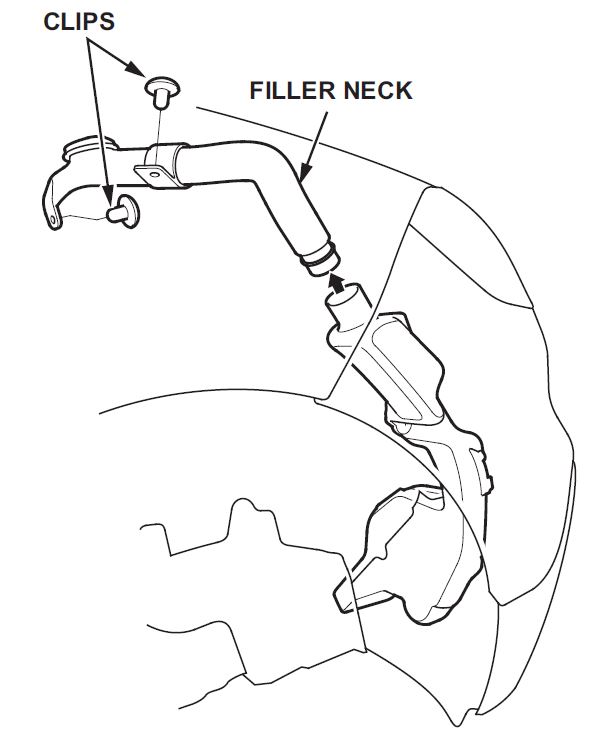
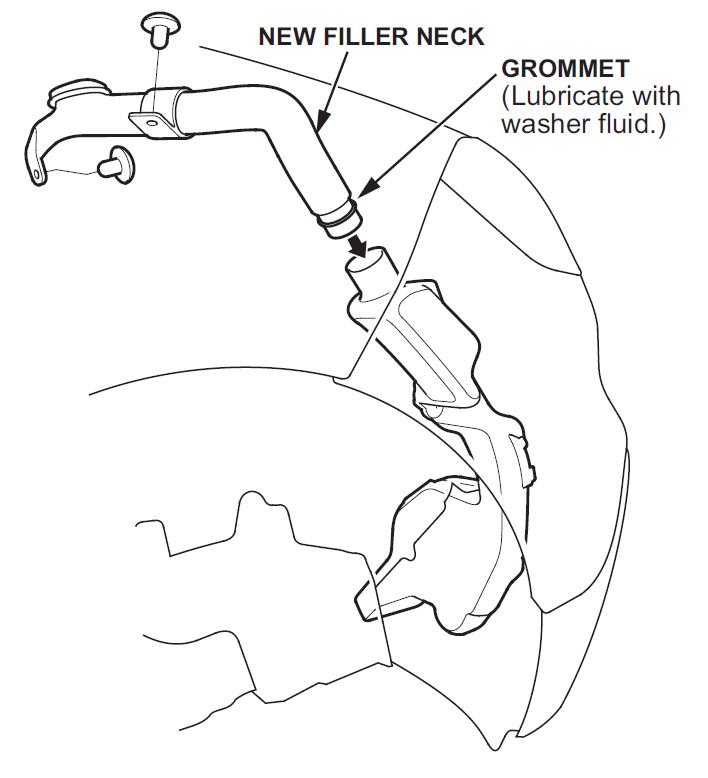
- Remove the filler neck clips, then pull up on the filler neck, and rotate it rearward to disengage it from the reservoir.
NOTE: Be careful not to damage the nearby brake lines or the A/C refrigerant lines.
- Rotate the filler neck forward and inward as you pull it out through the body opening.
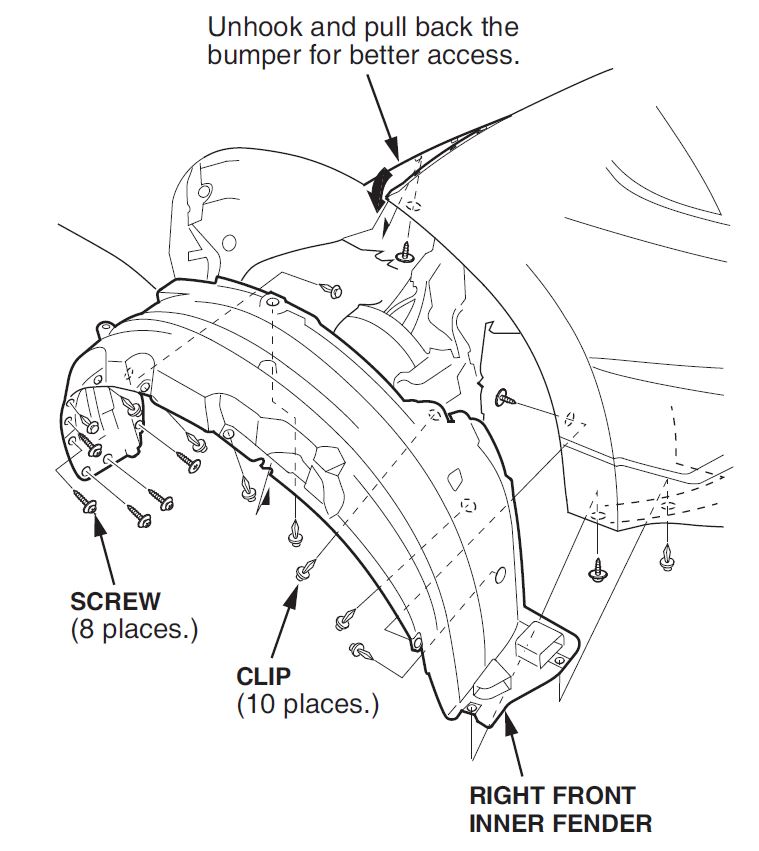
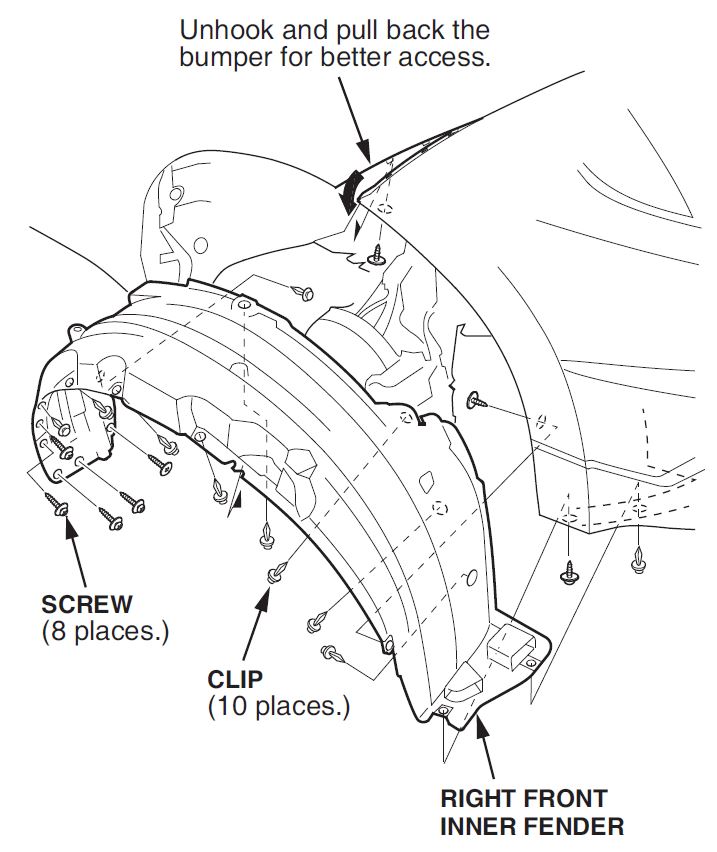
- Remove the fasteners from the front of the right front inner fender, and pull the inner fender away as needed to access the washer reservoir. If needed, unhook the upper right side of the bumper to improve access.
NOTE: You can access the washer reservoir without removing the right front wheel or the entire inner fender.
- Lubricate the grommet with washer fluid, and install it on the new filler neck.
- Install the filler neck in the reservoir in the reverse order of removal.
- Check that the grommet is firmly seated in the washer reservoir, then reinstall the filler neck clips.
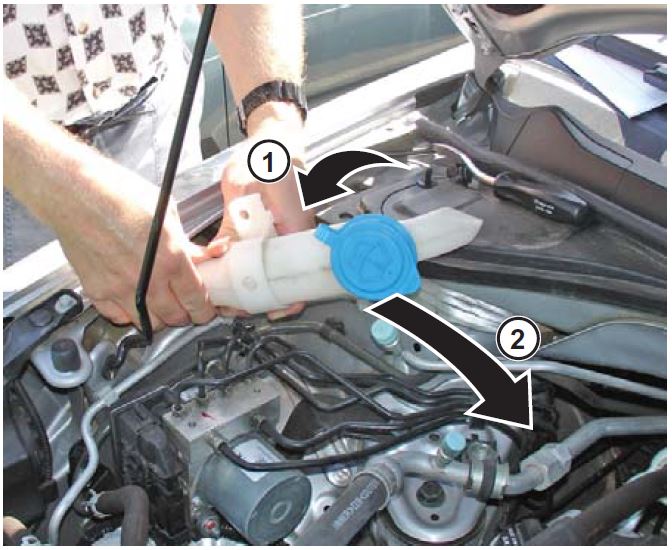
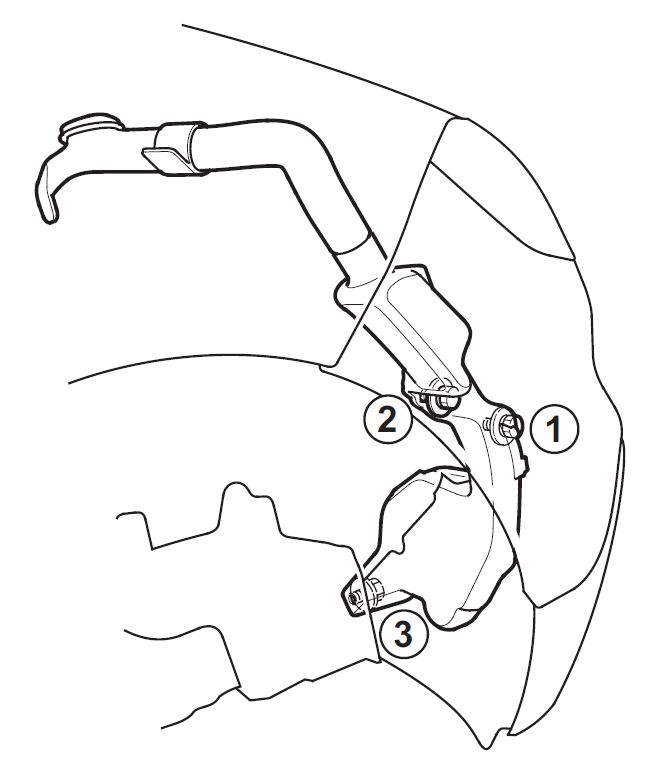
- Loosen the three washer reservoir mounting bolts, then align the bolts, and torque them to 9.8 N·m (7.2 lb-ft) in the order shown.
- Reinstall the bumper (if unhooked), the inner fender, and the front fender trim. Replace any damaged trim clips.
REPAIR PROCEDURE – 2008 MODELS FROM VIN 5J8TB1…8A016849 THRU 5J8TB1…8A099999, 2009 MODELS – ALL
- Remove the fasteners from the front of the right front inner fender, and pull the inner fender away as needed to access the washer reservoir. If needed, unhook the upper right side of the bumper to improve access.
NOTE: You can access the washer reservoir without removing the right front wheel or the entire inner fender.
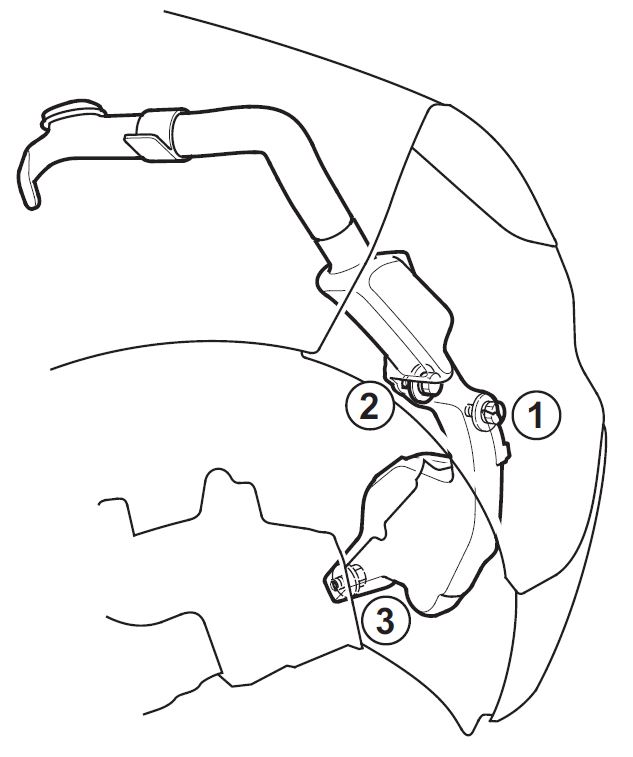
- Loosen the three washer reservoir mounting bolts, then align the bolts, and torque them to 9.8 N·m (7.2 lb-ft) in the order shown.
- Reinstall the bumper (if unhooked), the inner fender,and the front fender trim. Replace any damaged trim clips.
 Loading...
