| “This site contains affiliate links for which OEMDTC may be compensated” |
A15-029
May 8, 2015
00467 Version 1
Popping from the Speakers
AFFECTED VEHICLES
| Year | Model | Trim | VIN Range |
| 2012–13 | Civic | ALL Si with Navigation | ALL |
SYMPTOM
A popping is heard from the speakers when using the power door locks.
POSSIBLE CAUSES
There are no noise filters on the power door lock motors.
CORRECTIVE ACTION
Install a noise filter on each door lock.
PARTS INFORMATION
| Part Name | Part Number | Quantity |
| Condenser Sub Cord (Suppressor Harness) kit (4-door) | 06322-TR0-305 | 1 |
| Condenser Sub Cord (Suppressor Harness) kit (2-door) | 06322-TS8-305 | 1 |
TOOL INFORMATION
| Part Name | Part Number | Quantity |
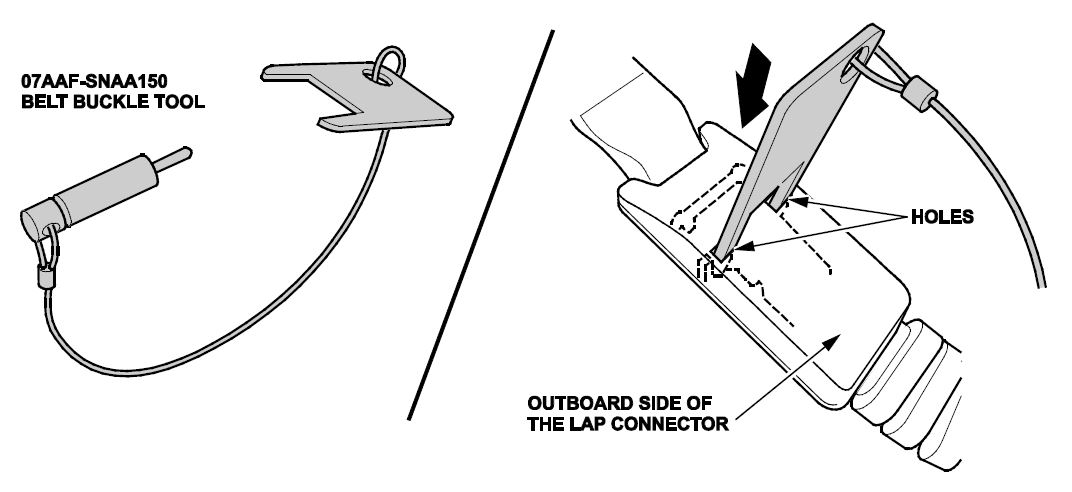
| Belt Buckle Tool | 07AAF-SNAA150 | 1 |
NOTE: These items can be purchased through the Honda Tool & Equipment Program 888-424-6857.
WARRANTY CLAIM INFORMATION
The normal warranty applies.
| Operation Number | Description | Flat Rate Time | Template ID | Failed Part Number |
| 0121B0
| Install noise filters on the door lock harness (2-door). | 0.5 hr | 15-029A | 39186-TR0-A52 |
| 0121B1 | Install noise filters on the door lock harness (4-door). | 0.9 hr | 15-029B |
Defect Code: 07801
Symptom Code: 04201
Skill Level: Repair Technician
REPAIR PROCEDURE
- Make sure the ignition is turned to lock.
- Do the battery terminal disconnection procedure.
- Wait at least 3 minutes before starting work.
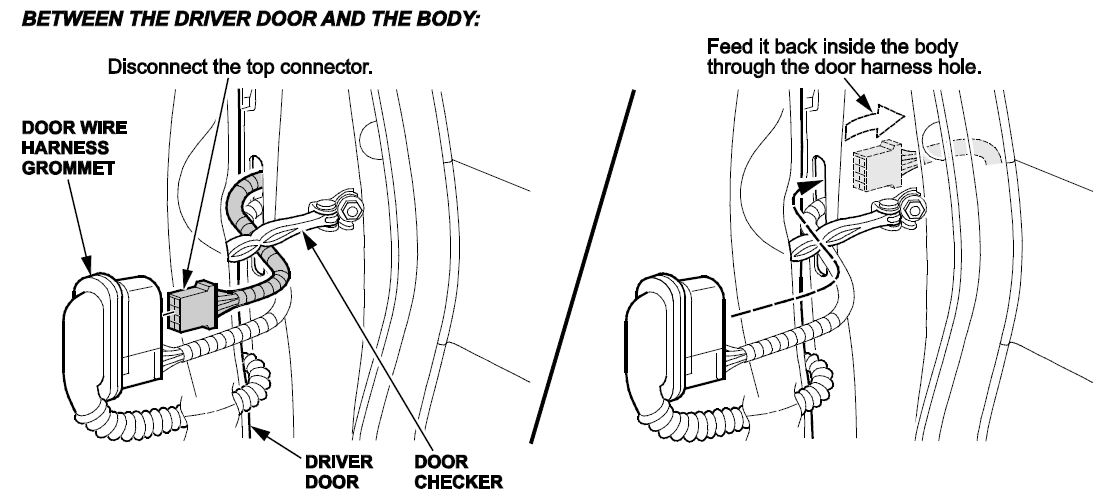
- Free the door wire harness grommet on the front driver’s door.
- Disconnect the door top connector.
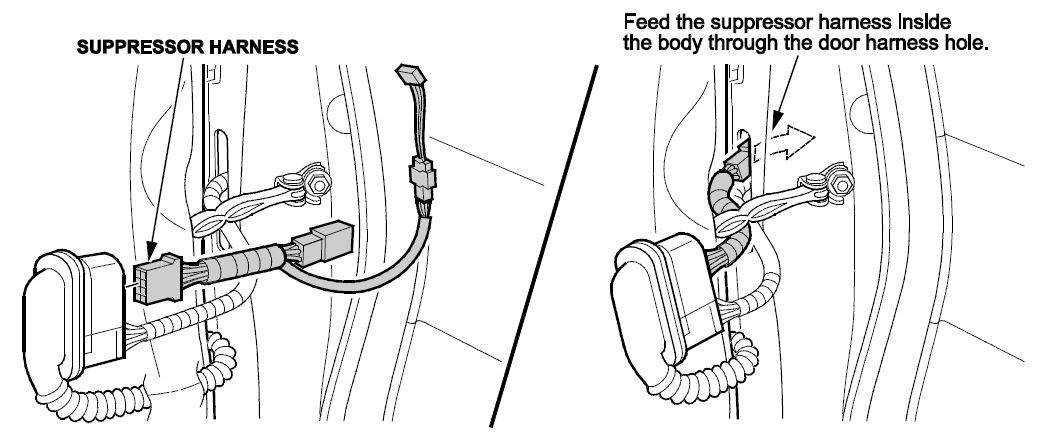
- Connect the suppressor harness to the door connector.
- Feed the suppressor harness inside the passenger cabin and reinstall the door wire harness grommet.
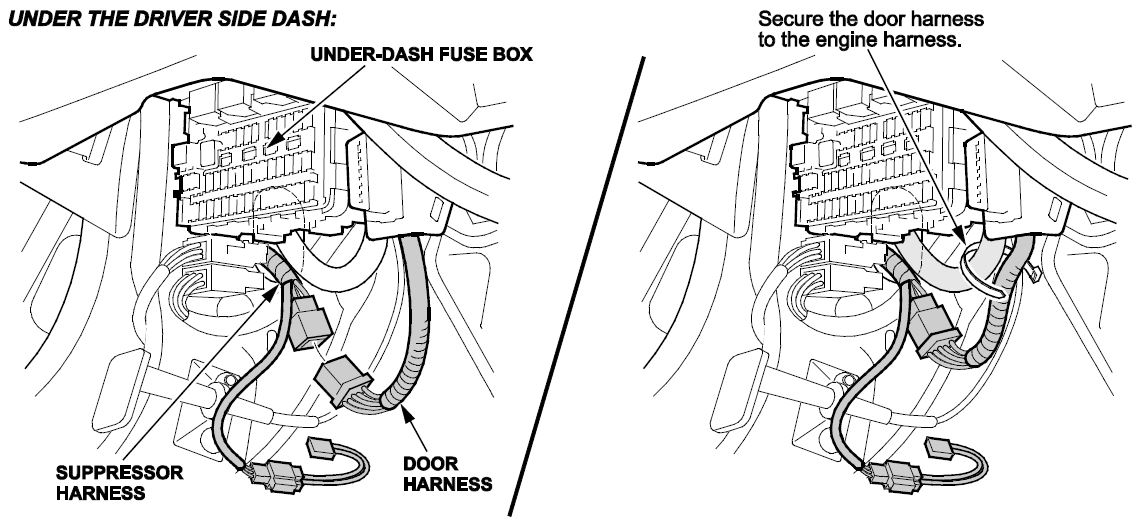
- Route the suppressor harness between the under-dash fuse box.
- Connect the suppressor harness to the door harness and secure it to the engine harness.
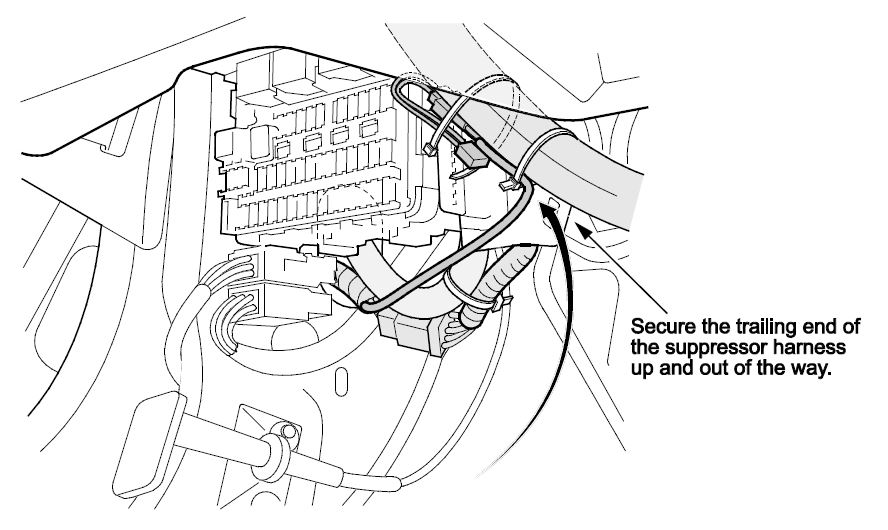
- Secure the suppressor harness as shown.
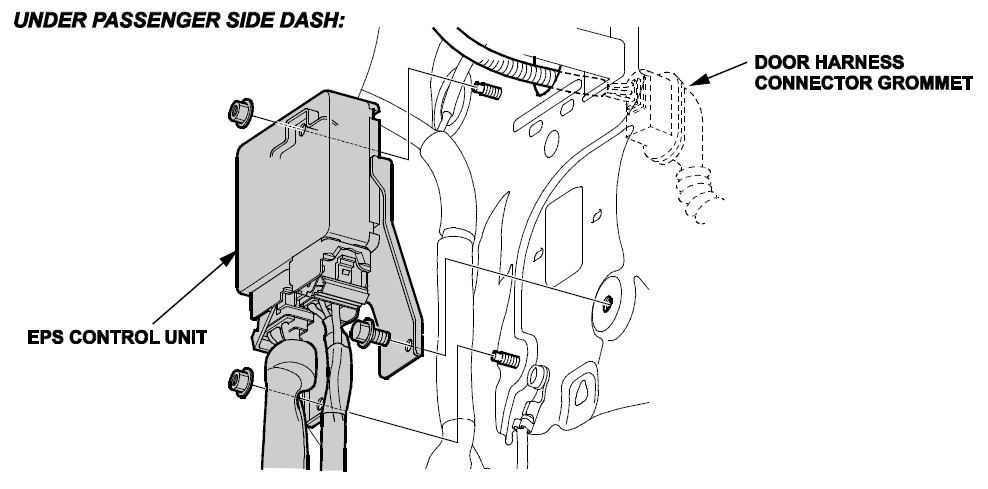
- For the front passenger’s door, remove the EPS control unit located under passenger side dash for more clearance.
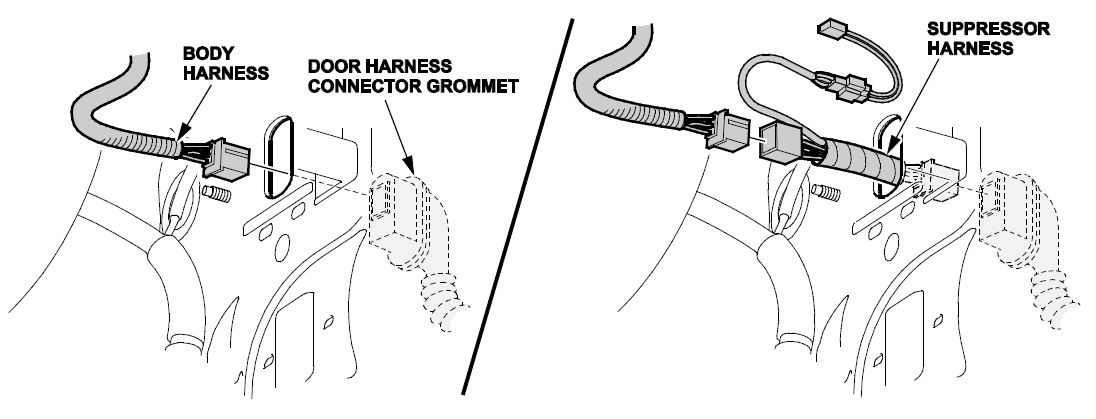
- With the front passenger’s door open, free the front passenger’s door harness connector grommet from the A pillar, disconnect the body harness connector, and connect the suppressor harness to the door harness connector and grommet connector.
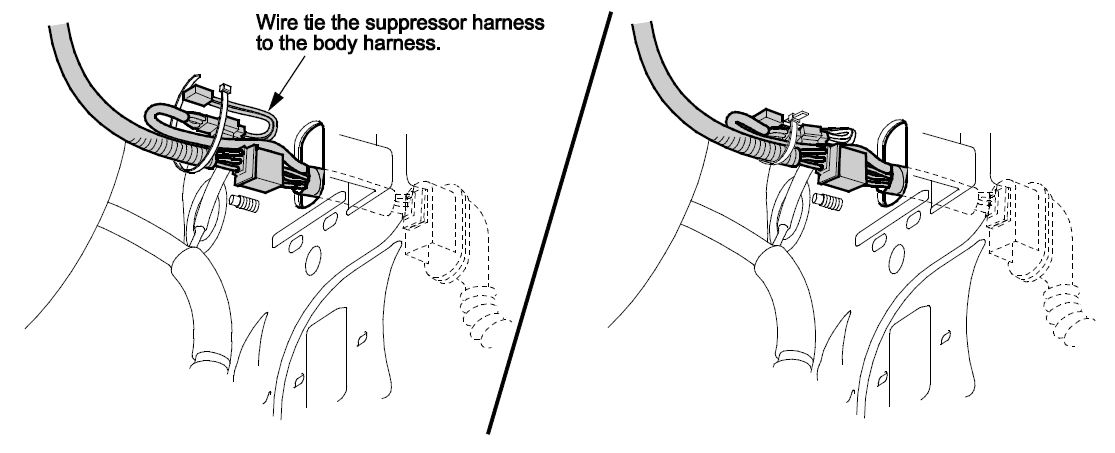
- Attach the suppressor harness to the body harness using a wire tie.
- Feed the suppressor harness inside the passenger compartment and reinstall the harness door wire grommet.
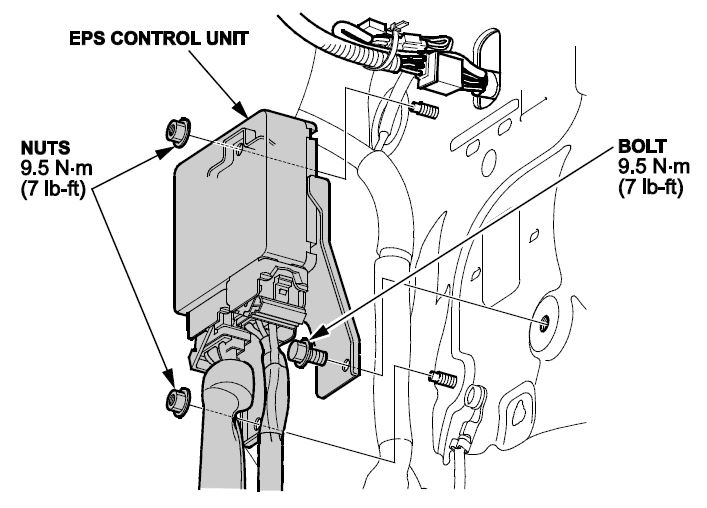
- Reinstall the EPS control unit.
Suppressor harness install on rear doors (4-door)
NOTE: If only doing the corrective action on a 2-door, continue on to step 25 to complete the repair procedure. If you are working on a 4-door, continue to step 16.
- Remove the front and rear door sill trims on passenger’s side.
- Remove the B-pillar lower trim.
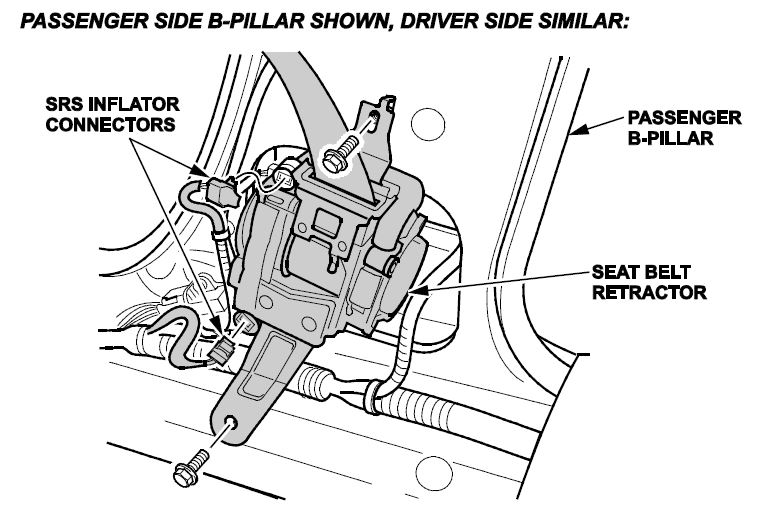
- Remove the seat belt retractor.
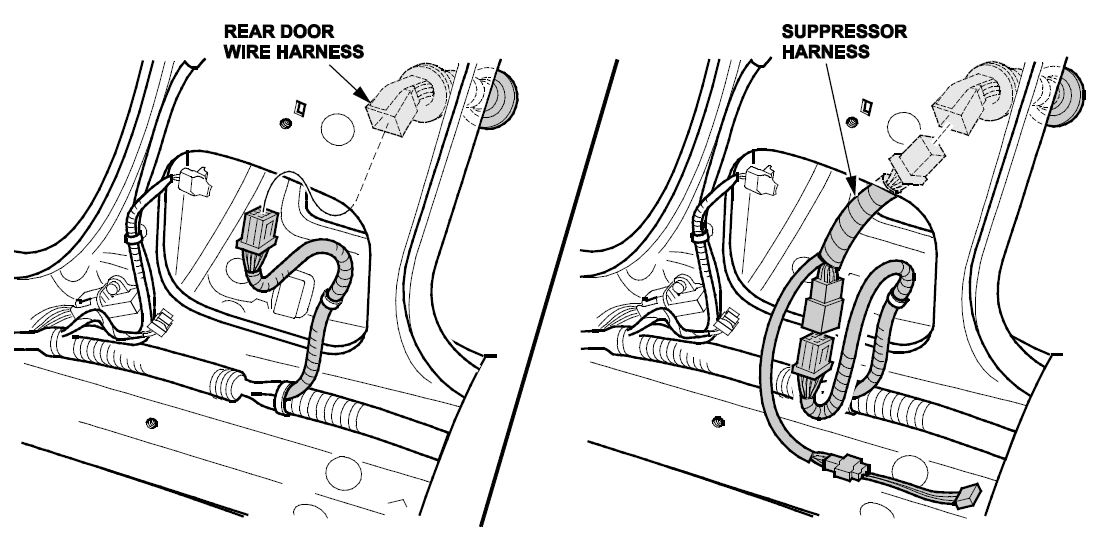
- Connect the suppressor harness to the rear door wire harness.
- Connect the suppressor harness to the rear door wire harness.
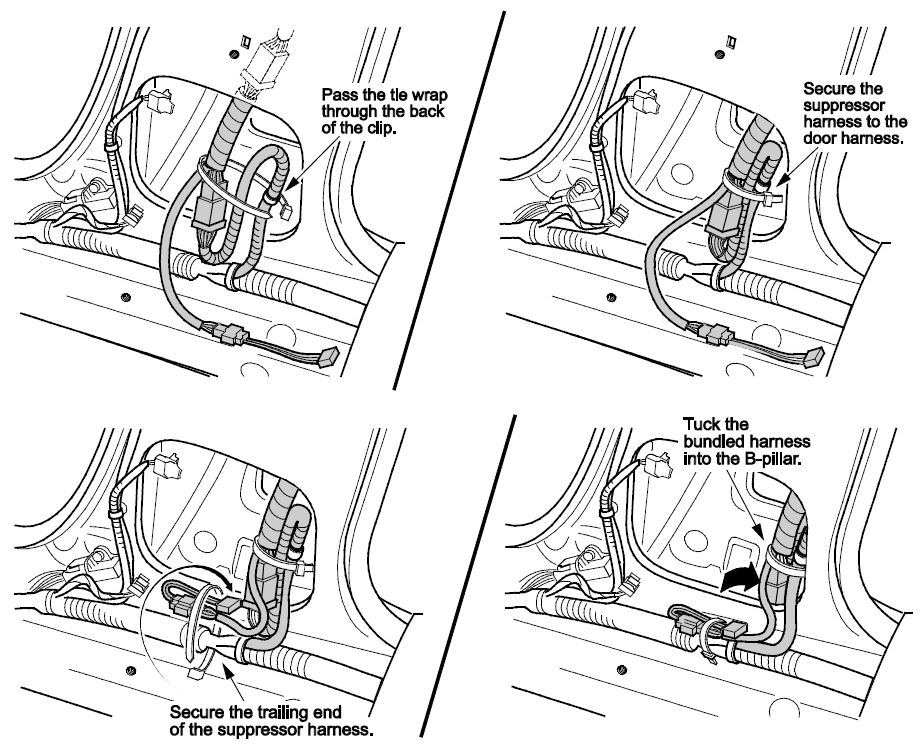
- Secure the suppressor harness to the door harness as shown using zip ties.
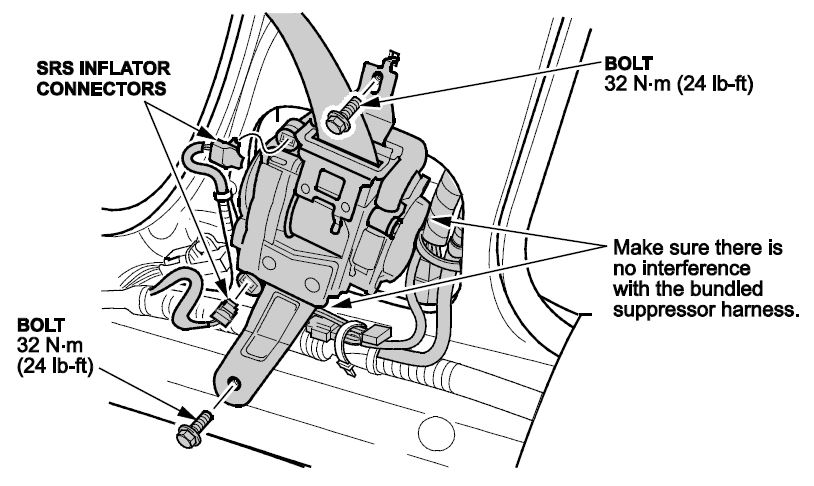
- Reinstall the seat belt retractor and make sure there is no interference with the suppressor harness.
- Reinstall the B-pillar lower trim and passenger’s front and rear door sill trims.
- For access to driver’s side rear door harness, use special tool shown to release the lower anchor on the driver’s side outer lap tensioner.
- Slowly insert the jig into the holes in the back of the lap connector cover to release the sublatch spring. Be sure the jig is inserted vertically.
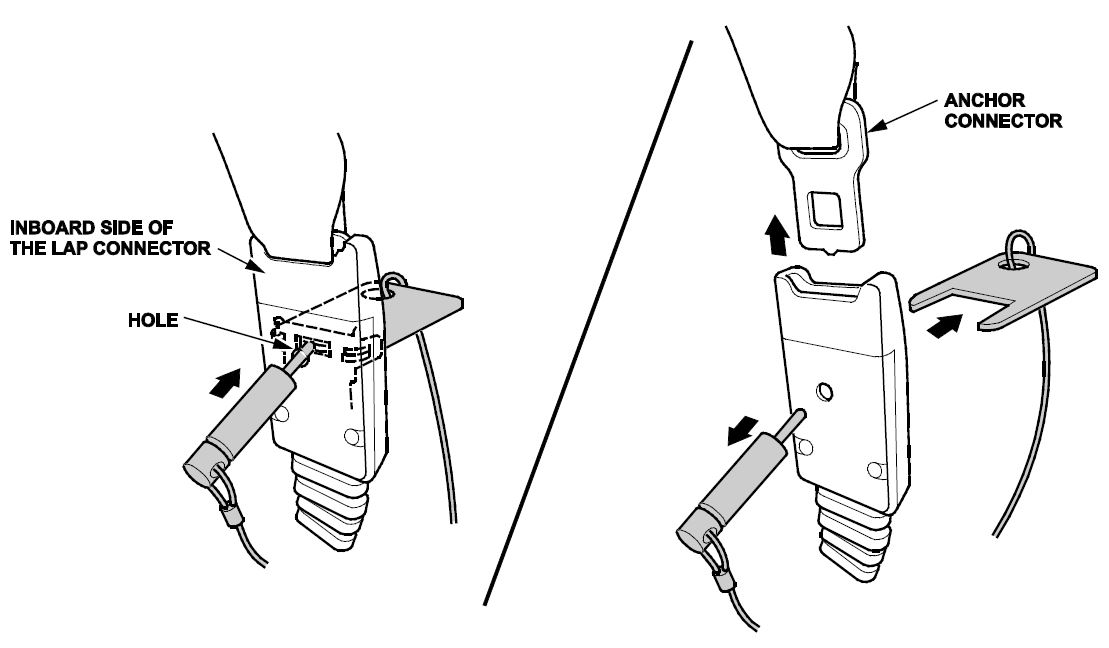
- Leave the jig set in the lap connector cover to keep the sublatch spring open. Carefully insert the tip of a small screwdriver into the hole in the lap connector cover, and unlock the lap connector by pushing in on the screwdriver.
- Remove the jig. While pulling the front seat belt upward, remove the screwdriver. As soon as you remove the screwdriver from the lap connector, the anchor connector will come off the lap connector.
- Slide the driver’s seat fully forward and remove the B-pillar lower cover.
- Repeat steps 16–23 for the driver’s side rear door harness.
- Do the battery terminal reconnection procedure.
NOTE: To protect the battery sensor connector from damage, do not hold it when installing the negative terminal.
- Connect the HDS and make sure no DTC were set.
 Loading...
