B14-034
November 5, 2014
BTB 00316 (1411)
i-MID Reads “12 Volt Battery Charging System Problem” with DTC P154A
AFFECTED VEHICLES
| Year | Model | Trim | VIN Range |
| 2014 | RLX | ALL | ALL |
| 2015 | RLX | ALL | JH4KC1…FC000001 thru JH4KC1…FC000811 |
SYMPTOM
The i-MID displays reads 12 Volt Battery Charging System Problem and DTC P154A (battery sensor internal failure) may be stored.
NOTE: If there is no DTC stored, or DTC P16E3 is stored, refer to S/B 14-028, i-MID Reads “12 Volt Battery Charging System Problem” with DTC P16E3.
POSSIBLE CAUSE
The battery sensor has an internal malfunction.
CORRECTIVE ACTION
Replace the battery sensor.
PARTS INFORMATION
| Part Name | Part Number | Quantity |
| Battery Sensor | 38920-TY2-A01 | 1 |
WARRANTY CLAIM INFORMATION
The normal warranty applies.
| Operation Number | Description | Flat Rate Time | Template ID | Failed Part Number |
| 7101B1 | Check for DTC P154A, and replace the battery sensor. | 0.4 hr (Includes DTC Check) | 14-034N | 38920-T2A-A02 |
Defect Code: 03217
Symptom Code: 03215
Skill Level: Repair Technician
DIAGNOSIS
Check for DTCs.
- If DTC P154A is stored, clear all DTCs and go to REPAIR PROCEDURE.
- If DTC P16E3 is stored or if there is no DTC present, go to Service Bulletin 14-028, i-MID Reads “12 Volt Battery Charging System Problem” With DTC P16E3.
REPAIR PROCEDURE
- Make sure the power mode is set to OFF.
- Disconnect the battery sensor connector from the battery.
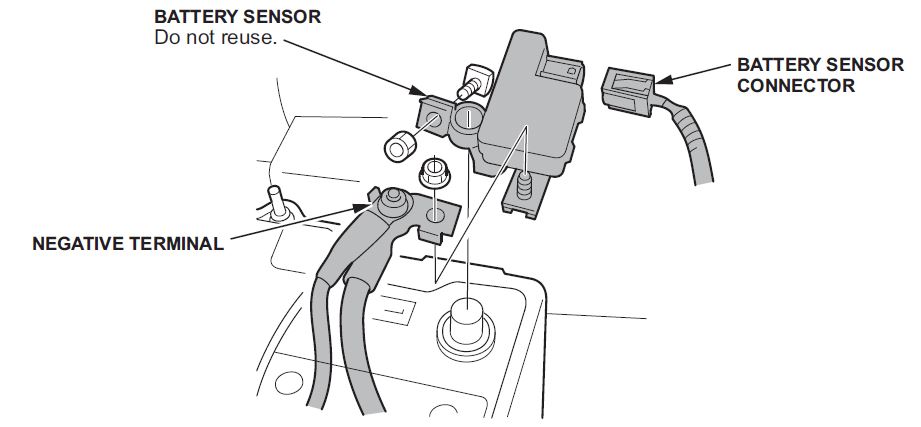
- Remove the battery sensor from the battery.
- Disconnect the negative terminal from the battery sensor, then remove the battery sensor.
NOTE: Make sure the areas between the negative terminal and the battery sensor are clean. To protect the battery sensor connector from any damage, do not hold it when installing the negative terminal.
- Install the new battery sensor onto the battery and torque the mounting nuts to 9–5.9 N·m (2.1–5.1 lb-ft)
- Install the negative terminal onto the battery sensor and torque the mounting nuts to 6.9–11.8 N·m (5.1–8.7 lb-ft).
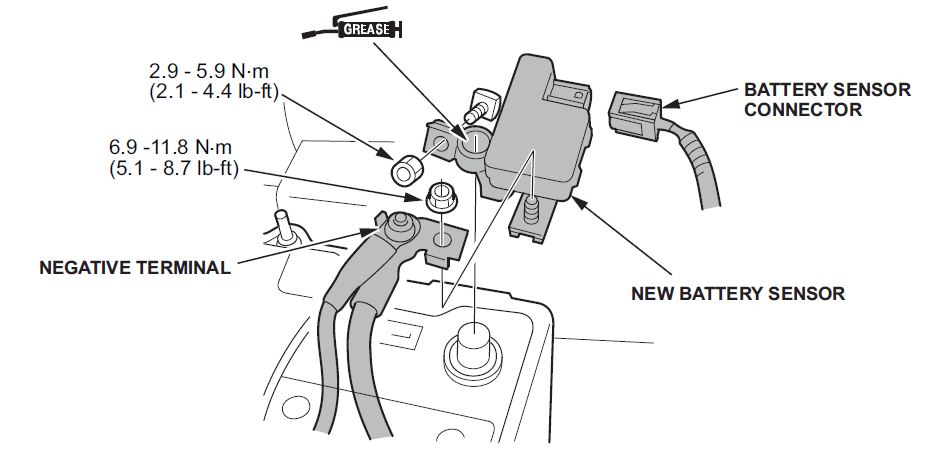
- Connect the battery sensor connector.
- Apply multipurpose grease to the terminal to prevent corrosion.
- Reset the clock to the correct time (non-navigation vehicles only).
END

- RUN 3 TESTS WITH 1 DEVICE: Diagnose battery health, charging system performance, and starter motor draw all from one automotive battery tester—no need for separate tools cluttering your bench.
- TEST WITH CONFIDENCE: Safely handle 6V and 12V batteries up to 1,000 CA with a 50-amp 6V load test and a 100-amp 12V load test, so you get accurate readings on nearly any battery you throw at it.
- WORKS ON WHAT YOU DRIVE: Compatible with gas and diesel vehicles, this 6V and 12V battery tester covers motorcycle, ATV, lawn tractor, car, boat, light truck, and RV batteries—one unit for your entire garage.
- READ RESULTS IN SECONDS: A top-mounted rocker switch and a highly visible analog meter make operation simple, giving you quick and clear results while you hold the unit.
- COMPLETE PACKAGE: Includes (1) BT-100 Battery Load Tester and Voltmeter, (1) User Manual


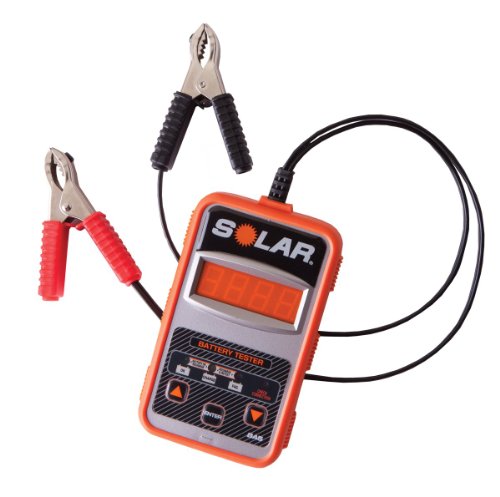
- Test 12-volt batteries from 100-1200 CCA, operating range from 7-15 volts
- Test multiple battery types, including conventional, AGM, gel cell, spiral wound, and deep cycle batteries (with a starting rating)
- LED indication of battery and system pass or fail (as applicable), plus derived reading for the battery tested
- Easy to use--the device guides you through each step in the testing process
- Bright 4-digit LED display is great for bright- or low-light settings
This product presentation was made with AAWP plugin.