| “This site contains affiliate links for which OEMDTC may be compensated” |
A14-037
June 27, 2014
ATB 51804 (1406)
Product Update: Front Passenger’s Door Glass Separates From Regulator
AFFECTED VEHICLES
| Year | Model | Trim | VIN Range |
| 2014 | CR-V | ALL | Check the iN VIN status for eligibility |
BACKGROUND
The incorrect primer was used on the glass before it was glued to the holders that attach the glass to the regulator. The glass can separate from the regulator and may come off the track, causing the glass to stop working and preventing it from being rolled up or down.
NOTE: There are two bulletins for the front door glass:
- 14-036 Product Update: Driver’s Door Glass Separates From Regulator
- 14-037 Product Update: Front Passenger’s Door Glass Separates From Regulator
Vehicles may have the driver’s door glass, the passenger’s front door glass, or the glass in both front doors replaced. Make sure you do only the bulletin(s) as directed by the iN VIN status inquiry.
CORRECTIVE ACTION
Replace the front passenger’s door glass.
CUSTOMER NOTIFICATION
Owners of affected vehicles will be sent a notification of this campaign.
Do an iN VIN status inquiry to make sure the vehicle is shown as eligible.
Some vehicles affected by this campaign may be in your new or used vehicle inventory. Repair these vehicles before they are sold.
PARTS INFORMATION
| Part Name | Part Number | Quantity |
| Right (Passenger’s) Front Door Glass | 73300-T0G-G00 | 1 |
WARRANTY CLAIM INFORMATION
| Operation Number | Description | Flat Rate Time | Template ID | Failed Part Number |
| 8271B3 | Replace the front passenger’s door glass. | 0.6 hour | 14-037A | 73300-T0G-G00 |
Defect Code: 5HJ00
Symptom Code: JF000
Skill Level: Repair Technician
REPAIR PROCEDURE
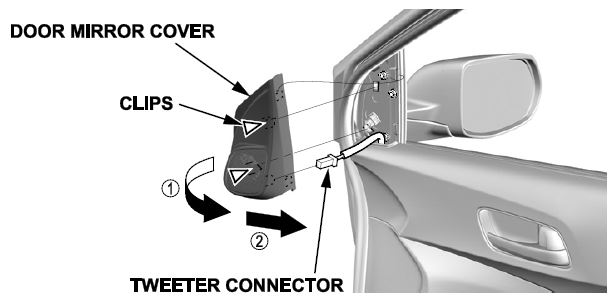
- Using the applicable trim tool, carefully pry out the door mirror cover to detach the clips, then remove the door mirror cover. Disconnect the tweeter connector (if applicable).
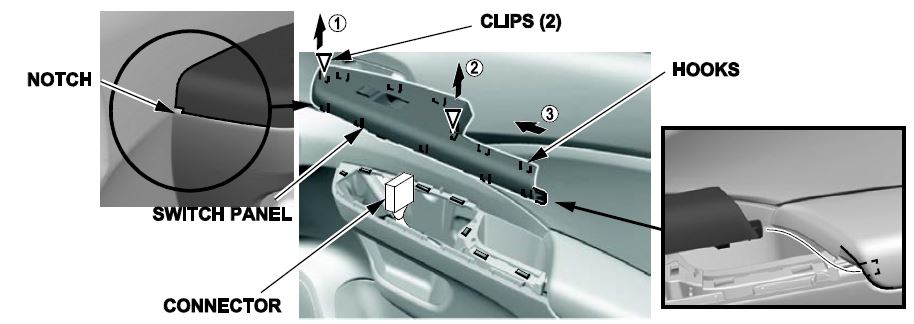
- Carefully remove the power window switch panel by prying it out at the notch to detach the clips and the hooks, then disconnect the connectors, and remove the switch panel.
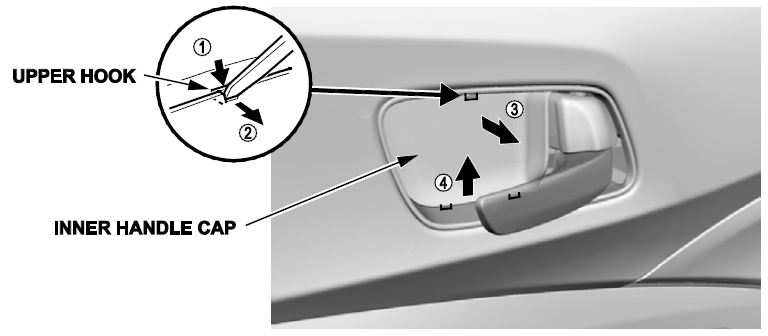
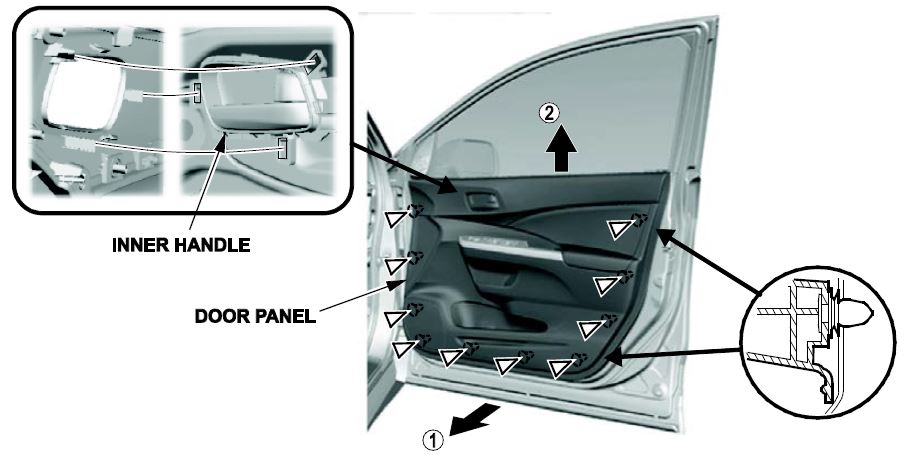
- Carefully pry out at the upper hook in the inner handle cap, then pull back the inner handle cap to remove it.
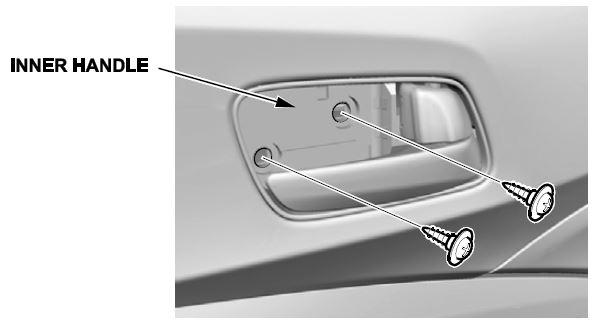
- Remove the screws.
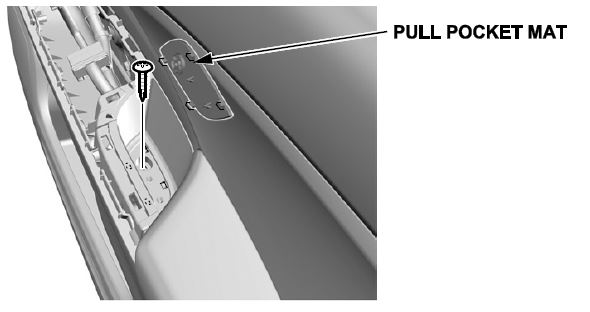
- Remove the pull pocket mat, then remove the screw.
- Remove the door panel:
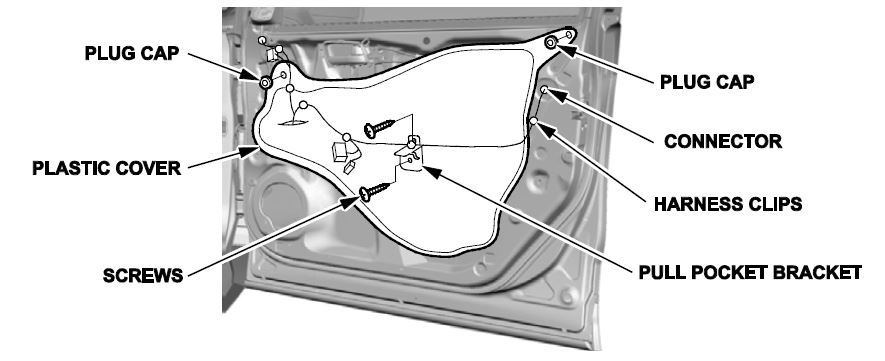
- Disconnect the connector, and detach the harness clips.
- Remove the pull pocket bracket.
- Remove the plug caps, and carefully remove the plastic cover.
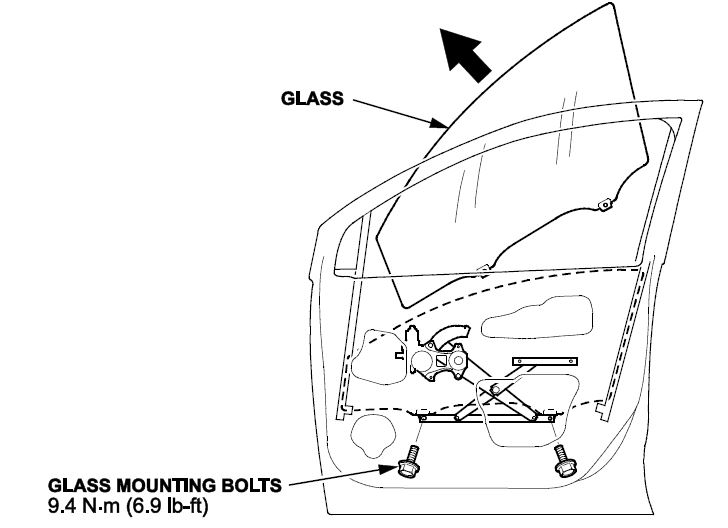
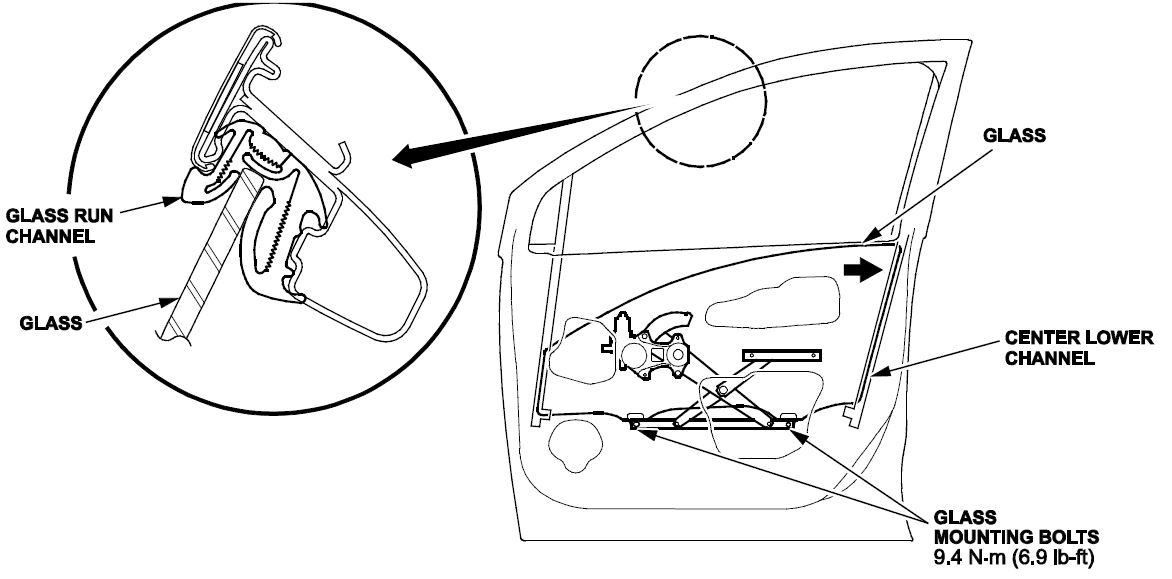
- Temporarily connect the switch, and carefully lower the glass until you can see the glass mounting bolts, then remove them. Pull the glass out through the window slot. Be careful not to drop the glass inside the door.
- Install the new glass through the window slot, then install the glass mounting bolts and torque them to 4 N·m (6.9 lb-ft).
NOTE:
- Check the weatherstrip and glass run channel for damage.
- Wipe the run channel clean with a shop towel.
- Verify that the window closes properly. If it does not, adjust the glass:
- Move the vehicle to a hard, flat surface if necessary.
- Carefully move the glass until you can see the glass mounting bolts, then loosen them.
- Push the glass against the center lower channel, then tighten the mounting bolts, then retighten them.
- Make sure that the glass moves smoothly.
- Raise the glass until the window is closed, and check for gaps. Make sure the glass evenly contacts the run channel.
- Reinstall the remaining parts.
END
 Loading...
 Loading...
