| “This site contains affiliate links for which OEMDTC may be compensated” |
A14-057
September 16, 2014
ATB 52107 (1409)
Product Update: 2015 Fit Front Bumper Beam
AFFECTED VEHICLES
| Year | Model | Trim | VIN Range |
| 2015 | Fit | ALL | Check the iN VIN status for eligibility |
BACKGROUND
After production of the 2015 Fit had begun, the design of the front bumper beam was changed to improve narrow offset (also known as small overlap) front crash test dynamics. Because early production vehicles were manufactured with the original front bumper beam design, American Honda has decided to provide the owners of those vehicles with the updated front bumper beam through this product update campaign.
CORRECTIVE ACTION
Replace the front bumper beam.
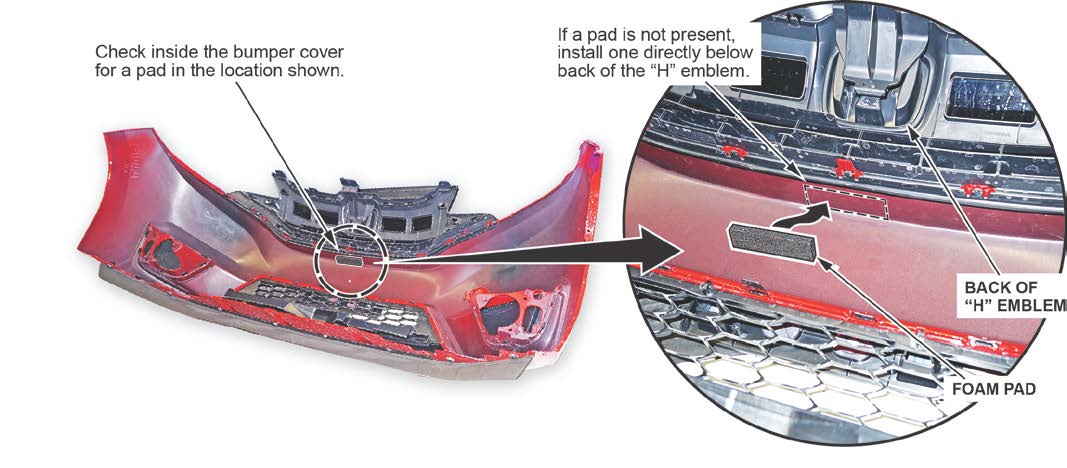
NOTE: Some early production vehicles may also need to have a foam pad installed on the bumper.
CUSTOMER NOTIFICATION
Owners of affected vehicles will be sent a notification of this campaign.
Do an iN VIN status inquiry to make sure the vehicle is shown as eligible.
Some vehicles affected by this campaign may be in your new or used vehicle inventory. Repair these vehicles before they are sold.
PARTS INFORMATION
| Part Name | Part Number | Quantity |
| Bumper Beam | 71130-T5R-A01ZZ | 1 |
| Foam Pad | 71570-TX4-A00 | 1 (if needed) |
WARRANTY CLAIM INFORMATION
| Operation Number | Description | Flat Rate Time | Template ID | Failed Part Number |
| 810125 | Replace the front bumper beam. | 0.6 hour | 14-057A | 71130-T5R-A00ZZ |
| Operation Number | Description | Flat Rate Time | Template ID | Failed Part Number |
| 810125 | Replace the front bumper beam. | 0.6 hour | 14-057B | 71130-T5R-A00ZZ |
| A | Add the foam pad. | 0.1 hour |
Defect Code: 5JW00
Symptom Code: JG200
Skill Level: Repair Technician
UPDATE PROCEDURE
- Raise and support the vehicle about chest high so you can easily access the front bumper.
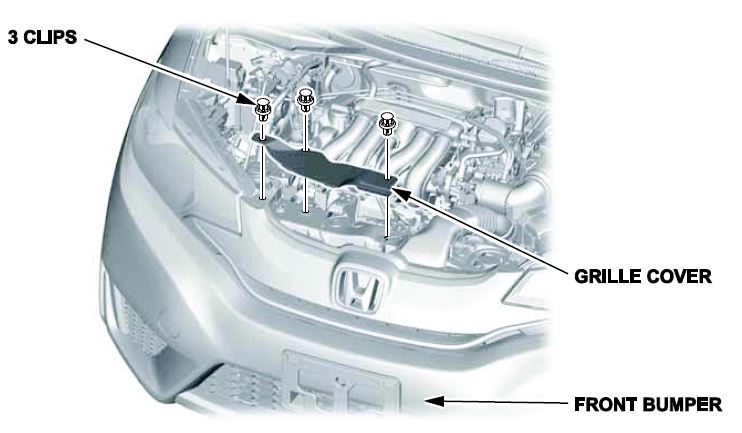
- Remove the front grille cover.
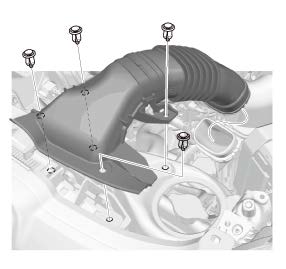
- Remove the intake air duct.
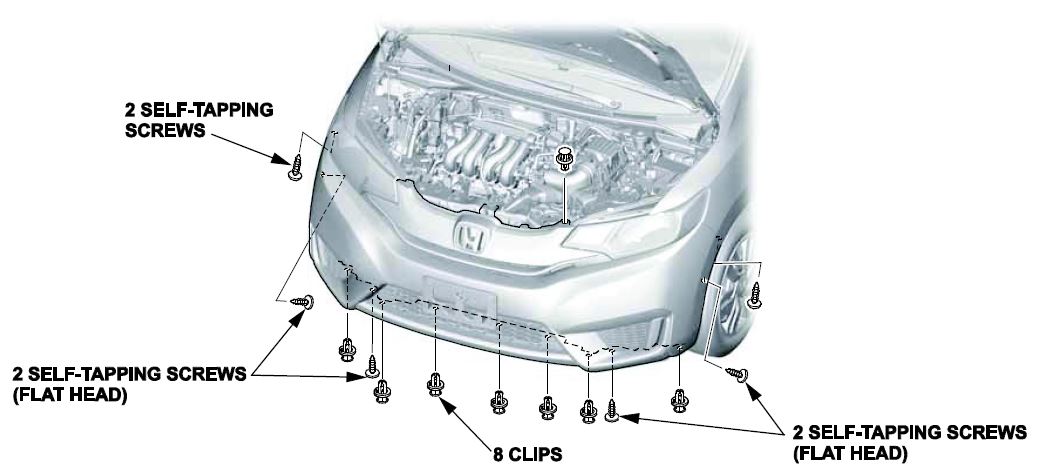
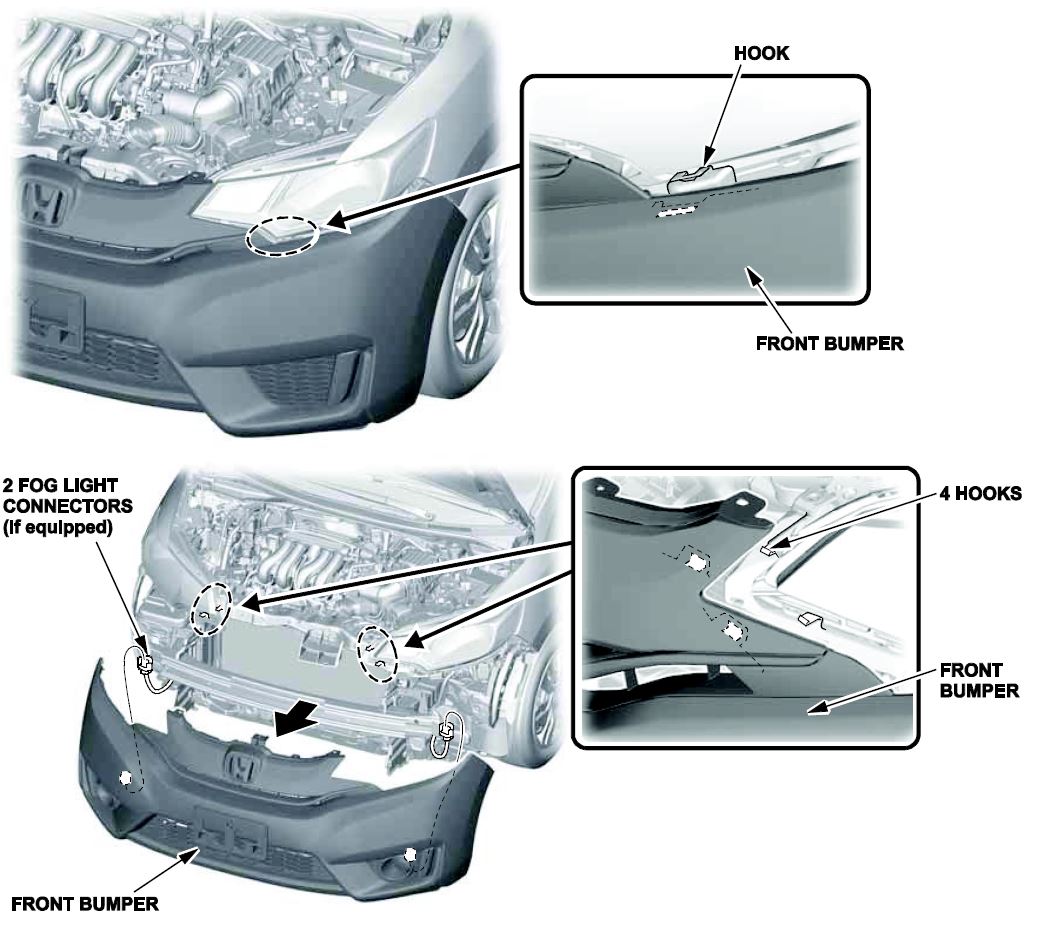
- Remove front bumper by removing the screws and clips.
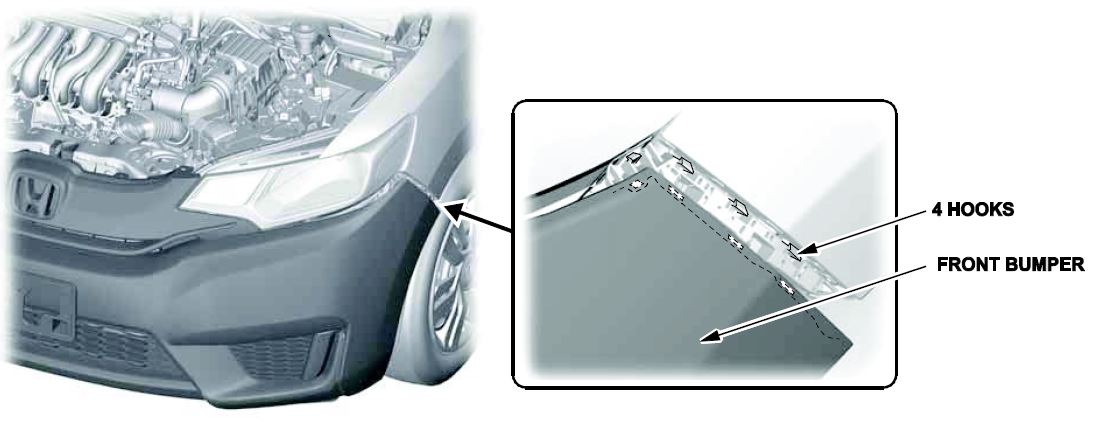
- With the help of an assistant, gently pull the front bumper away from the side spacer and release the bumper from the hooks on the upper beam, then remove the front bumper.
NOTE: If the vehicle is equipped with fog lights, disconnect the connectors while your assistant holds the front bumper.
- Inspect the inside of the bumper cover for a foam pad. If there is no pad present, install one.
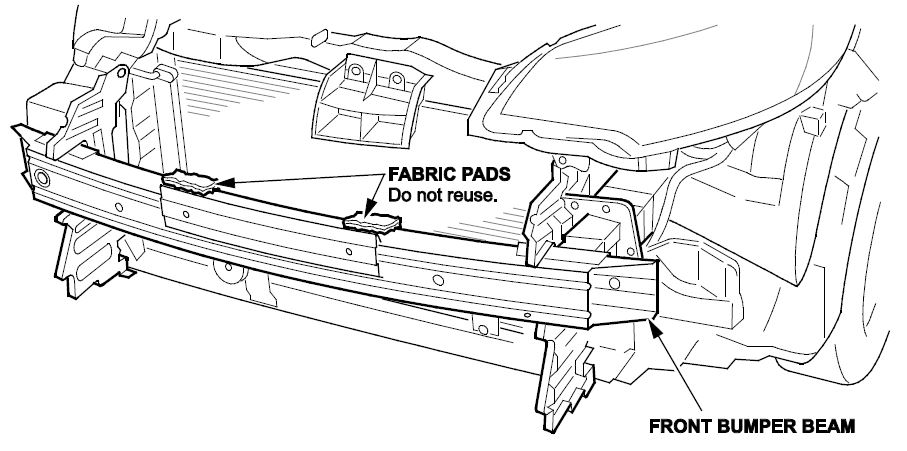
NOTE: There may be two fabric pads located on the front bumper beam. Do not reuse or replace these pads when you replace the bumper beam.
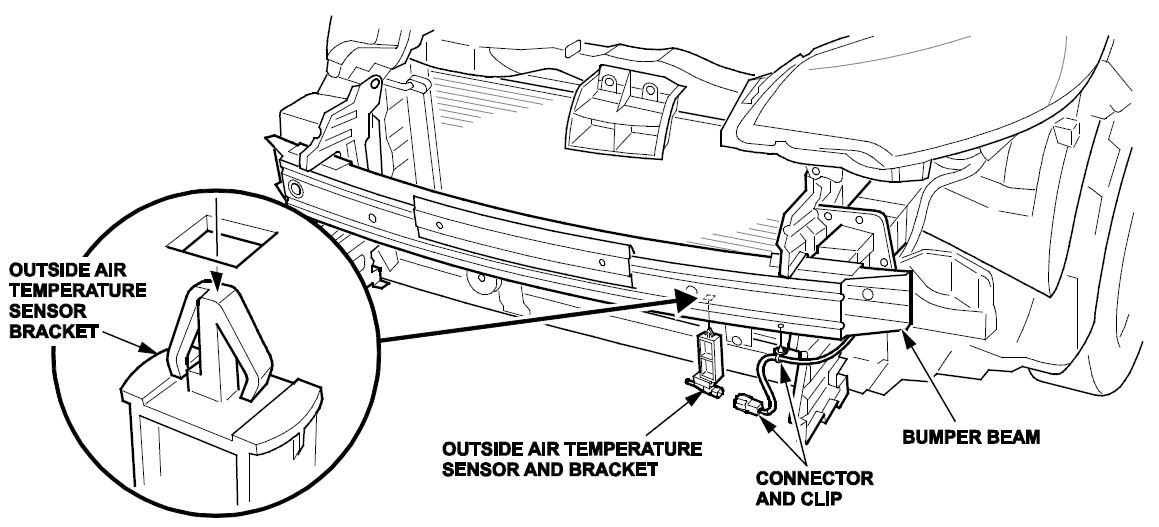
- Remove the outside air temperature sensor by disconnecting the connector and the harness clip. Squeeze the tabs on the outside air temperature sensor bracket to release the lock and remove it.
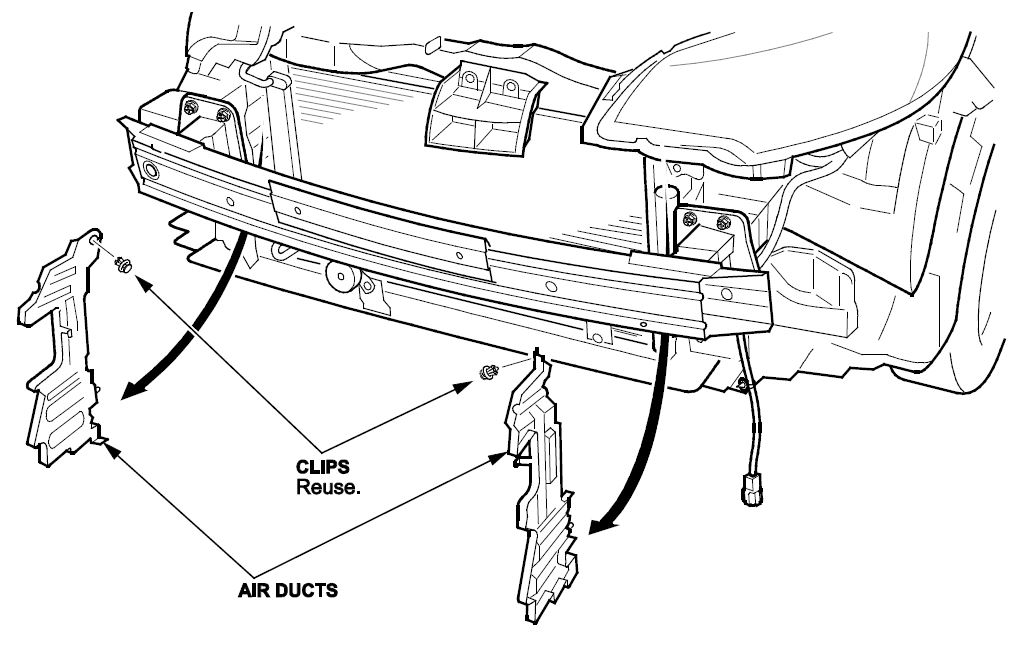
- Remove the air ducts.
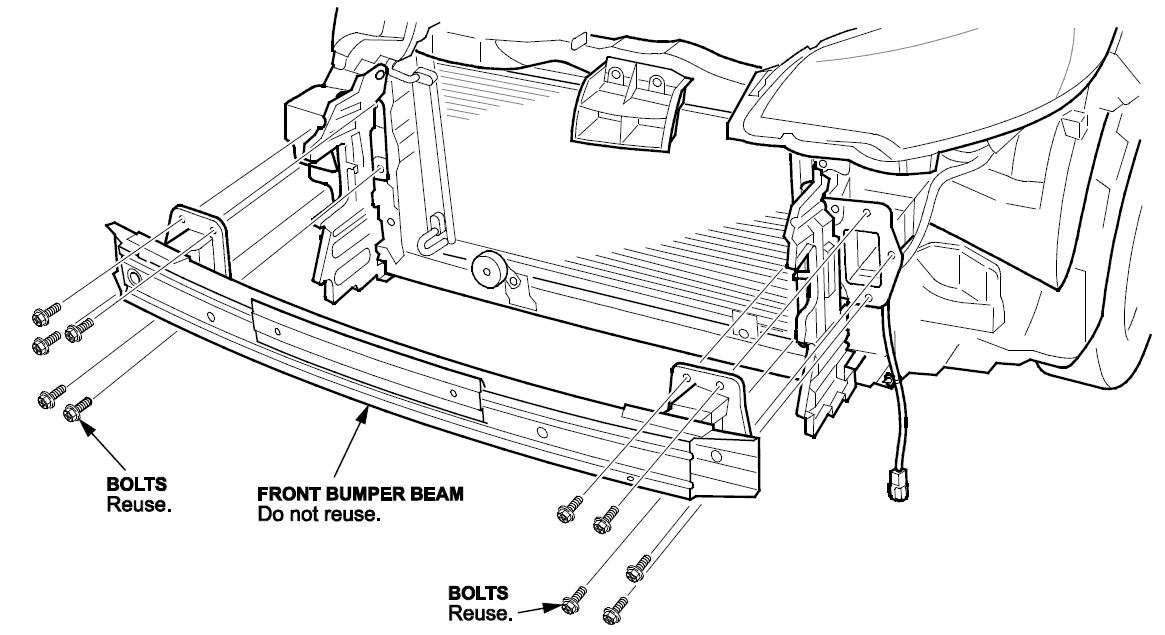
- Remove the front bumper beam.
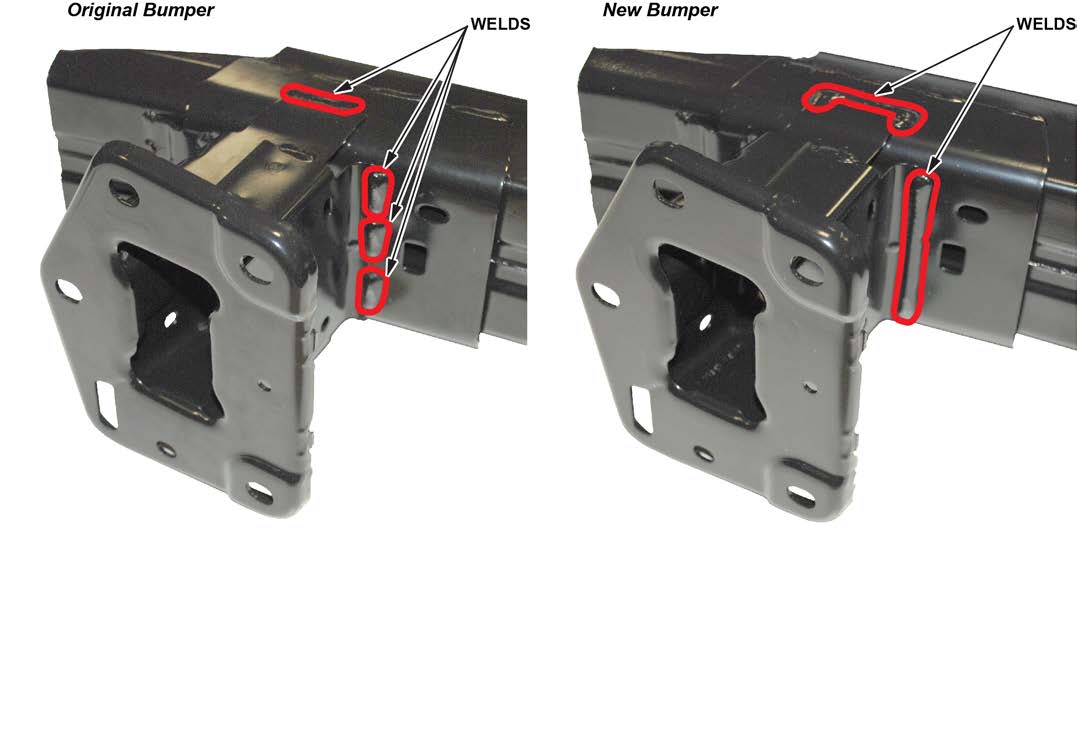
NOTE: Both parts are similar but you can tell the new part from the original part by looking at the weld seams where the bracket connects to the beam as shown.
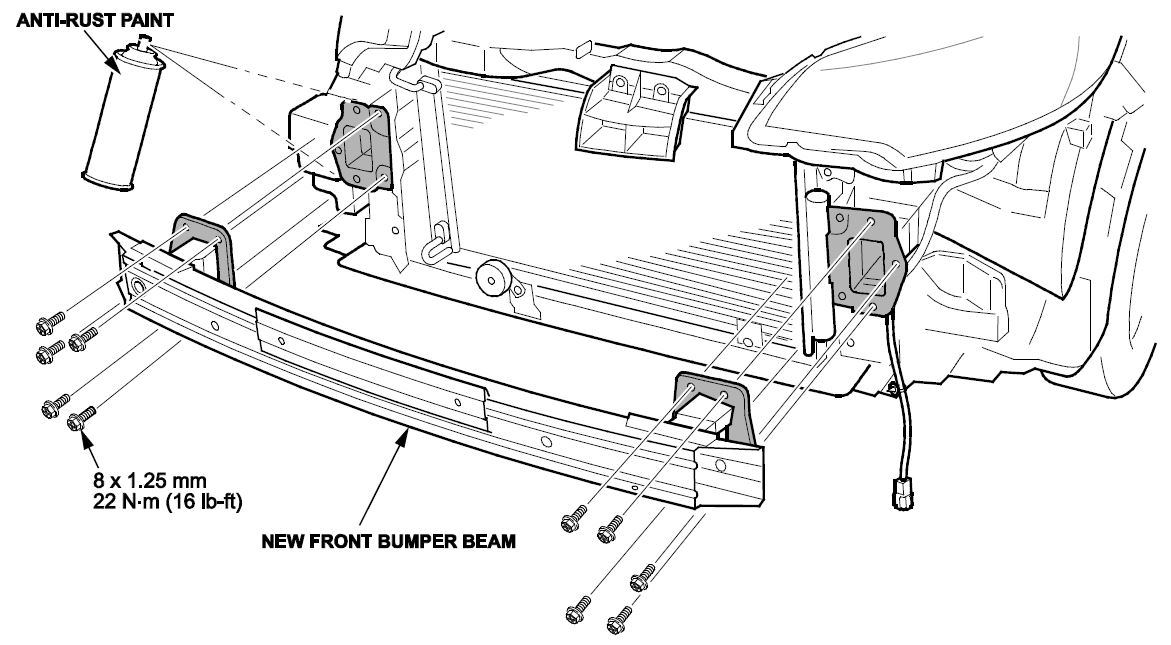
- Apply a commercially available anti-rust paint like 3M Rust Fighter anti-rust coating (3M P/N 08892) or equivalent to the areas shown, then install the new front bumper beam and torque the bolts to 22 N·m (16 lb-ft).
- Install the front grille cover.
- Write your dealer number and RO number on the original front bumper beam with a white paint pen before returning it.
END
 Loading...
 Loading...
