| “This site contains affiliate links for which OEMDTC may be compensated” |
B14-047
November 25, 2014
BTB 00387 (1411)
Front Door Sash Outer Trim Is Loose, Warped, or Causing a Wind Noise
AFFECTED VEHICLES
| Year | Model | Trim | VIN Range |
| 2014 | RLX | ALL | ALL |
| 2014 | RLX Hybrid | ALL | ALL |
SYMPTOM
The front door sash outer trim is loose, warped, or causing a wind noise.
POSSIBLE CAUSES
The double sided tape on the front door sash outer trim is not strong enough.
CORRECTIVE ACTION
Replace the front door sash outer trim.
PARTS INFORMATION
| Part Name | Part Number | Quantity |
| Left Front Door Sash Outer Trim | 72470-TY2-A01 | 1 |
| Right Front Door Sash Outer trim | 72430-TY2-A01 | 1 |
WARRANTY CLAIM INFORMATION
The normal warranty applies.
| Operation Number | Description | Flat Rate Time | Template ID | Failed Part Number |
| 8261B8 | Replace the left front door sash outer trim. | 0.7 hr | 14-047N | 72470-TY2-A01 |
| 8271B4 | Replace the right front door sash outer trim. | 0.7 hr | 14-047P | |
| 8261B9 | Replace the left and right front door sash outer trims. | 1.2 hrs | 14-047Q |
Defect Code: 06201
Symptom Code: 04201
Skill Level: Repair Technician
REPAIR PROCEDURE
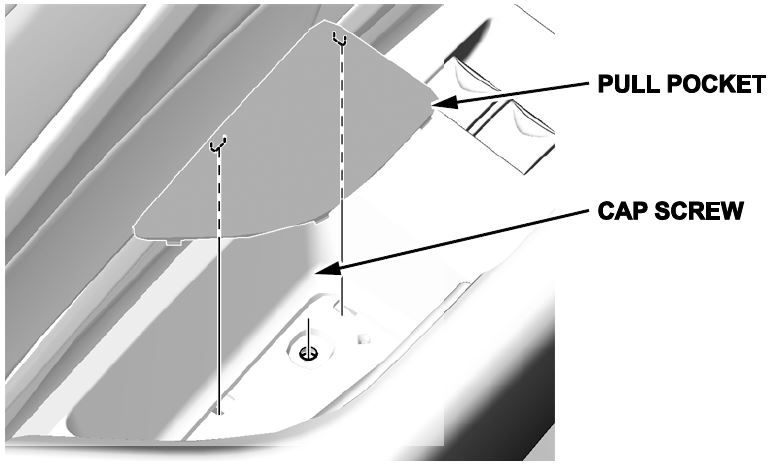
- Remove the pull pocket and the cap screw.
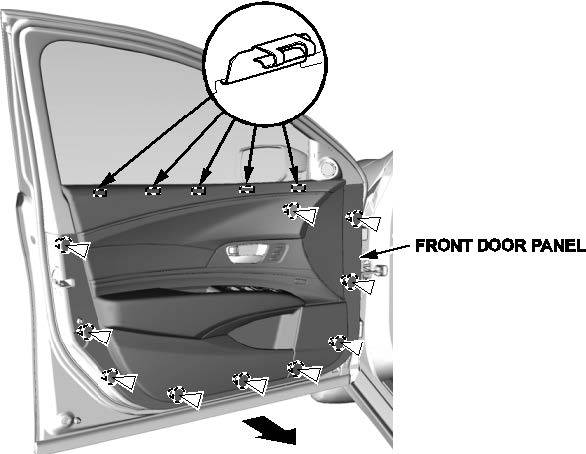
- Starting at the bottom edge of the front door panel, remove the clips with a commercially available trim pad remover.
- Starting at the rear, pull out on the door panel.
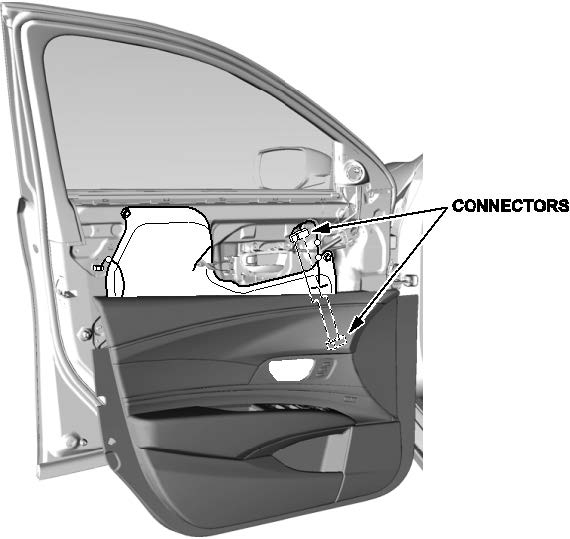
- While holding the front door panel away from the door, disconnect the front door wire harness connectors.
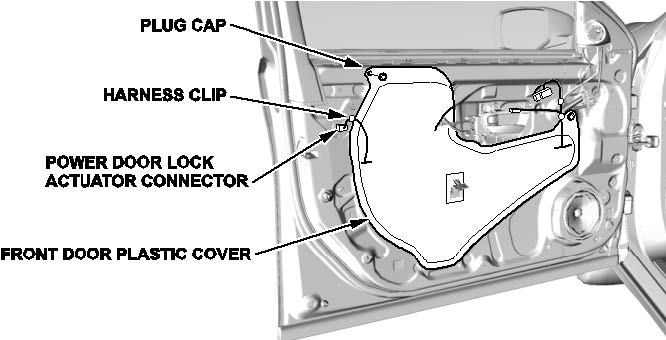
- Disconnect the power door lock actuator connector and remove the harness clip.
- Remove the plug cap.
- Remove the front door plastic cover as needed.
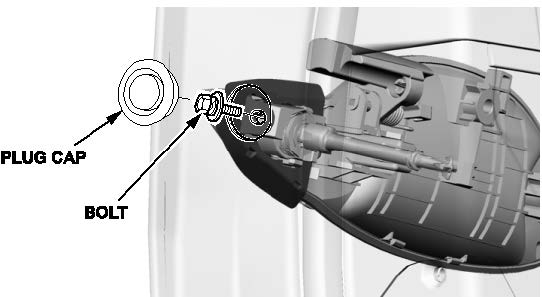
- Remove the plug cap and the bolt.
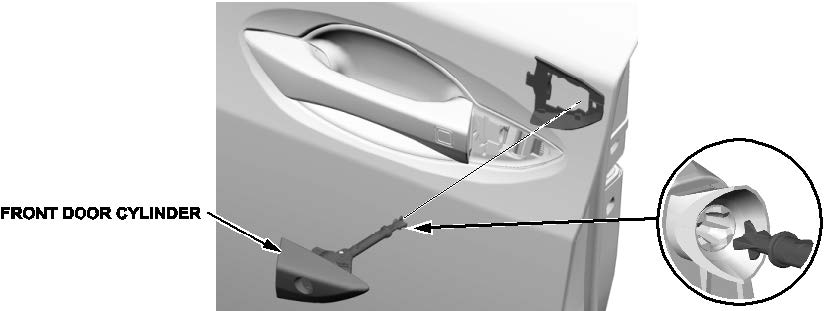
- Remove the front door cylinder.
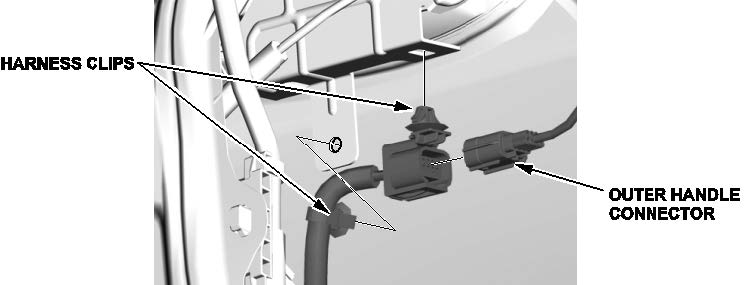
- Disconnect the outer handle connector.
- Remove the harness clips.
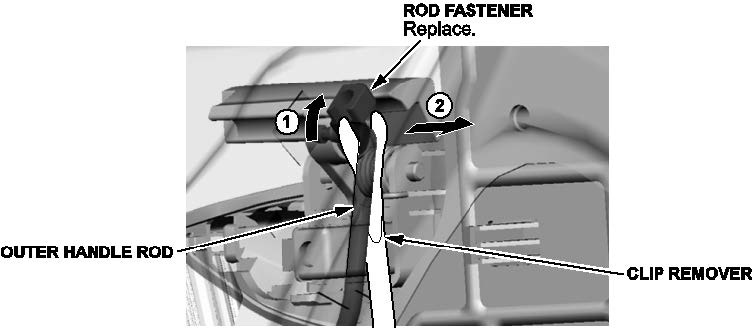
- Disconnect the outer handle rod with a clip remover.
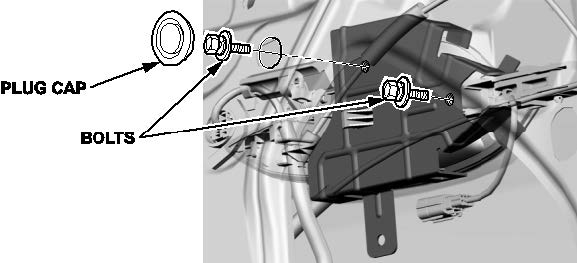
- Remove the plug cap and the bolts.
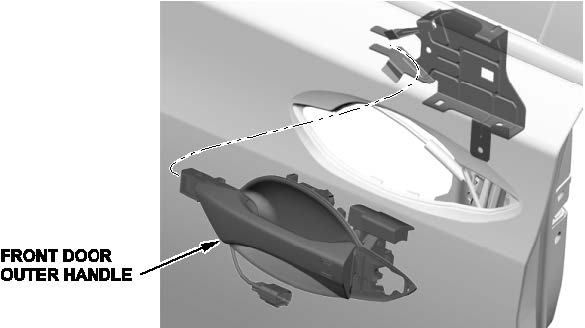
- Remove the front door outer handle.
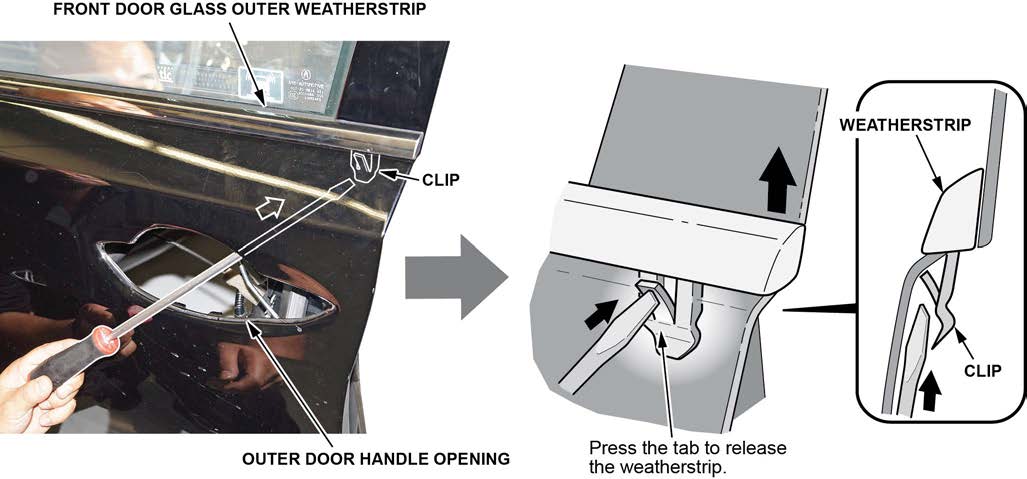
- Release the clip from the window trim using a flat edge screwdriver, then pull up on the trim to remove it.
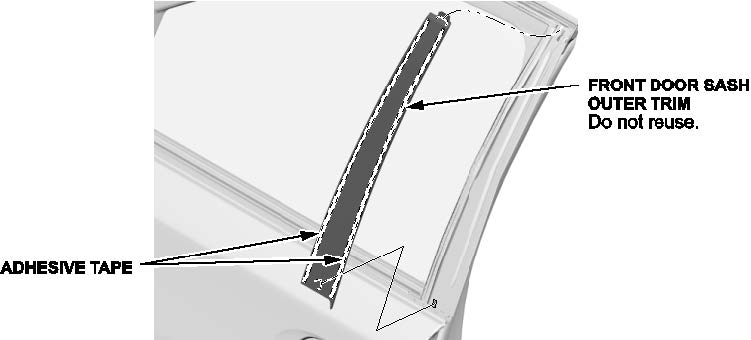
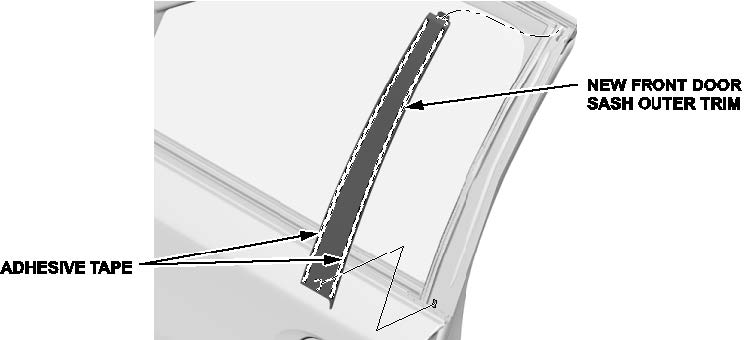
- Pull out the upper edge of the front door sash outer trim from the edge of the sash and cut the double-sided adhesive tapes with a utility knife. Then remove the front door sash outer trim.
- Carefully remove the remaining double-sided adhesive tapes from the sash, then clean the surface with a shop towel dampened with isopropyl alcohol.
- Remove the backing from the new front door sash outer trim, then install it to the door sash.
- Repeat the procedure on the opposite side if needed.
- Reinstall all removed parts in the reverse order of removal.
END
 Loading...
Price Disclaimer
Price Disclaimer
