| “This site contains affiliate links for which OEMDTC may be compensated” |
ServiceNews Article
April 8, 2015
A15040C Version 1
Removing a Stripped or Broken T-30 Torx Fastener from the Steering Wheel
AFFECTED VEHICLES
General Information
EDITOR’S NOTE: This article replaces “Tips for Removing Stripped or Broken T-30 Torx Bolts,” posted in September 2013.
Have you ever stripped or broken a T-30 Torx fastener while removing the driver’s airbag from the steering wheel? It can put a real crimp in your day. Here’s what you can do to make short work of this problem.
Stripped Fastener
- Make sure the steering wheel is in its straight-ahead position. Then, turn the ignition to OFF and turn the steering wheel clockwise until it locks.
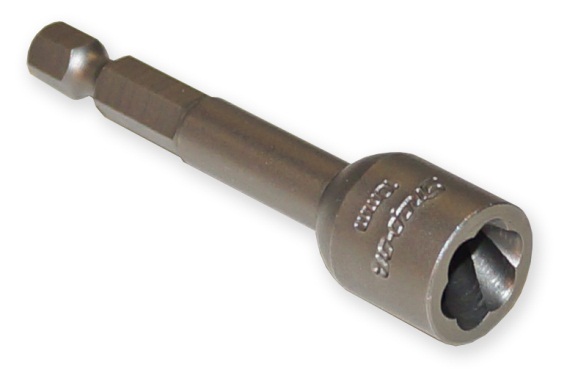
- With a hammer, tap a 10 mm Power Fastener Hex Extractor (Model No. BETM710) onto the fastener head.
NOTE: This tool is commercially available or you can order it from the Honda Tool and Equipment Program. If you’re a Honda
 dealer, go to the iN main menu, click on SERVICE, Service Bay, and Tool and Equipment Program. If you’re a ServiceExpress subscriber, from the home page, click on Tool & Equipment Programs – Online Catalogs (Honda
 ).
).
Enter the tool number in the search box and click on Search. You can also call them at 888-424-6857.
- Attach a socket or power tool to the extractor’s shank, then slowly remove the fastener by turning it counterclockwise. Always turn in this direction; the tool won’t work unless you do.
- If the other Torx fastener is stripped, repeat these steps, making sure you turn the steering wheel counterclockwise until it locks.
Broken Fastener
- Remove the airbag, then the steering wheel. Clamp the steering wheel in a vice on a workbench.
- Heat the area around the broken fastener with a pencil pinhead torch; this helps to loosen the bolt.
- Grab the undamaged end of the fastener with a pair of small vise-grip pliers. Make sure you grab it by the non-threaded part so you don’t damage any threads. Heat the area until you can freely turn the fastener with the pliers, then turn off the torch.
- Turn the fastener clockwise until the damaged end sticks out from the fastener hole. Now, grab that end with the pliers and turn the fastener counterclockwise until it’s free of the hole.
- Run a 6.0 mm x 1.0 mm tap through the hole.
- Reinstall the steering wheel.
 Loading...

