| “This site contains affiliate links for which OEMDTC may be compensated” |
A14-076
March 24, 2015
00393-01725 Version 2
Rattle from the Tailgate Area on Rough Roads or Going over Bumps
(Supersedes 14-076, dated December 4, 2014, to revise the information highlighted in yellow.)
AFFECTED VEHICLES
| Year | Model | Trim | VIN Range |
| 2011–15 | Odyssey | All with power tailgate | ALL |
REVISION SUMMARY
The illustration and torque setting has been changed in step 13.
SYMPTOM
There is a rattle from the tailgate area when driving on rough roads or going over bumps.
POSSIBLE CAUSES
The power tailgate arm has too much play.
CORRECTIVE ACTION
Replace the power tailgate arm.
PARTS INFORMATION
| Part Name | Part Number | Quantity |
| Power Tailgate Arm | 74966-TK8-A01 | 1 |
WARRANTY CLAIM INFORMATION
The normal warranty applies.
| Operation Number | Description | Flat Rate Time | Template ID | Failed Part Number |
| 8231K8 | Replace the power tailgate arm. | 1.5 hrs | 14-076A | 74966-TK8-A01 |
Defect Code: 03217
Symptom Code: 04201
Skill Level: Repair Technician
REPAIR PROCEDURE
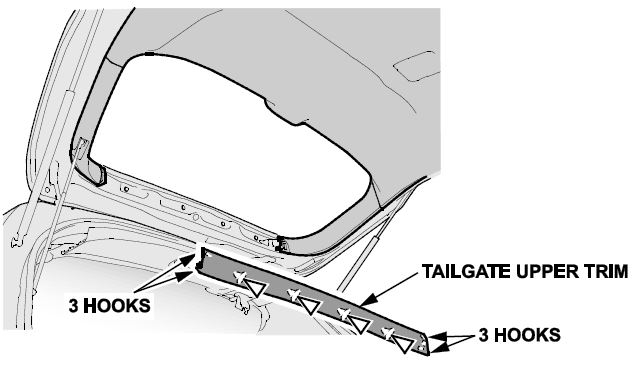
- Remove the tailgate upper trim by releasing the hooks, pulling out on the trim to detach the clips, then removing the trim.
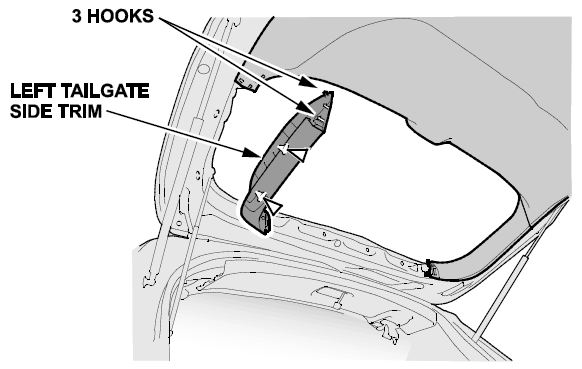
- Remove the left tailgate side trim by releasing the hooks, pulling out on the top of the trim to detach the clips, then removing the left tailgate side trim.
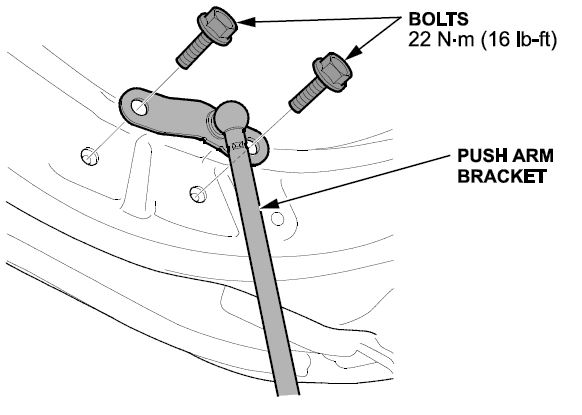
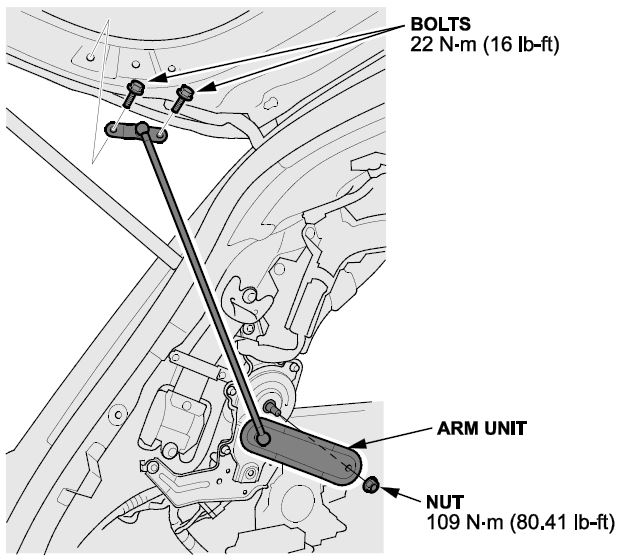
- Remove the bolts from the power tailgate push arm bracket, then release the bracket from the tailgate.
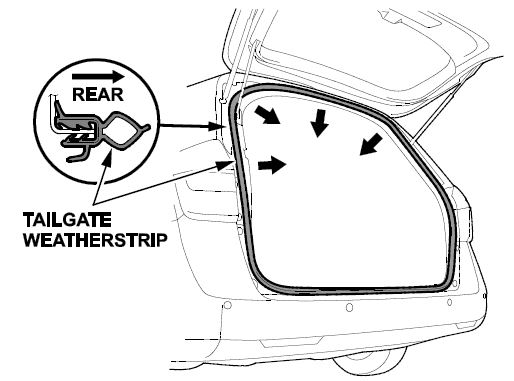
- Remove the tailgate weatherstrip, as needed, by pulling it out.
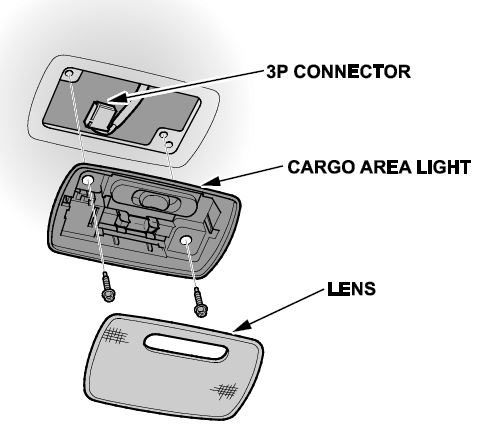
- Carefully pry off the lens with a flat-tip screwdriver.
- Remove the two screws, then remove the cargo area light.
- Disconnect the 3P connector from the cargo area light.
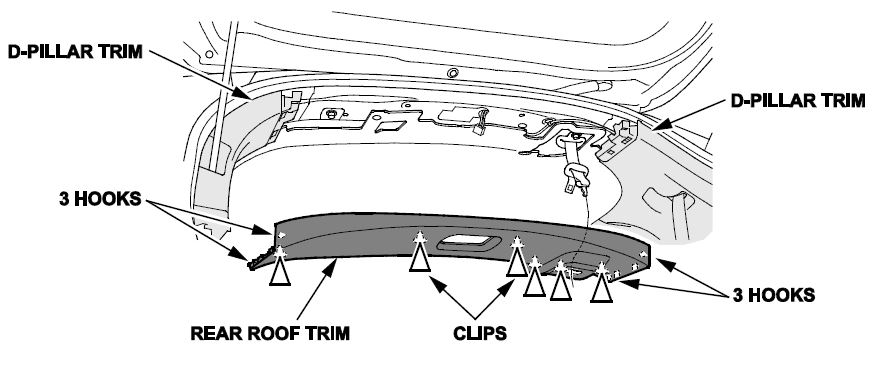
- Release the hooks from the D-pillar trim. Pull down on the rear roof trim to detach the clips, then remove the trim.
- Release the hooks from the D-pillar trim. Pull down on the rear roof trim to detach the clips, then remove the trim.
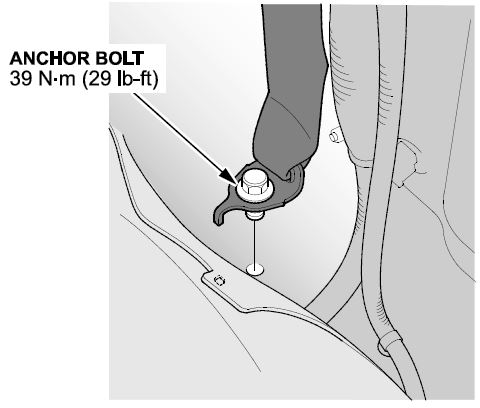
- Remove the third row seat belt lower anchor bolt.
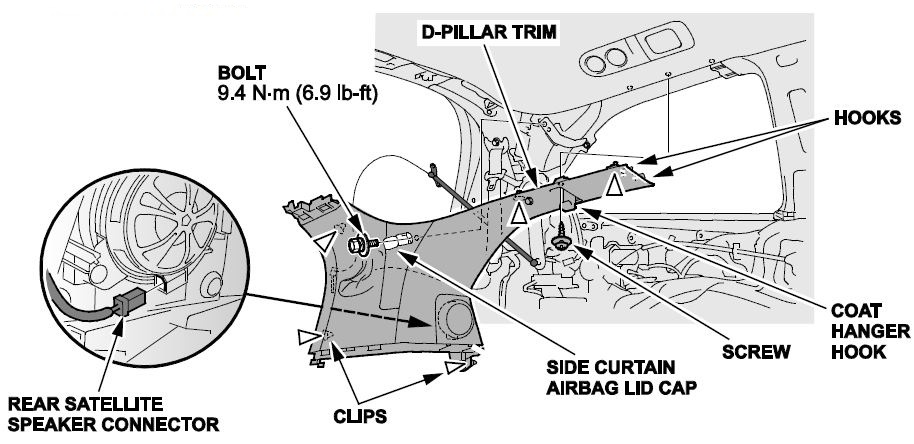
- Remove the D-pillar trim.
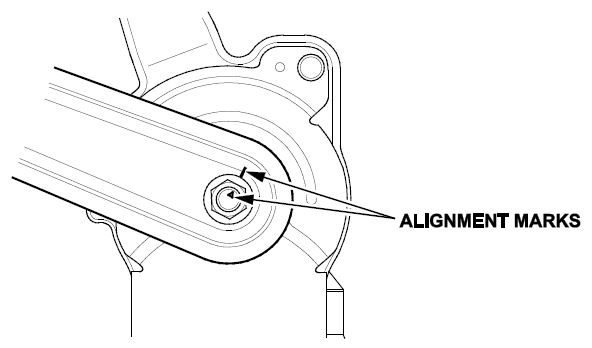
- Note the alignment marks on the drive unit and the arm unit. Carefully remove the nut, and the arm unit.
- 13Install the new power tailgate arm and torque the bolts to 22 N·m (16 lb-ft) and the nut to 109 N·m (80.41 lb-ft).
- Install all parts in the reverse order of removal.
NOTE:
- Any cracks, deformations, or stress-whitened areas in the D-pillar trim, or any stress-whitened areas in the upper part of the trim.
- Any cracks or stress-whitening in the clip seating surfaces.
- If the clips are damaged or stress-whitened, replace them with new ones.
END
 Loading...


I fixed the rattling issue with a 3 cents zip tie, fastened on the dowel/pin of the push arm, preventing it from moving loosely. Works like a charm, while still allowing the arm to pivot and flex as needed.