| “This site contains affiliate links for which OEMDTC may be compensated” |
B14-024
January 20, 2015
51321-00375 Version 3
Chirping From the Engine Area While Driving On Rough Roads in Hot Weather
Supersedes 14-024, dated July 23, 2014, to revise the information highlighted in yellow.
AFFECTED VEHICLES
| Year | Model | Trim | VIN Range |
| 2013−15 | ILX | ALL Except Hybrid | ALL Except Hybrid |
REVISION SUMMARY
- Under AFFECTED VEHICLES, the 2015 Year Model was added and the trim levels were changed to ALL.
- Under PARTS INFORMATION, the 2.4 liter side engine mount and flange bolt was added.
SYMPTOM
There is a chirping from the engine area while driving on rough roads in high ambient temperatures.
POSSIBLE CAUSE
The side engine mounts internal components are rubbing together, causing a noise.
CORRECTIVE ACTION
Replace the side engine mount.
PARTS INFORMATION
| Part Name | Part Number | Quantity |
| Side Engine Mount (2.0 liter engine) | 50820-TX6-A82 | 1 |
| Side Engine Mount (2.4 liter engine) | 50820-TX6-A01 | 1 |
| Flange Bolt (12 mm x 97 mm) | 90165-SWY-E00 |
1 |
| Flange Bolt (12 mm x 35 mm) | 90168-S5A-000 | 2 |
| Flange Bolt (14 mm x 47 mm) | 90160-TR0-A10 |
1 |
| Flange Bolt (14 mm x 47mm ) (2.4 liter) | 90160-SVB-A00 | 1 |
| Flange Nut (14 mm) | 90371-SJD-003 | 1 |
WARRANTY CLAIM INFORMATION
The normal warranty applies.
| Operation Number | Description | Flat Rate Time | Template ID | Failed Part Number |
| 1121A5 | Replace the side engine mount. | 0.8 hr | 14-024N | 50820-TX6-A80 |
Defect Code: 03214
Symptom Code: 07303
Skill Level: Repair Technician
DIAGNOSIS
Test-drive the vehicle on a rough road and listen for the chirping.
- If you hear a chirping, go to REPAIR PROCEDURE.
- If you do not hear a chirping, this bulletin does not apply, continue with normal troubleshooting.
REPAIR PROCEDURE
- Raise the vehicle on a lift.
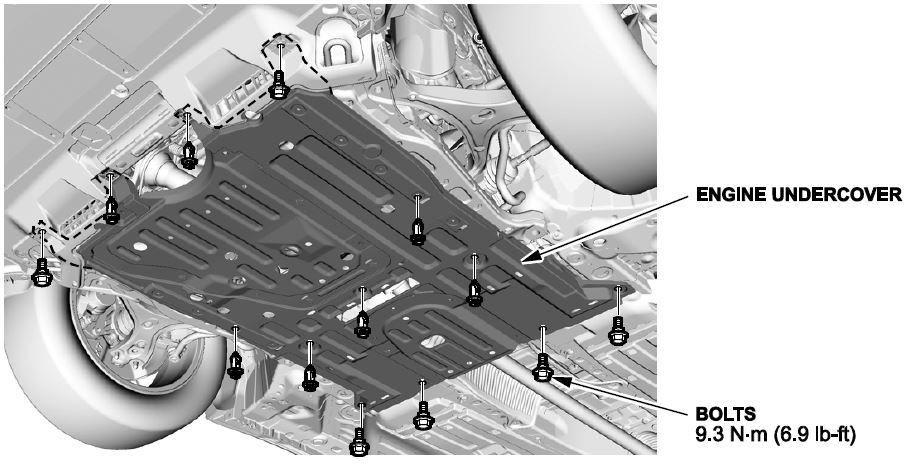
- (2.0 liter engine only): Remove the engine undercover. Place a floor jack with a wood block under the oil pan to support the engine.
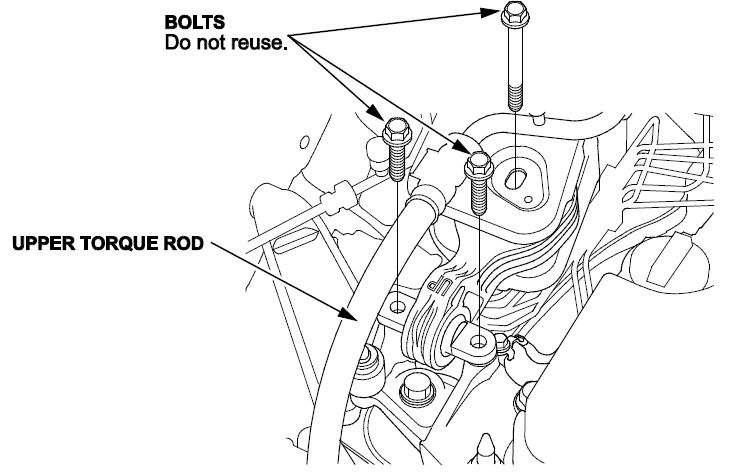
- Remove the upper torque rod.
- Remove the side engine mount bracket.
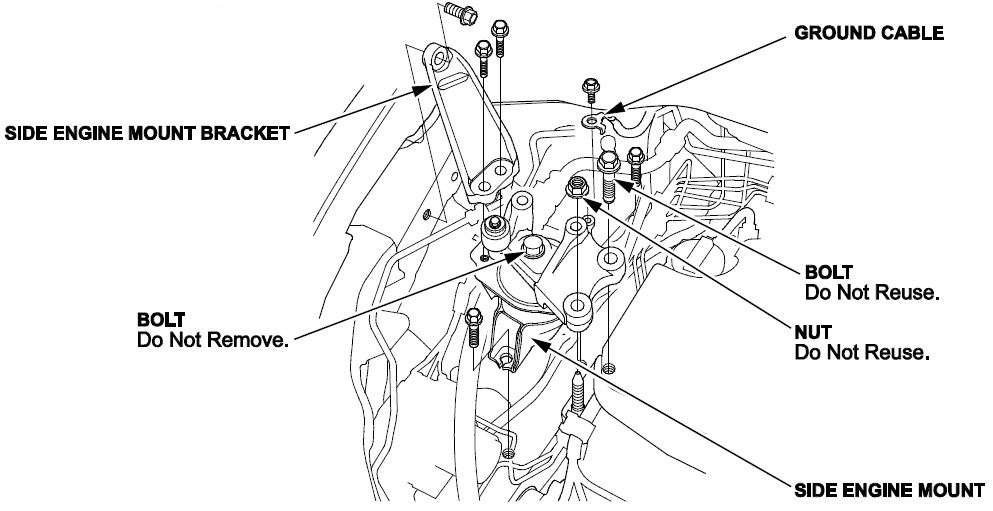
- Remove the ground cable.
- Remove the side engine mount.
- Install the new side engine mount.
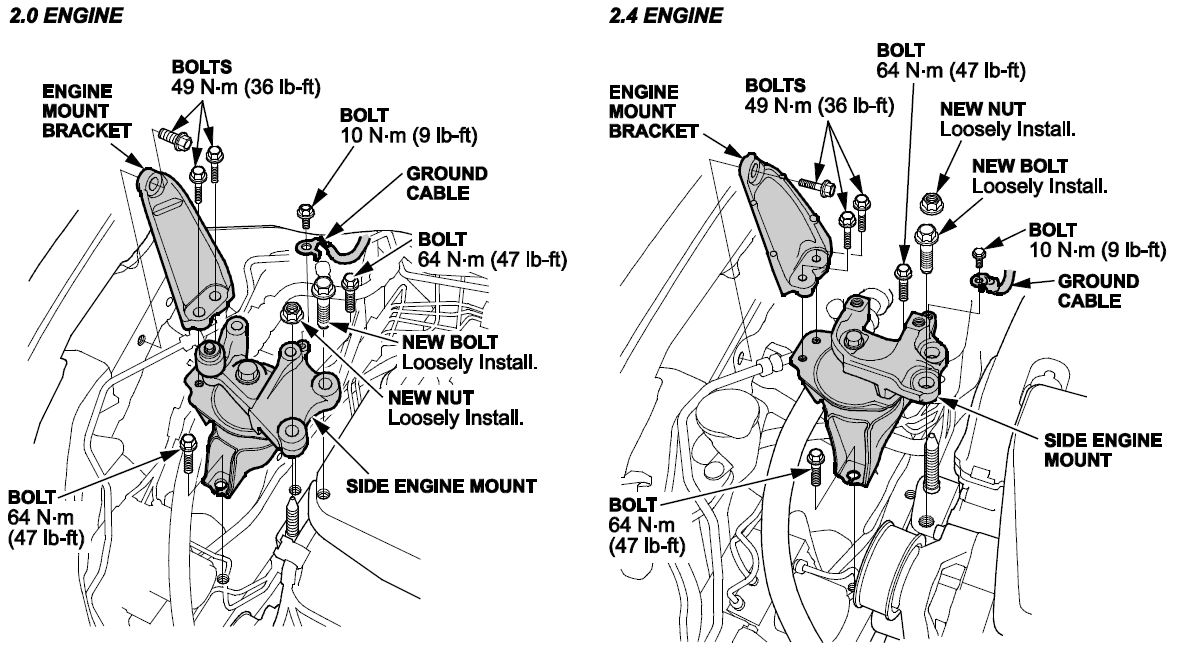
- Tighten the side engine mount bolts to 64 N∙m (47 lb-ft) and loosely install the new bolt and the new nut.
- Install the ground cable.
- Install the side engine mount bracket.
- Remove the floor jack and wooden block.
- Remove the air cleaner.
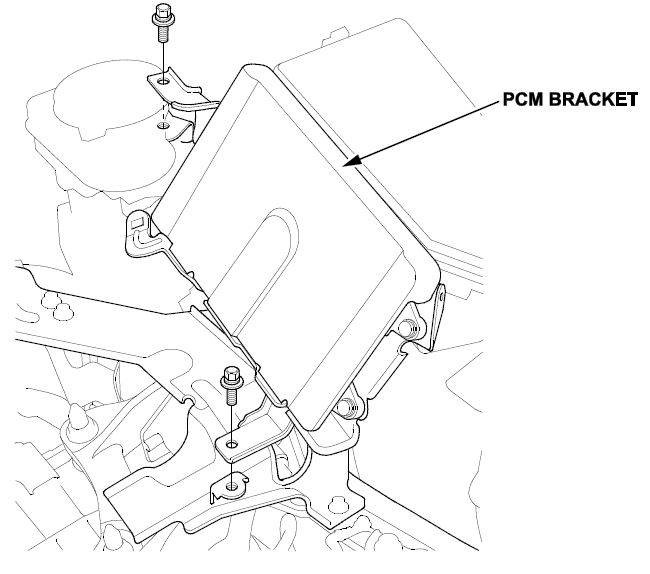
- Remove the PCM bracket but DO NOT disconnect the PCM connectors.
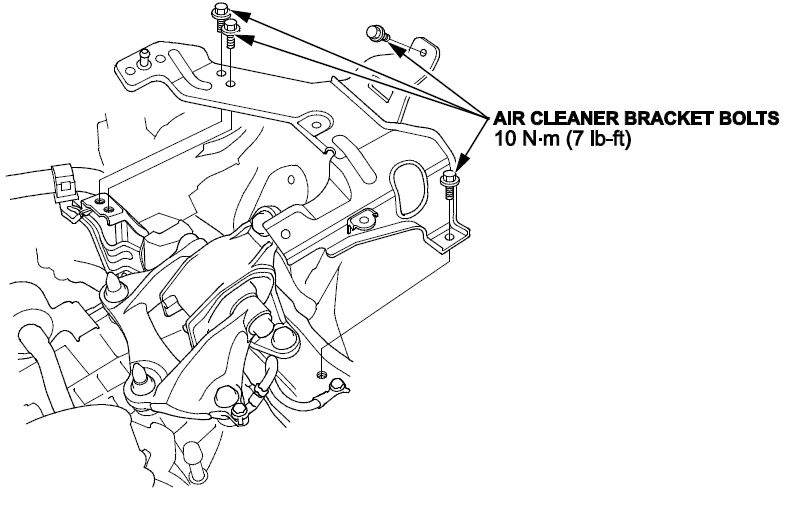
- Remove the air cleaner bracket.

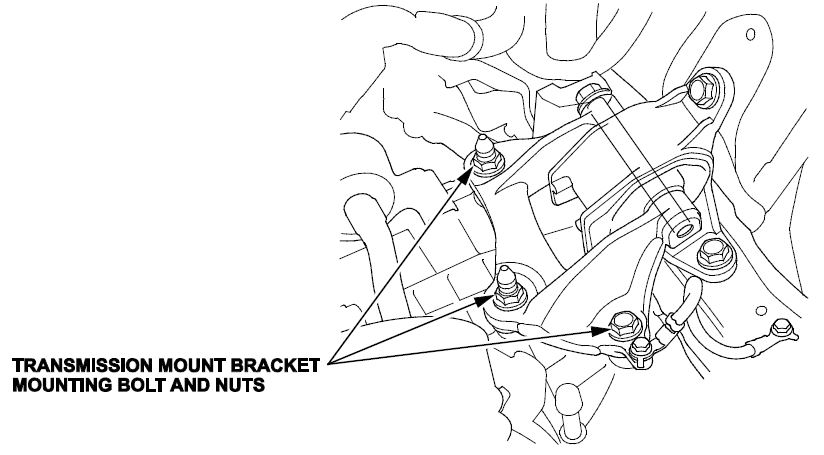
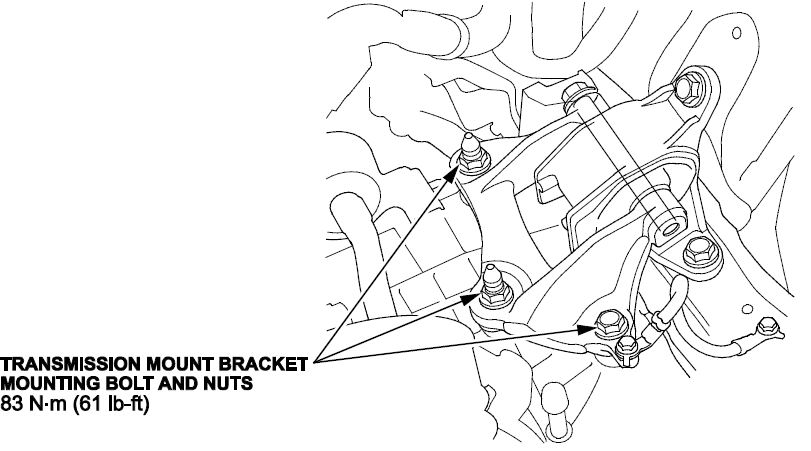
- Loosen the transmission mount bracket bolts and nuts.
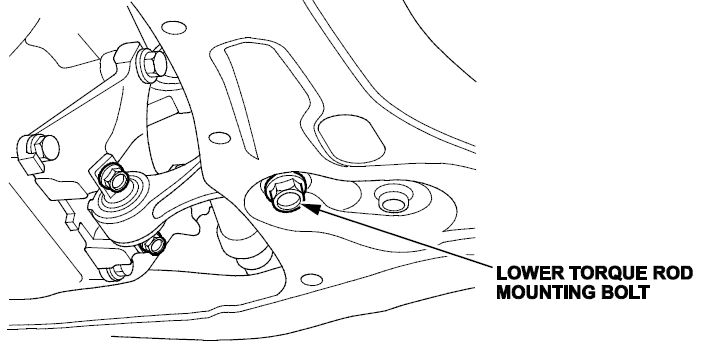
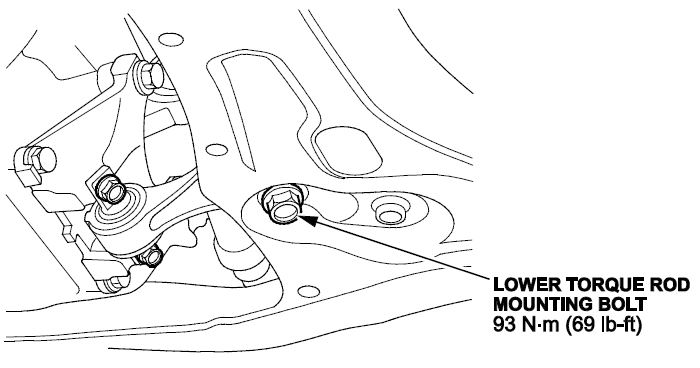
- Loosen the lower torque rod bolt.
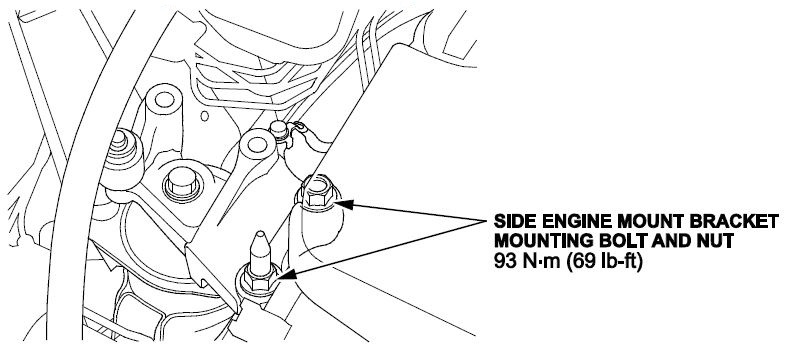
- Tighten the side engine mount bracket bolt and nut to 93 N∙m (69 lb-ft). NOTE: 2.0L engine shown, the 2.4L engine is similar.
- Tighten the lower torque rod bolt to 93 N∙m (69 lb-ft).
- Tighten the lower torque rod bolt to 93 N∙m (69 lb-ft).
- (2.0 liter only): Install the undercover.
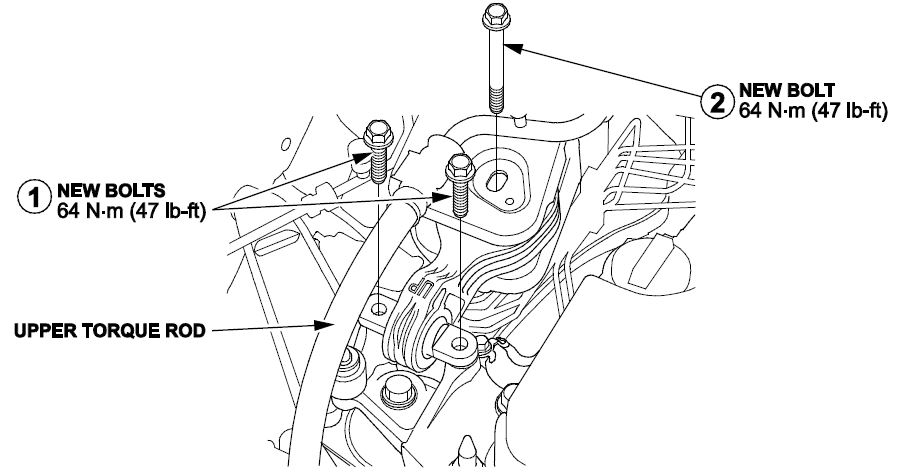
- Install the upper torque rod, then tighten the new bolts in the numbered sequence as shown to 64 N∙m (47 lb-ft).
- Install the air cleaner bracket.
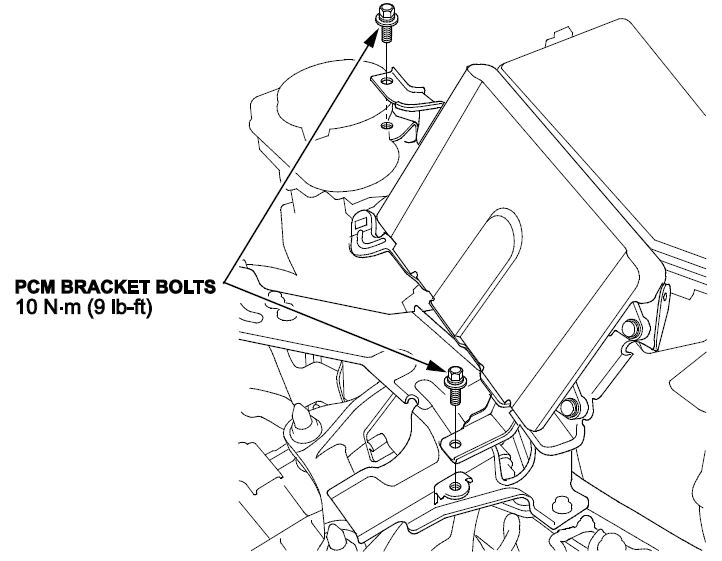
- Install the PCM bracket.
- Install the air cleaner.
END
 Loading...