| “This site contains affiliate links for which OEMDTC may be compensated” |
A14-038
September 27, 2014
ATB 51877-00169 REV1 (1409)
Front Brake Caliper Bracket Contacts Rotor Causing Grinding, Rubbing, or Screeching Noise
Supersedes 14-038, dated September 23, 2014, to revise the information highlighted in yellow.
AFFECTED VEHICLES
| Year | Model | Trim | VIN Range |
| 2014 | Odyssey | ALL | 5FNRL5…EB098185 thru 5FNRL5…EB110523 |
| 2015 | Odyssey | ALL | 5FNRL5…FB009095 thru 5FNRL5…FB014769 |
REVISION SUMMARY
- The Operation Number was changed under WARRANTY CLAIM INFORMATION.
SYMPTOM
The front brakes grind, rub or screeches
POSSIBLE CAUSES
An improperly machined front brake caliper bracket may come in contact with the front brake disc(s).
CORRECTIVE ACTION
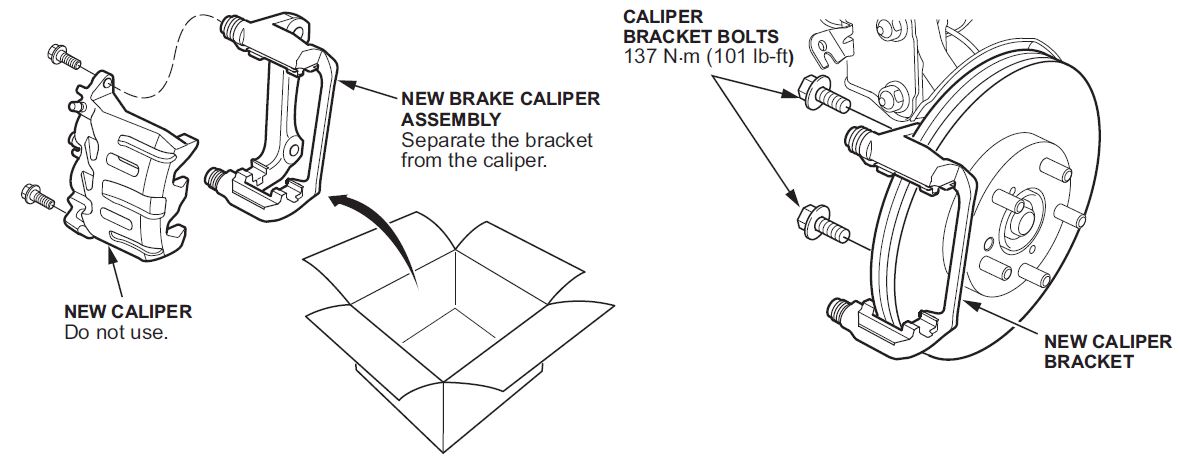
Replace the left, the right, or both front brake caliper brackets and refinish the disc(s). If necessary, replace the brake disc(s).
PARTS INFORMATION
| Part Name | Part Number | Quantity |
| Left-Front Brake Caliper Assembly | 45019-TK8-A01 |
1 |
| Right-Front Brake Caliper Assembly | 45018-TK8-A01 |
1 |
WARRANTY CLAIM INFORMATION
The normal warranty applies.
| Operation Number | Description | Flat Rate Time | Failed Part Number |
| 4101E6 | Replace one front brake caliper bracket | 0.5 |
|
| A | Add to if replacing both front caliper brackets | 0.3 | |
| B | Add to resurface one front brake disc (Do not use with Combo Code “C”) | 0.4 | |
| C | Add to resurface both front brake discs (Do not use with Combo Code “B”) | 0.8 | |
| D | Add to if replacing one front brake disc (Do not use with Combo Code “E”) | 0.2 | |
| E | Add to if replacing both front brake discs (Do not use Combo Code “D” | 0.4 |
Defect Code: 07701
Symptom Code: 04201
Skill Level: Repair Technician
REPAIR PROCEDURE
- Raise and support the vehicle.
- Remove the front wheels.
- Remove the brake hose mounting bolt.
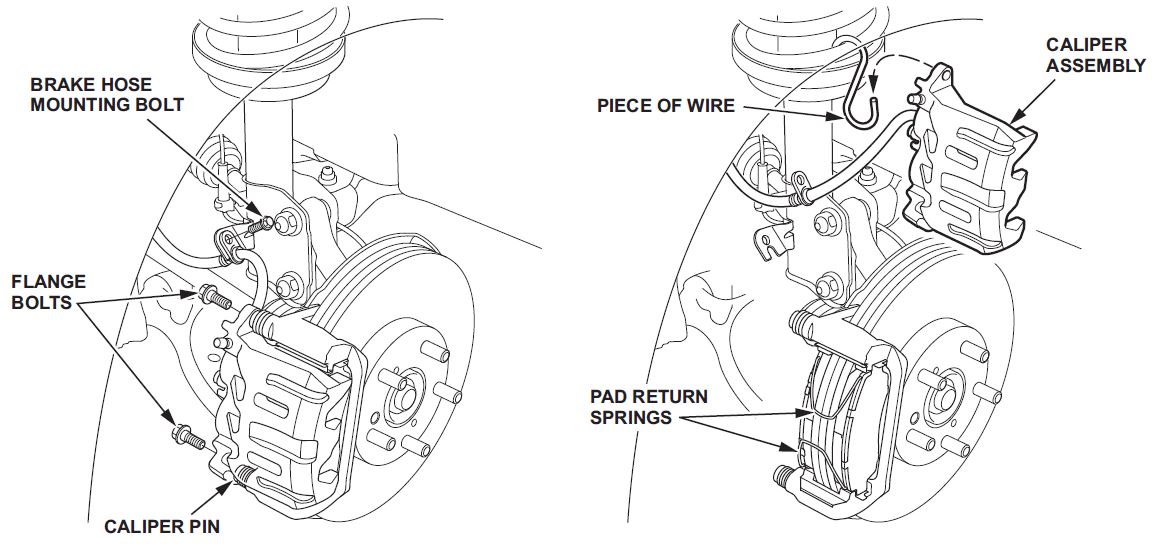
- While holding the caliper pins with a wrench, remove the flange bolts. Being careful not to damage the pin boots, remove the caliper and hang it up out of the way. To prevent damage to the caliper or brake hose, use a short piece of wire to hang the caliper from the undercarriage. Do not twist the brake hose excessively. Check the hose for damage and deterioration.
- Hold the brake pads and remove the pad springs.
NOTE: The pad return springs are installed on the pads to prevent brake drag. Be careful when removing the caliper body or the spring could pop out of position.
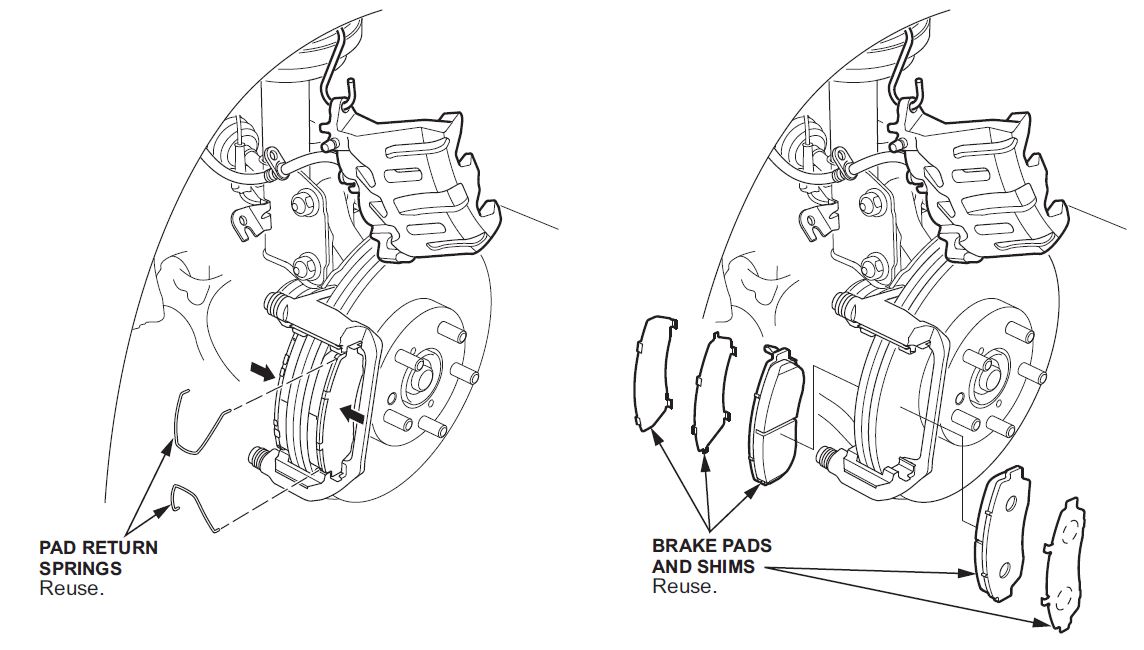
- Remove the brake pads
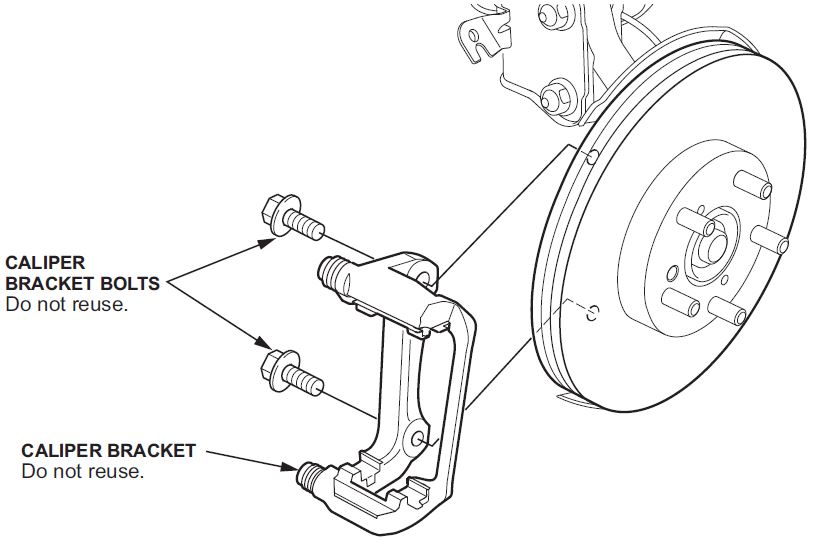
- Remove the brake caliper bracket mounting bolts, then remove the caliper bracket from the knuckle.
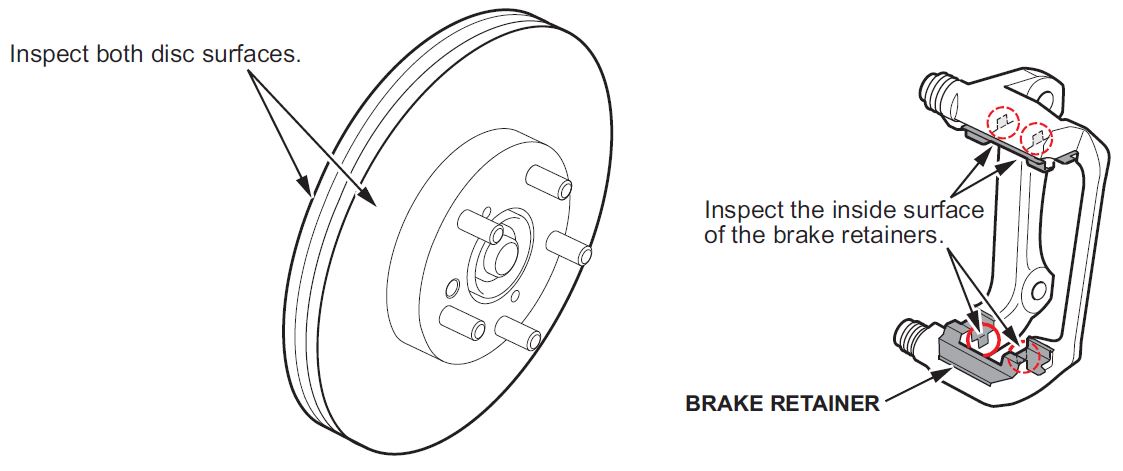
- Inspect both surfaces of the brake disc and the insides of both brake retainers for any damage. Repeat for the opposite side.
- If there is damage go to step 09.
- If there is no damage go to step 11.
- Refinish the damaged brake disc (or the side which has a damaged retainer) with a Honda-approved commercially available on-car brake lathe to remove any damage. Refer to S/B 00-088.
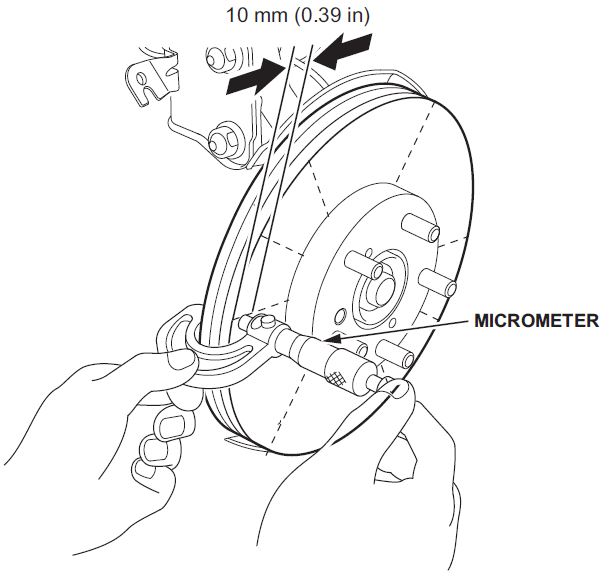
- After refinishing the disc, use a micrometer to measure the brake disc thickness about 10 mm (0.39 in) in from the outer edge of the brake disc. Maximum refinishing limit: 26.0 mm (1.024 in)
- If the disc is within specification, go to step # 11
- If the disc is not within specification, replace the brake disc then got to step #11
- Install the new brake caliper bracket and torque the bolts to 137 N·m (101 lb-ft).
- Apply a thin coat of M-77 assembly paste to the retainer mating surface of the brake pad.
NOTE: Keep grease and assembly paste away from the brake disc and brake pad surface. Contaminated brake disc or brake pads reduce stopping ability.
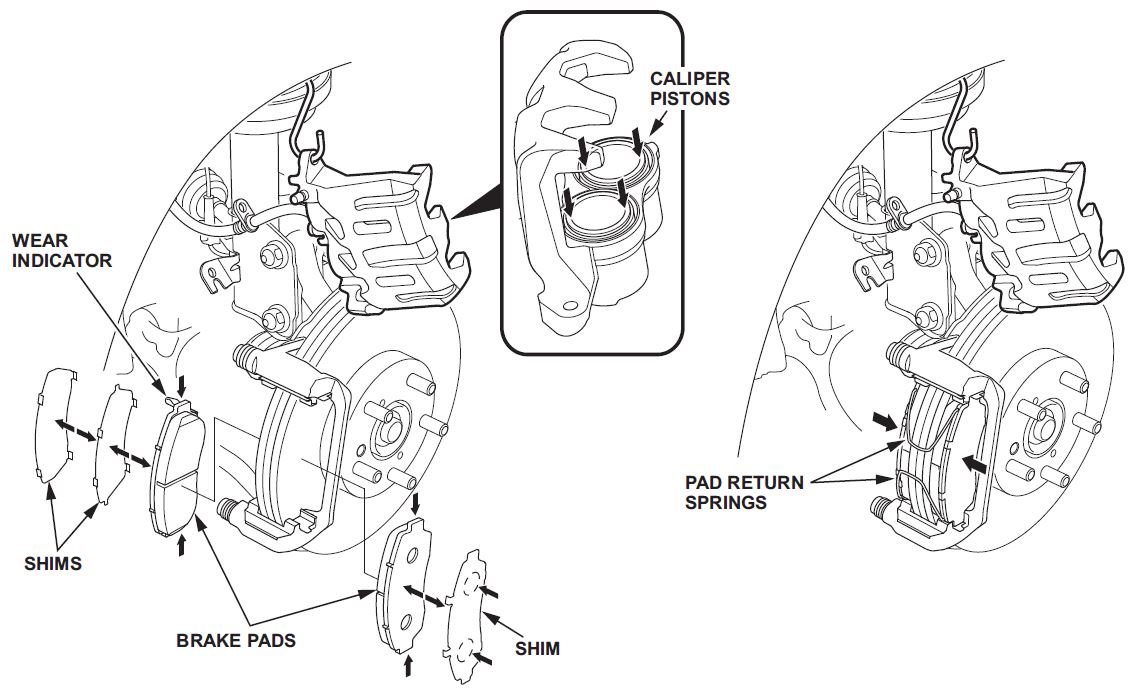
- Install the original brake pads with the wear indicator on the upper inside position on the new caliper bracket.
- While holding the brake pads, insert the pad return spring ends into the pad installation holes securely.
- Install the original caliper onto the bracket. Hold the caliper pin with a wrench and install the flange bolts, and torque them to 50 N·m (37 lb-ft) being careful not to damage the pin boot.

- Install the brake hose mounting bolt and torque them to 21 N·m (15 lb-ft).
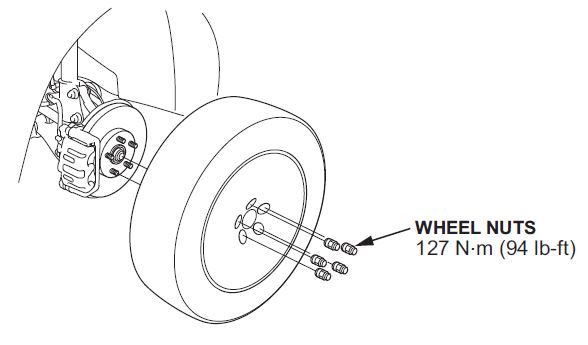
- Clean the mating surfaces between the brake disc and the inside of the wheel, then install the front wheels.
- Press the brake pedal several times to make sure the brakes work.
END
 Loading...

