| “This site contains affiliate links for which OEMDTC may be compensated” |
A14-082
December 20, 2014
ATB 01216 (1412)
Power Sliding Door(s) Get Stuck in the Unlocked Position
AFFECTED VEHICLES
| Year | Model | Trim | VIN Range |
| 2014 | Odyssey | ALL except LX | ALL |
SYMPTOM
The power sliding door gets stuck in the unlocked position.
POSSIBLE CAUSES
The lock knob lever rotates too much, and gets stuck behind the micro switch for the lock.
CORRECTIVE ACTION
Replace the power sliding door remote control assembly.
PARTS INFORMATION
| Part Name | Part Number | Quantity |
| Left Remote Control Assembly | 72662-TK8-A31ZA | 1 |
| Right Remote Control Assembly | 72622-TK8-A31ZA |
1 |
WARRANTY CLAIM INFORMATION
The normal warranty applies.
| Operation Number | Description | Flat Rate Time | Template ID | Failed Part Number |
| 8171B8 | Replace the left power sliding door remote control assembly. | 0.5 hr | 14-082A | 72662-TK8-A31ZA |
| 8171B9 | Replace the right power sliding door remote control assembly. | 0.5 hr | 14-082B | |
| 8171E2 | Replace both power sliding door remote control assemblies. | 0.9 hr | 14-082C |
Defect Code: 03214
Symptom Code: 08201
Skill Level: Repair Technician
REPAIR PROCEDURE
- Open the sliding door as needed.
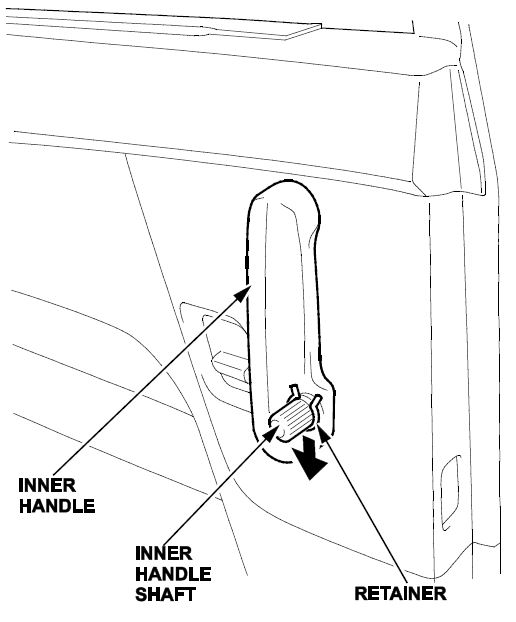
- Pull off the retainer of the inner handle shaft with a hook-shaped tool and remove the inner handle.
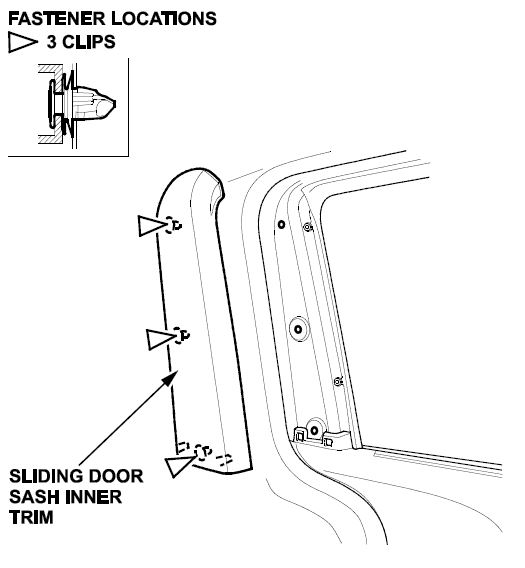
- Detach the clips, then remove the sliding door sash inner trim.
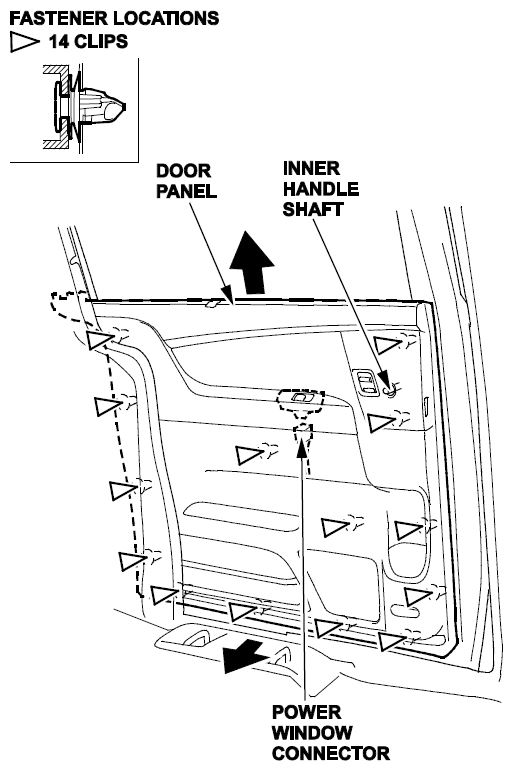
- Remove the door panel with as little bending as possible to avoid creasing or damaging it.
- Remove the latch remote control assembly from the door.
- Disconnect the remote control assembly connectors.
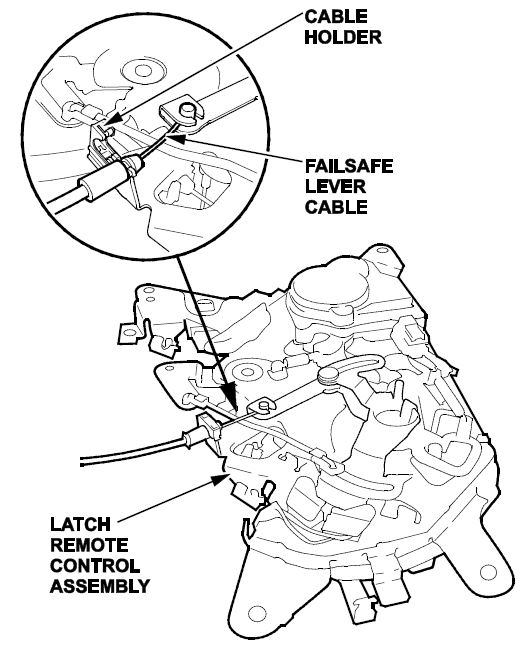
- Release the cable holders and disconnect the outer handle cable, lower roller cable, front latch cable, and rear latch cable.
- Remove the bolts and the screw.
- Detach the harness clip and release the hook.
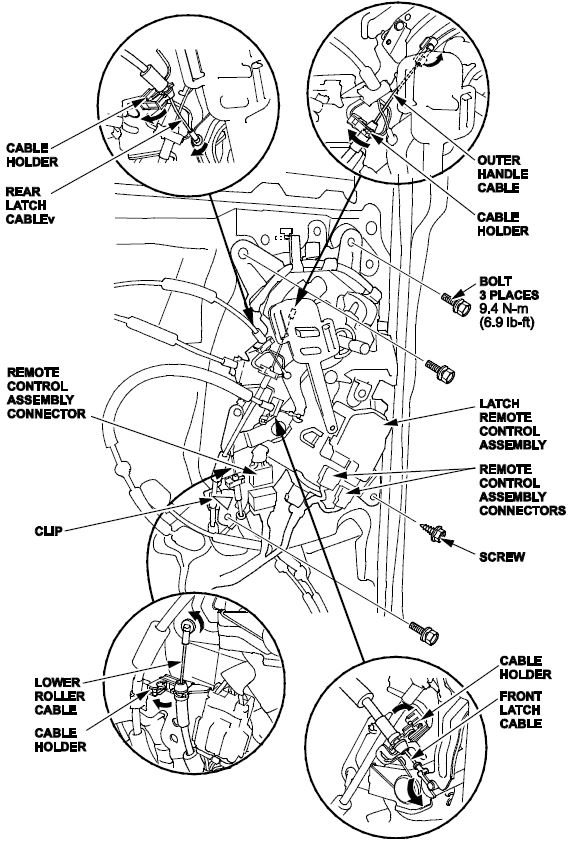
- Release the cable holder and disconnect the failsafe lever cable from the latch remote control assembly.
- Install the new latch remote control assembly and torque the bolts to 4 N·m (6.9 lb-ft)
- Install the door panel in the reverse order of removal.
NOTE:
- Make sure each connector is plugged in properly and each cable is routed properly and connected securely.
- Take care not to bend any of the cables.
- Make sure the door locks and opens properly.
- If the clips are damaged or stress-whitened, replace them with new ones.
- Push the clips and the hooks into place securely.
- Repeat steps 1 through 8 on the other sliding door if needed.
END
 Loading...


